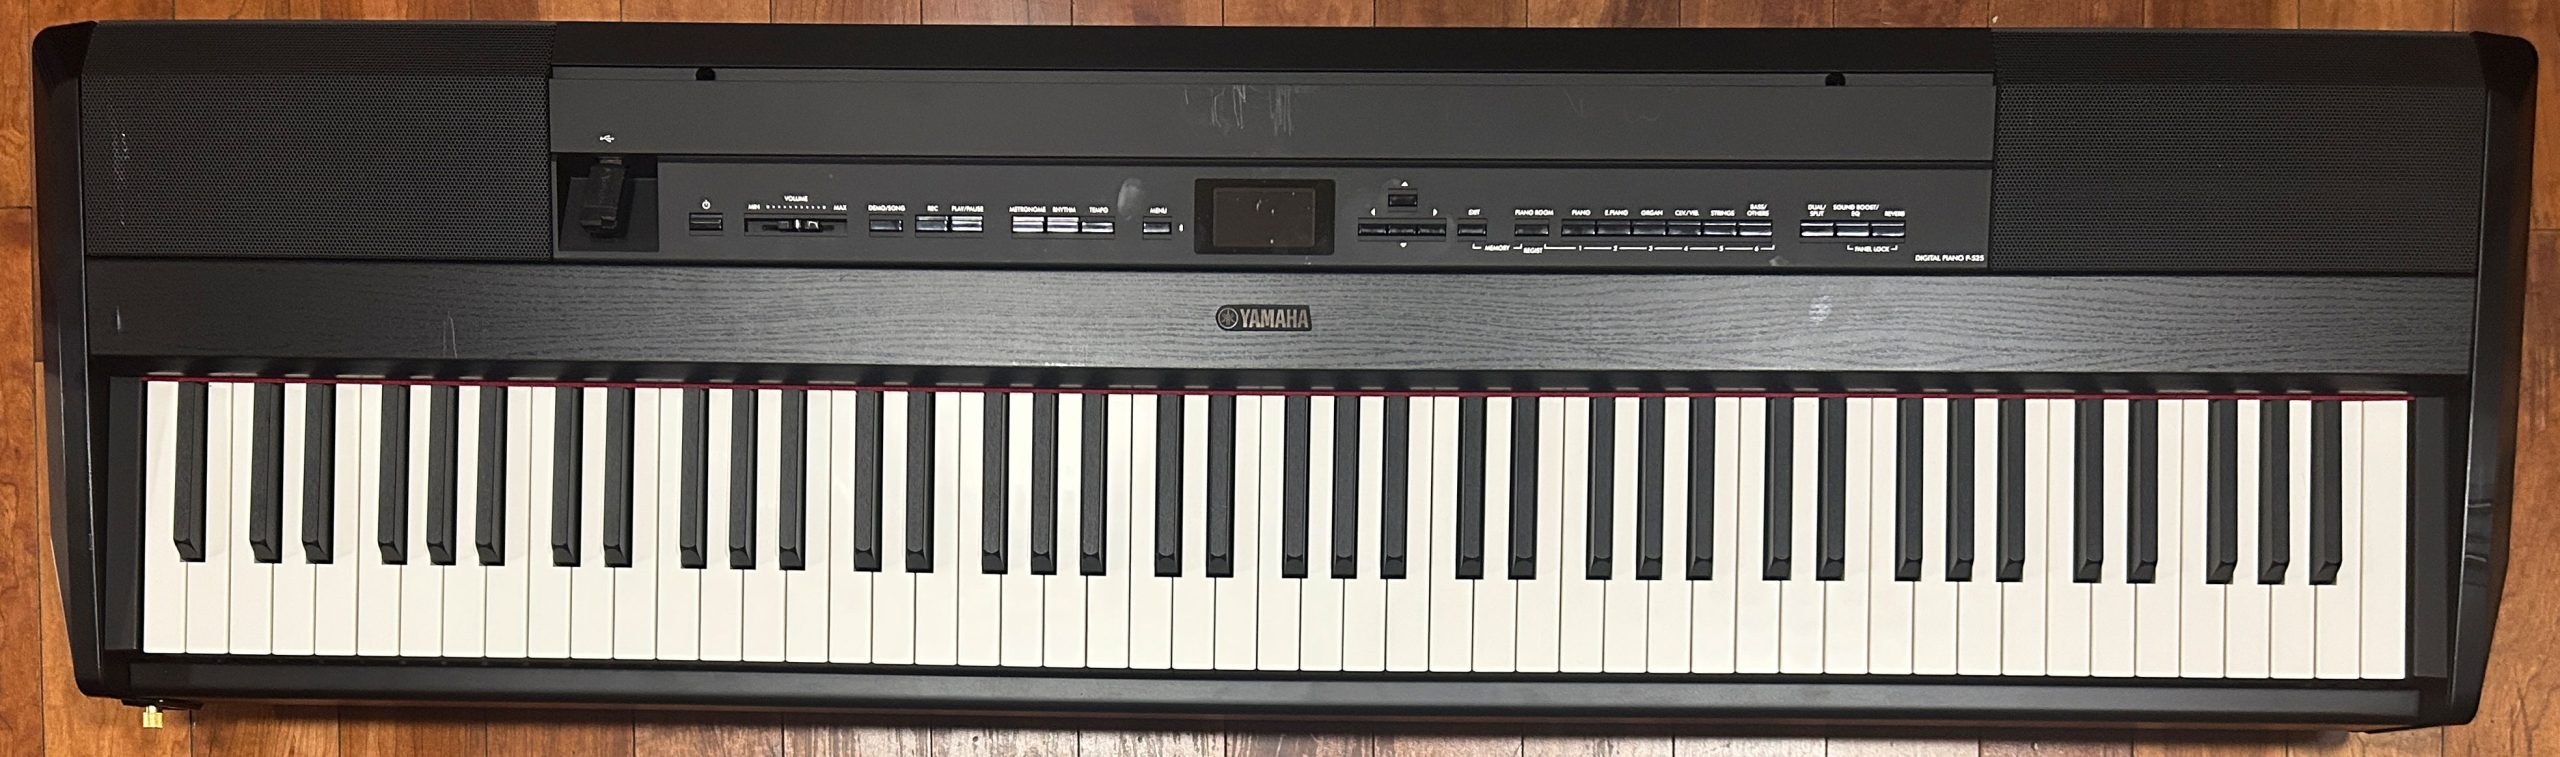
This is my review on Yamaha’s flagship model in the P series, the Yamaha P-525 which replaced the highly regarded P-515 in 2023. I gave the Yamaha P-515 a glowing review when I rented one a few years back, so I was excited to rent the updated model to do this review. At first glance, the P-525 LOOKS to be exactly the same as the P-515, but . . . don’t worry, there have been some cool improvements (at least in my opinion) – Let’s get into the review.
Yamaha “P” Series
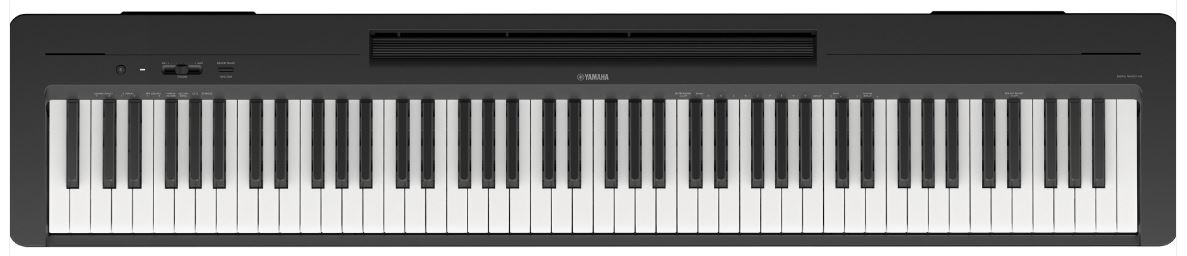
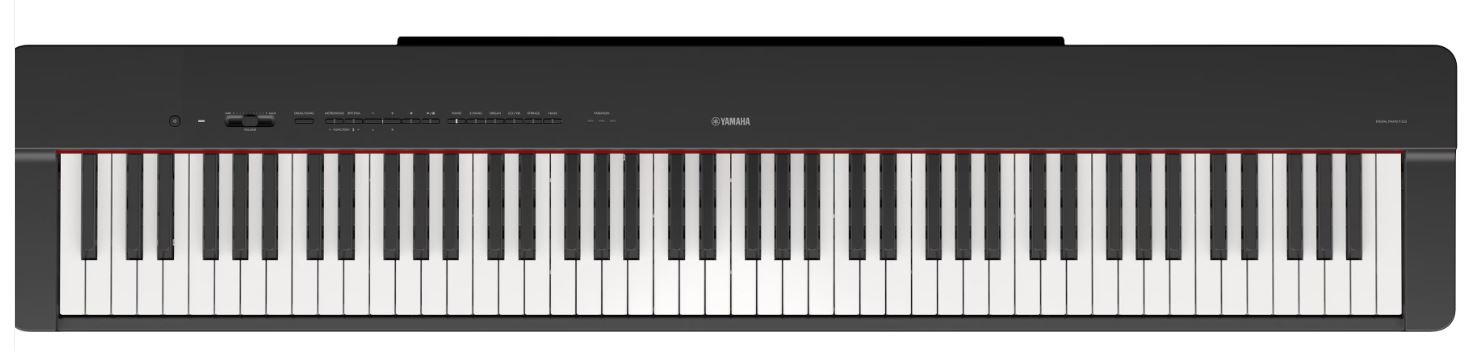
Yamaha’s “P” series (their portable line of digital pianos) has sometimes included an extra model or 2, but for the most part, has consisted of 3 MAIN models for over a decade now; an entry level model (currently the P-145), a mid level model (currently the P-225) and then the flagship model (currently the P-525). The entry and mid level models share the same key action (currently Yamaha’s fully weighted and graded GHC action – “Graded Hammer Compact”); the P-145, currently selling for about $500 USD has only a handful of sounds, and minimal features. The P-225, currently selling for about $750 USD has a few more (& slightly better quality) sounds, a better user interface, some basic rhythms and accompaniment, and L&R line out ports which are great for gigging musicians. There has always been a significant price jump between the mid level model and the flagship model, and that remains the same today; the Yamaha P-525 is currently selling for about $1700 USD, so more than TWICE the price of the P-225. But, as with it’s predecessor, the P515, you DO get quite a bit more for that extra money. Let’s dive into the review and take a closer look.
Key Action
I’ll talk about key action first, because this is one of the biggest differences between the Yamaha P-225 and the P-525. The Yamaha P-525 uses a newer action from Yamaha, the GTS action (“Grand Touch S” – which is an upgrade from the NWX action which was found on the P-515). This is a much higher end action than the GHC action found on the entry level models; the P-525 actually shares this action with some of the higher end Yamaha Clavinova pianos. The Grand Touch S is a fully weighted and graded triple sensor action WITH escapement. So what is escapement? On an acoustic piano, there’s a mechanism called “escapement” that makes sure that the hammer that strikes a string is released from that string as quickly as possible (if there was no such mechanism, the hammer could sort of “stick” to the string unless you let go of the key immediately, and you would only get a muffled sound of some sort). To the player, this kind of feels like a “notch” when you have pressed a key down partially; so on some higher end digital piano actions, manufacturers have tried to incorporate that sensation. If I play the P-525 keys VERY softly, I CAN feel the escapement, but to be honest I only really notice it if I’m consciously looking for it. I don’t play acoustic pianos, so it’s not something I’m experienced with or used to, but it is something advanced players will likely appreciate.
The white keys on the P-525 are actually SOLID WOOD (instead of plastic), and are laminated to prevent warping, and the key tops have a synthetic ebony and ivory finish. Alot of keyboards have some kind of imitation finish on them, but I have to say this is probably the nicest matte finish I’ve seen; you notice it but it’s not over the top. There are 6 levels of touch sensitivity (well . . . 5 and then “fixed”), which is nice to see – the Yamaha P-225 only has 4, so an extra 2 DOES help you dial in the perfect resistance for your playing style. This action isn’t Yamaha’s top of the line Grand Touch action, but it is close; it uses the same mechanism as the Grand Touch, but has a shorter pivot length to allow it to fit into a portable case. But that being said, the pivot length on the P-525’s Grand Touch S action is still significantly longer than the pivot length on the GHC action found on the cheaper models (and longer than the GHS action found on other Yamaha pianos such as the DGX-670, CK-88 or older P-125). Yamaha doesn’t officially specify pivot lengths, but from pretty consistent user data found online, these actions have approximate pivot lengths are as follows:
- Grand Touch: 250mm
- Grand Touch S (Yamaha P-525): 195mm
- Graded Hammer Standard (GHS: Yamaha DGX-670, CK-88, P-125): 165mm
- Graded Hammer Compact (GHC: Yamaha P-145, P-225): 150-160mm
So what’s the big deal about a longer pivot length? A longer pivot length means that you won’t notice as much of a difference in resistance as you play further into the keys (further up the keys). Whether the numbers I’ve quoted are exact or not, I can definitely confirm that there is a BIG difference when you play into the keys on the P-525 as opposed to the P-225; while there isn’t a TON of extra resistance when you do this on the P-225, there IS some extra resistance – on the P-525, I do not notice ANY difference playing deep into the keys, so that’s awesome news for all the accomplished pianists considering this keyboard.
So enough of all the fancy stats; how does this action FEEL? As I’ve always mentioned in my reviews, key action is totally personal – I’ve personally always preferred light and fast responding key actions, with some of my favorites being Yamaha’s GHS and Casio’s Smart Scaled hammer action. I was expecting my reaction to be similar to my experience with the P-515’s NWX action, which felt quite heavy to play at first, but actually took very little time to get used to, and I DID like that action. I was surprised (and happy) that when I started playing the P-525, it DID also feel on the heavy side to me, but if memory serves; not as drastically heavy feeling as the P-515 was. This would be confirmed by gram weight stats at middle C that I’ve found online; the P-525 IS on the heavy side at about 80 grams, the predecessor P-515 was a BIT higher at about 85g.
While my initial reaction was that it felt fast and responsive but a bit heavy, after playing it for a few days, I basically had the exact same reaction that I did with the P-515; “it’s heavy to play – and yet it’s not . . .” It’s hard to put into words, but even though I definitely notice the downweight (especially when sitting down at it the first day), I did get used to it quickly, and I don’t seem to get tired playing it – and I am totally comfortable playing fast passages on this action – even with the downweight, I find it very responsive, and the longer i spend with it the more I like it. But as I’ve mentioned, action is a personal preference – so personally, I WOULD still prefer a lighter, faster action (even if it’s technically inferior), but if you’re an accomplished jazz or classical player, or you’re just someone who wants a higher end, realistic key action, then I think you will LOVE the Grand Touch S keybed.
User Interface
The user interface on the Yamaha P-525 is pretty much the same as it was on the Yamaha P-515; but that’s not a bad thing, because it’s a great user interface. As I mentioned in my review on the P-515, this user interface is very much like an enhanced version of one of my favorite interfaces, the one on the Yamaha P-125/P-225. The buttons and controls are all functional and intuitive, and I can easily control all of the main settings I would ever want to right from the front panel. The navigation when you have choices up on the screen is pretty easy and intuitive; there are directional arrows to the right of the screen, as well as an EXIT button. Instead of having some type of ENTER button to confirm a selection, the menu screen will always have arrows by the options – so you just use the indicated arrow to make your choice. And on the topic of the menu screen, at first glance I thought Yamaha had left it the same as the P-515, but when I started using the keyboard I thought the screen looked much better so I double checked the specs, and Yamaha did upgrade the screen from 128×64 LCD to 198×100, which does make a big difference.

On the left side, we have a USB flash drive slot (this is used for saving and recalling data; you can save MIDI recordings onboard OR on the flash drive, and you can record and play back audio files from the flash drive). And thanks Yamaha, for putting this on the front where it’s easy to access instead of on the back. Then we have the power button & volume slider, and then the DEMO/SONG button, which allows you to play back built in voice demos, onboard songs as well as any audio songs (like backing tracks) that you have stored on your flash drive.
Then we have the REC & PLAY/PAUSE buttons; these allows you to initiate and work with either a simple & quick MIDI recording, or start creating a 16 track MIDI recording, or you can also record audio (which is usually my preference). The MIDI recordings can be saved onboard or on a flash drive, the audio files get saved and replayed from the flash drive. To initiate an onboard MIDI recording you can just press the REC button; to store a MIDI recording on a flash drive, to add additional tracks to a MIDI recording or to record an audio recording just LONG press the REC button. I’ll be going over recording in a bit more detail later in the review. Then we have the metronome button (which I never use, but you classicial pianists out there will appreciate), and then the RHYTHMS button for playing along with a drumbeat and optional bass accompaniment; you can navigate between the different rhythms using the arrow buttons and just press RHYTHM to start and stop the accompaniment. Being able to choose rhythms on screen is a big improvement over the Yamaha P-225, where you have to look up or memorize key combinations to choose your rhythms. I’ll go over these in more detail later.
Then next is the MENU button; this allows you to deep dive into some less common settings; the main menus are Voice, Song, Metronome/Rhythm, Recording & System – you cycle through those by repeatedly tapping the MENU button. Then you can navigate within these menus using the arrow buttons to find and change settings as you like. For example, if I was to go to the Voice menu, I can use the arrows to change things like transposing, fine tuning piano settings (you have a LOT of options here, but I’d just recommend the “Piano Room” button instead – I’ll get to that in a minute), you can also set reverb & chorus options, and if you have a compatible triple pedal unit connected you can customize what those pedals do. I wish I had one, because I noticed there is an option for rotary speed for organ voices – I would LOVE to be able to test that but I can’t. So if you’re looking for a less used or system type setting that you don’t see direct access buttons for on the panel, this is where you should look.

Then on the right side of the screen we have the navigation and EXIT buttons, then we come to the “Piano Room”. You might recognize this from Clavinova pianos, or from the Smart Pianist app; if you’re the type who likes to deep dive into fine tuning your piano sound, then this is for you. You can customize:
- Lid position
- Brightness
- Touch response
- Reverb (type and level)
- Master tuning
- Virtual Resonance Modeling
- Damper resonance
- Damper noise
- String resonance
- Duplex resonance
- Body resonance
- Grand Expression modeling
- Half pedal point
If you look at the front panel, you’ll notice that you can press the EXIT and PIANO ROOM buttons at the same time to access the new registration memory system on the P-525; I am going to go over that in more detail later in the review, so I’ll leave that for now and move on to the voice selection section. Selecting voices is SUPER easy; you press the category, and then use the left and right arrow buttons to navigate between the available voices in each section (you’ll see the voice name, a small picture, and the dots at the bottom indicate how many voices are in the current section). So this is how you access the main 44 voices, but what about the drum kits and XG voices? Easy – just press the BASS/OTHER category TWO times and a menu will open up allowing you to select from those, using the arrow buttons to navigate and make your choice.
Then we have the DUAL/SPLIT button; if you press it once, you’ll be in dual mode – the 2 voices will be displayed as “1” and “2”, and then use the arrows to move between those 2 voices and change your selections. If you press the DUAL/SPLIT button TWICE in succession, you go to split mode instead (where the voices are displayed as “L” and “R”. And if you want to have 2 voices layered on the right AND have a voice on the left, then just press the DUAL/SPLIT voice THREE times in succession. Next is the SOUND BOOST/EQ button; you can access Sound Boost settings by pressing the button once, and Master EQ by pressing it twice. Sound boost is meant to enhance different aspects of your play, and there are 3 options you can look up in the manual (to be honest, my beginner ears don’t notice anything significant here – maybe you will). And then the Master EQ allows you to customize your overall output a bit as well; not something I typically bother with, but could be handy to help cut through a mix. And then finally, we have a REVERB button – this will allow you to choose the reverb TYPE, but to set the level of reverb you need to drill down a bit further into Voice Edit–>Reverb Depth (or set it in the “Piano Room”).
Just one more thing to note on the user interface is there is a “Panel Lock” feature – if you press SOUND BOOST and REVERB simultaneously, the front panel will be locked (so you can’t change a setting or voice accidentally); press those 2 buttons again to unlock. I guess some players might like this, but to be honest I would never use that on the P-525; that’s a feature you usually see on keyboards with a far more involved user interface like an arranger.
So my overall thoughts on the user interface on the Yamaha P-525? Awesome! I REALLY like how simple and intuitive it is to use, and I like how there are direct access buttons right on the front panel for pretty much every setting I can see myself needing. While there are some settings that require diving into a menu system, they’re not settings that I would need to change on the fly, and the menu system isn’t HUGE, and it’s very easy and intuitive to navigate. And I like the fact that we have even a small screen to display context sensitive information like your current voice setup, or current rhythm etc, which is something the Yamaha P-225 could REALLY benefit from. Now just an FYI – the menu screen ONLY displays context sensitive info, so it will STAY wherever you last were, unless you press EXIT. For example, if I’ve split the keyboard into 2 voices on the right and 1 on the left, I do see that on the display as I glance at the screen which is great; but if I press RHYTHM to start a rhythm playing, the screen switches to the rhythm display and I lose my voice setup display; but not to worry, just press EXIT after you start your rhythm and you’ll get your voice display back.
Voices
The Yamaha P-525 has 256 notes of polyphony, and 542 voices overall; this is broken down into 44 “main” voices, 18 SFX/drumkit voices and then 480 XG voices. The 44 main voices include:
- 12 pianos (including the Yamaha CFX Grand & the Bosendorfer Imperial Grand)
- 9 electric pianos
- 6 organs
- 2 harpsichords
- 1 clavichord
- 1 vibraphone
- 7 strings/pads (including a choir voice)
- 4 bass guitars
- 2 guitars
The XG voices are definitely not the same quality as the main voices, BUT these XG voices are a step up on the XG Lite voices you’ll find on cheaper Yamahas. I personally don’t go into this section much (especially in any of the categories that exist in the main voices), but if you’re looking for an obscure instrument voice then you’re likely to find it in there.
MAIN Piano Voices – CFX Grand And Bosendorfer
The main piano voices on the P-525 are the Yamaha CFX Grand, and the Bosendorfer Imperial. The CFX Grand (at least to my ears) is a brighter, more dynamic sounding piano, while the Bosendorfer is a warmer, more subtle sounding piano. Like key action, sounds are also personal preference, but I really like a bright sounding & dynamic piano so the CFX Grand is by far MY favorite. While versions of the CFX piano’s samples can be found on other Yamaha models (including the much less expensive P-225), it’s worth talking about the upgraded versions of this voice on the P-525 (and the Bosendorfer) because there’s some pretty cool technology built into the P-525 that really improves the piano sound.
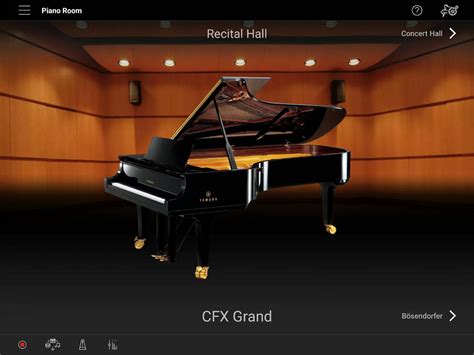
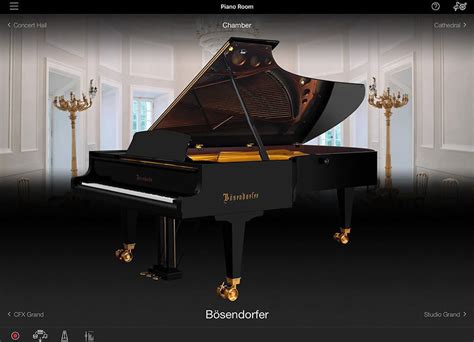
So what fancy technology am I talking about? Modeling. Modeling is when the samples being generated are altered to reflect how the player is playing. This results in capturing more of the subtle nuances you may notice when playing an actual acoustic piano.
- “Virtual Resonance Modeling” (VRM): VRM adds realism to your playing by adding different types of natural resonances that you’ll get with a real piano; things like damper, string and soundboard resonances. For example, when you press the sustain pedal, all the dampers are lifted so strings for some notes you are not playing may still vibrate slightly and produce noise; or if you hold down some notes (like a C major chord); after they have finished ringing, while still holding them down (so the dampers are still lifted) you strike another note (like a G) that is harmonically related, you will hear the original notes vibrate as well.
- “Grand Expression Modeling” (GEM): GEM alters the samples based on the depth, intensity and speed of your keystrokes in real time. Most digital pianos will do this as well, but only on an EXTREMELY basic level; entry level pianos will just modify the volume based on the intensity detected, but the sample will remain the same. GEM will modify samples to a FAR greater detail to reflect the nuances of your play
- “Binaural Sampling” (NOTE: This is ONLY available on the CFX Grand sample). Binaural sampling is only enabled when playing with headphones; it enhances the sound even further by enabling extra samples recorded at the position of a player’s ear.
So how do these (and some of the other main 44 voices) sound? I’ll try to demo some voices from each of the main voice categories, as well as some splits and layers, but I will spend most of my time on the CFX Grand and Bosendorfer. Let’s take a listen . . .
So what did you think of the voices on the P-525? I have to say the main piano voices (especially the CFX Grand) are absolutely fantastic. And as usual, Yamaha has done a fabulous job with the other voices – I’ve always enjoyed their electric piano samples, and Yamaha has always (in my opinion) outdone the competition with strings voices (especially when layering with pianos; the strings never seem to overpower the piano).
Rhythms & Accompaniment
The Yamaha P-525 has 40 built in rhythms in various genres that you can play along with, including optional bass accompaniment. I have always LOVED how Yamaha implemented the accompaniment on their P-Series; the P-125, P-225 and P-515 all work this way, and gladly so does the new P-525. This isn’t like an arranger keyboard, where you have multiple chord fingering modes, finger chords in the left and play piano in the right, have tons of accompanying instruments etc. Instead, this has been implemented with piano players in mind: there is only ONE fingering mode – full keyboard; so chords will be detected using the entire keyboard range, AND you WILL always hear what your left hand is playing. And if you enable the bass accompaniment, the virtual bass player keeps the bass accompaniment simplified; on most of the rhythms, the bass sticks to root notes or 5ths which is actually cool, because that will work with pretty much any chord – major, minor, 7th, 9th, whatever; AND it even allows you to play some solos or improv in your right hand, and as long as you are regularly fingering a chord or even octaves in your left hand, it doesn’t start changing chords based on your right hand soloing notes.
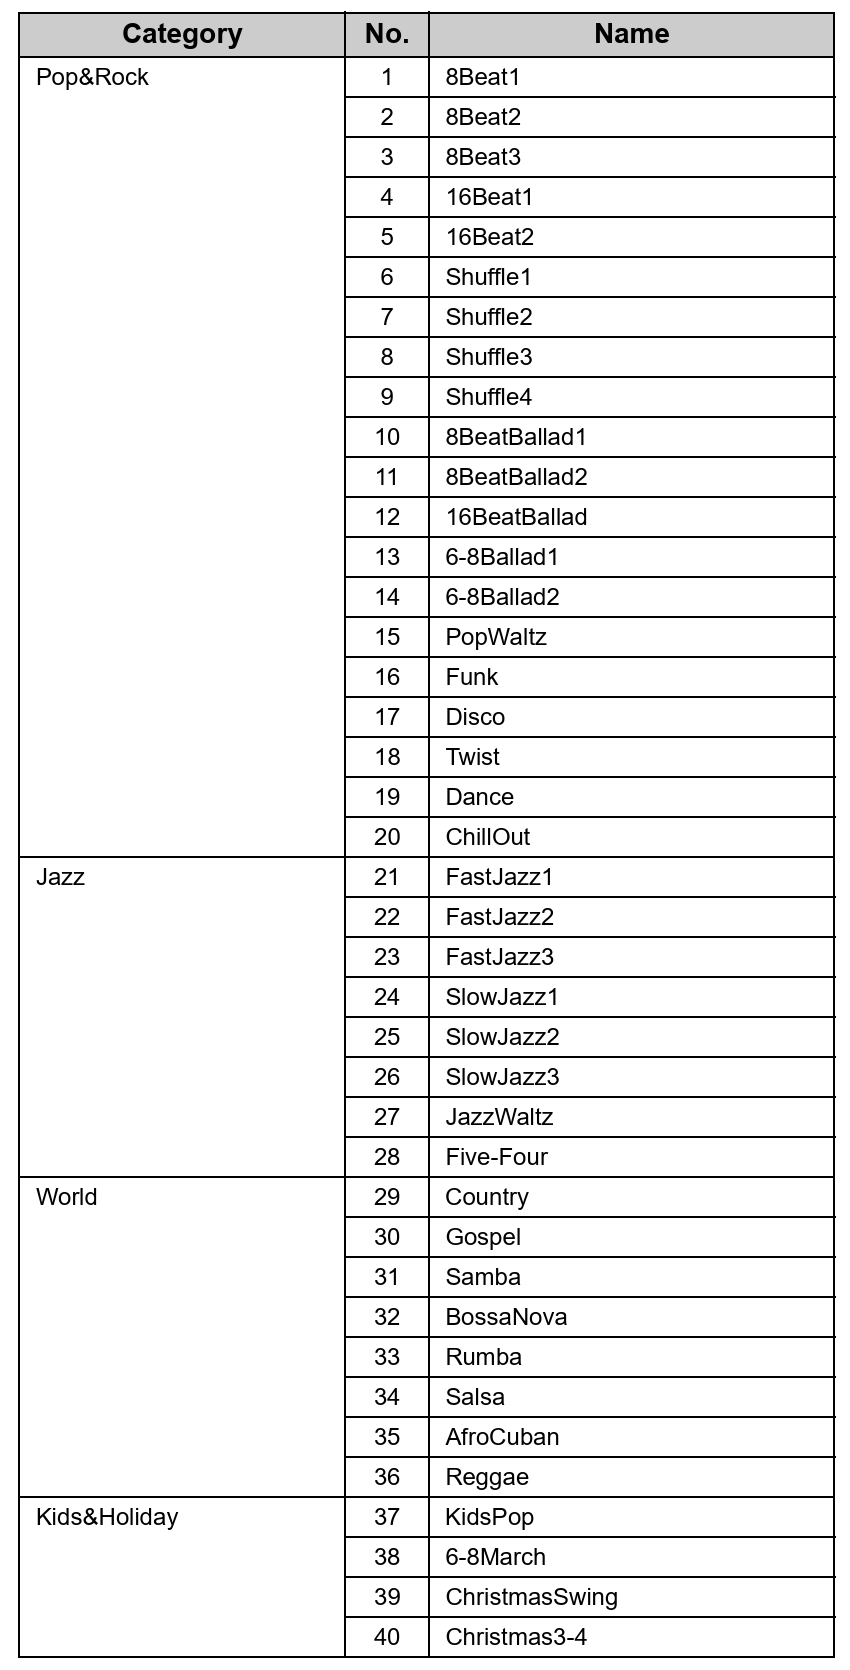
NOTE: To see the rhythms in action, check out that section of my full video review at the bottom of this page
For example, if I start up a basic rhythm (and note you get a simple count-in which I love) and just press a C note with my left hand; you’ll hear the bass just playing the C root note. Same thing if I play an octave in my left; but if I play a major chord (and I can do this anywhere on the keyboard), you’ll hear the 5th come in (so the bass is alternating between a C and G which is the 5th in the key of C). And if I play a minor chord, or a 7th chord; the bass stays the same which is fine, that still works. So if I start playing just some octaves in my left and playing chords in my right, even if I throw in some basic improv in my right, the bass sticks to the chords based on the roots I’m playing in my left. So this is super cool. And when you end the rhythm, you get a basic fill. So you COULD use these for a solo piano performance; they’re not super fancy like on an arranger keyboard, BUT they are definitely optimized for piano playing and they actually work well; even if you never used these in a performance, they are SUPER handy (and fun) to have for practicing. Even if I’m practicing scales, I will ALWAYS practice to a drumbeat; it just naturally leads you into soloing and improv, and having the bass there as well is a nice option (do note that if you only want to play with the drums, you CAN disable the bass if you want to).
Effects
In addition to the reverb and chorus options, the Yamaha P-525 also has some common effects you can enable – you access these by pressing MENU and then drilling down into the VOICE EDIT menu in the Voice section.
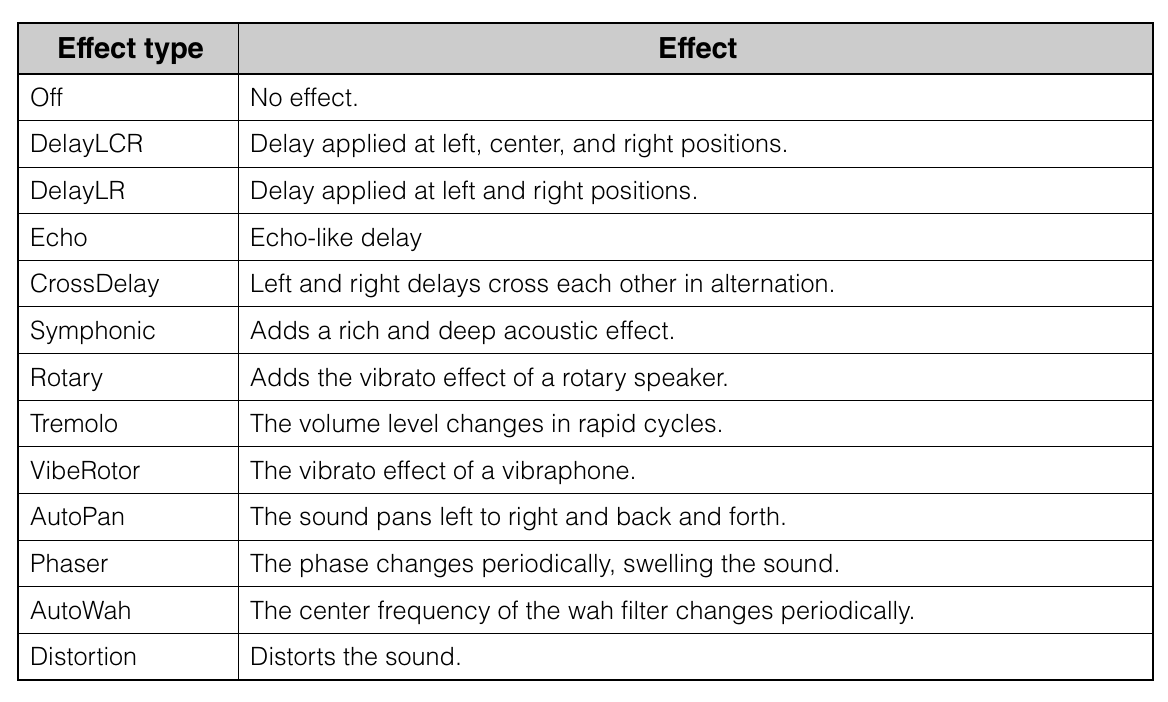
Now I’m not usually someone who’s super interested in tinkering with my voices using effects, but given that I’m a huge Hammond organ fan, I immediately noticed the rotary speaker effect. I immediately tested that out to see how it sounded, and also how it transitions from slow to fast (on some keyboards, it won’t be a nice gradual & smooth transition because the manufacturer is just switching between a pre-recorded sample at slow and another pre-recorded sample at fast. Well I was super impressed at how good the rotary transitions AND how it sounds (on a keyboard without an actual organ engine, I’m usually not expecting much, but this sounded surprisingly good.
Recording (Intro)
Given that most people who do create recordings never use onboard recording features anymore, and instead use DAW software on an iPad or a computer to take advantage of a much nicer user interface and WAY more functionality, I’m not going to spend a ton of time on these features, in the interest of not making this review longer than it needs to be, but I will go over the basics.
To initiate a quick MIDI recording (this will be stored onboard the piano by default), just press REC and then start playing; you can include rhythm and bass as well if you want; after pressing REC, press the RHYTHM button (you’ll need to select your rhythm and set the tempo ahead of time) then start playing and your recording will start. When you’re done you can press the REC button again, and then you’ll be prompted to save, retry or cancel. If you save, your file saves and will be given a filename; you can press PLAY to listen to it. So let’s say I want to add a track to that recording – I could select a different voice, let’s say an organ, and then LONG press REC instead – now instead of recording a new MIDI song, I get a menu where I can choose a new onboard MIDI song, a new MIDI song stored on the flash drive, a new audio song stored on the flash drive, OR I can choose my existing song. If I choose the existing song, then I can use the left and right arrow buttons to choose different tracks to add to my recording (NOTE: “L” and “R” are really just tracks 1 and 2 – there are 16 tracks total); if I choose one of those and press PLAY, the song will start playing back and I can record my new track, and then once again choose to save, retry or cancel. So then, you can continue adding tracks as you like. Now there are some editing options available that I’m not going to bother demoing here, but you can re-record or overdub sections on a measure by measure basis, so “sort of” a “punch in punch out”. If you press MENU repeatedly to cycle through to the recording menu, then you can set some options for that.
So for audio recordings to the flash drive, you long press the REC button again, but choose AUDIO – then you can start playing (and you can include rhythms if you like) and press REC when you’re done. If you choose to save it, you’ll have an audio file on your flash drive. When you want to replay that song (or if you want to replay an audio file you just saved to your flash drive like a backing track) you can access those by using the song button and navigating to the USB–>USER FILES folder.
Registration Memory
So when I heard about registration memory being added to the P-525 (it was missing on the P-515) I was super excited – on a keyboard this advanced, with great sounds, key action, speakers and L&R line outs, lots of players would consider gigging with it – but if you’re going to use a keyboard like this at gigs, unless you’re just using the built in voices and settings at their default settings . . . you’re likely going to want (actually NEED) a registration memory system to save and quickly recall your custom setups at a performance. Now there are only 24 registration memory slots, but that’s actually plenty – this isn’t an arranger keyboard with 1,000 sounds, so I’d easily be able to save common setups for a piano/electric piano/organ gig within that limit. But it’s not all roses unfortunately; while having registrations is a massive feature, I think Yamaha may have added these as an afterthought because the user interface for these is unfortunately pretty clunky; nowhere near as intuitive as the rest of the user interface. To be honest, it’s clunky enough that I’m no longer super excited about it. 🙁
There are 4 “banks” (A,B,C & D), each of which can store up to 6 registrations; so you first choose a bank and then use the 6 voice category buttons to access the registrations (that’s why the voice category buttons also have numbers assigned to them from 1-6). So to save a new registration, if I first make all my selections; let’s say I choose an organ voice, I’ll go into the Voice Edit menu and set the rotary speed to fast, I’ll enable splits with bass & cymbal voice, and I’ll choose Shuffle1 as the rhythm. To save this, I open the registration menu by pressing EXIT and PIANO ROOM at the same time. Now to select a bank from A-D, I need to use the up and down arrows while holding down the REGIST button – so if I do that and choose Bank A, NOW I have to simultaneously press EXIT and PIANO ROOM AGAIN, press one of the 6 buttons I want to store my settings in; let’s say I press 2, then I can choose MEMORY and press the right arrow to save my selection (see what I mean by not intuitive?). Now if I change my settings around and want to load my registration back in, I simultaneously press EXIT and PIANO ROOM again, except this time I just hold the REGIST button down and use the arrows to navigate to the one I saved and then let go, and then my settings are loaded.
So I know that regardless of how “clunky” something on a user interface is, if you own the keyboard you will eventually memorize it, so it IS awesome that Yamaha added this feature, especially for those who might want to gig with the piano, but . . . come on Yamaha, the rest of this UI is awesome so don’t “mail it in” on this feature. Maybe they’ll clean that up for the next model 🙂
Connectivity
So the Yamaha P-525 has some pretty awesome connectivity going for it:
- 2 x 1/4″ stereo headphone ports on the front, thanks Yamaha
- The USB flash drive port is also thankfully on the front of the keyboard for easy access; you can store audio wav and MIDI recordings on the flash drive, and easily play them back on the piano
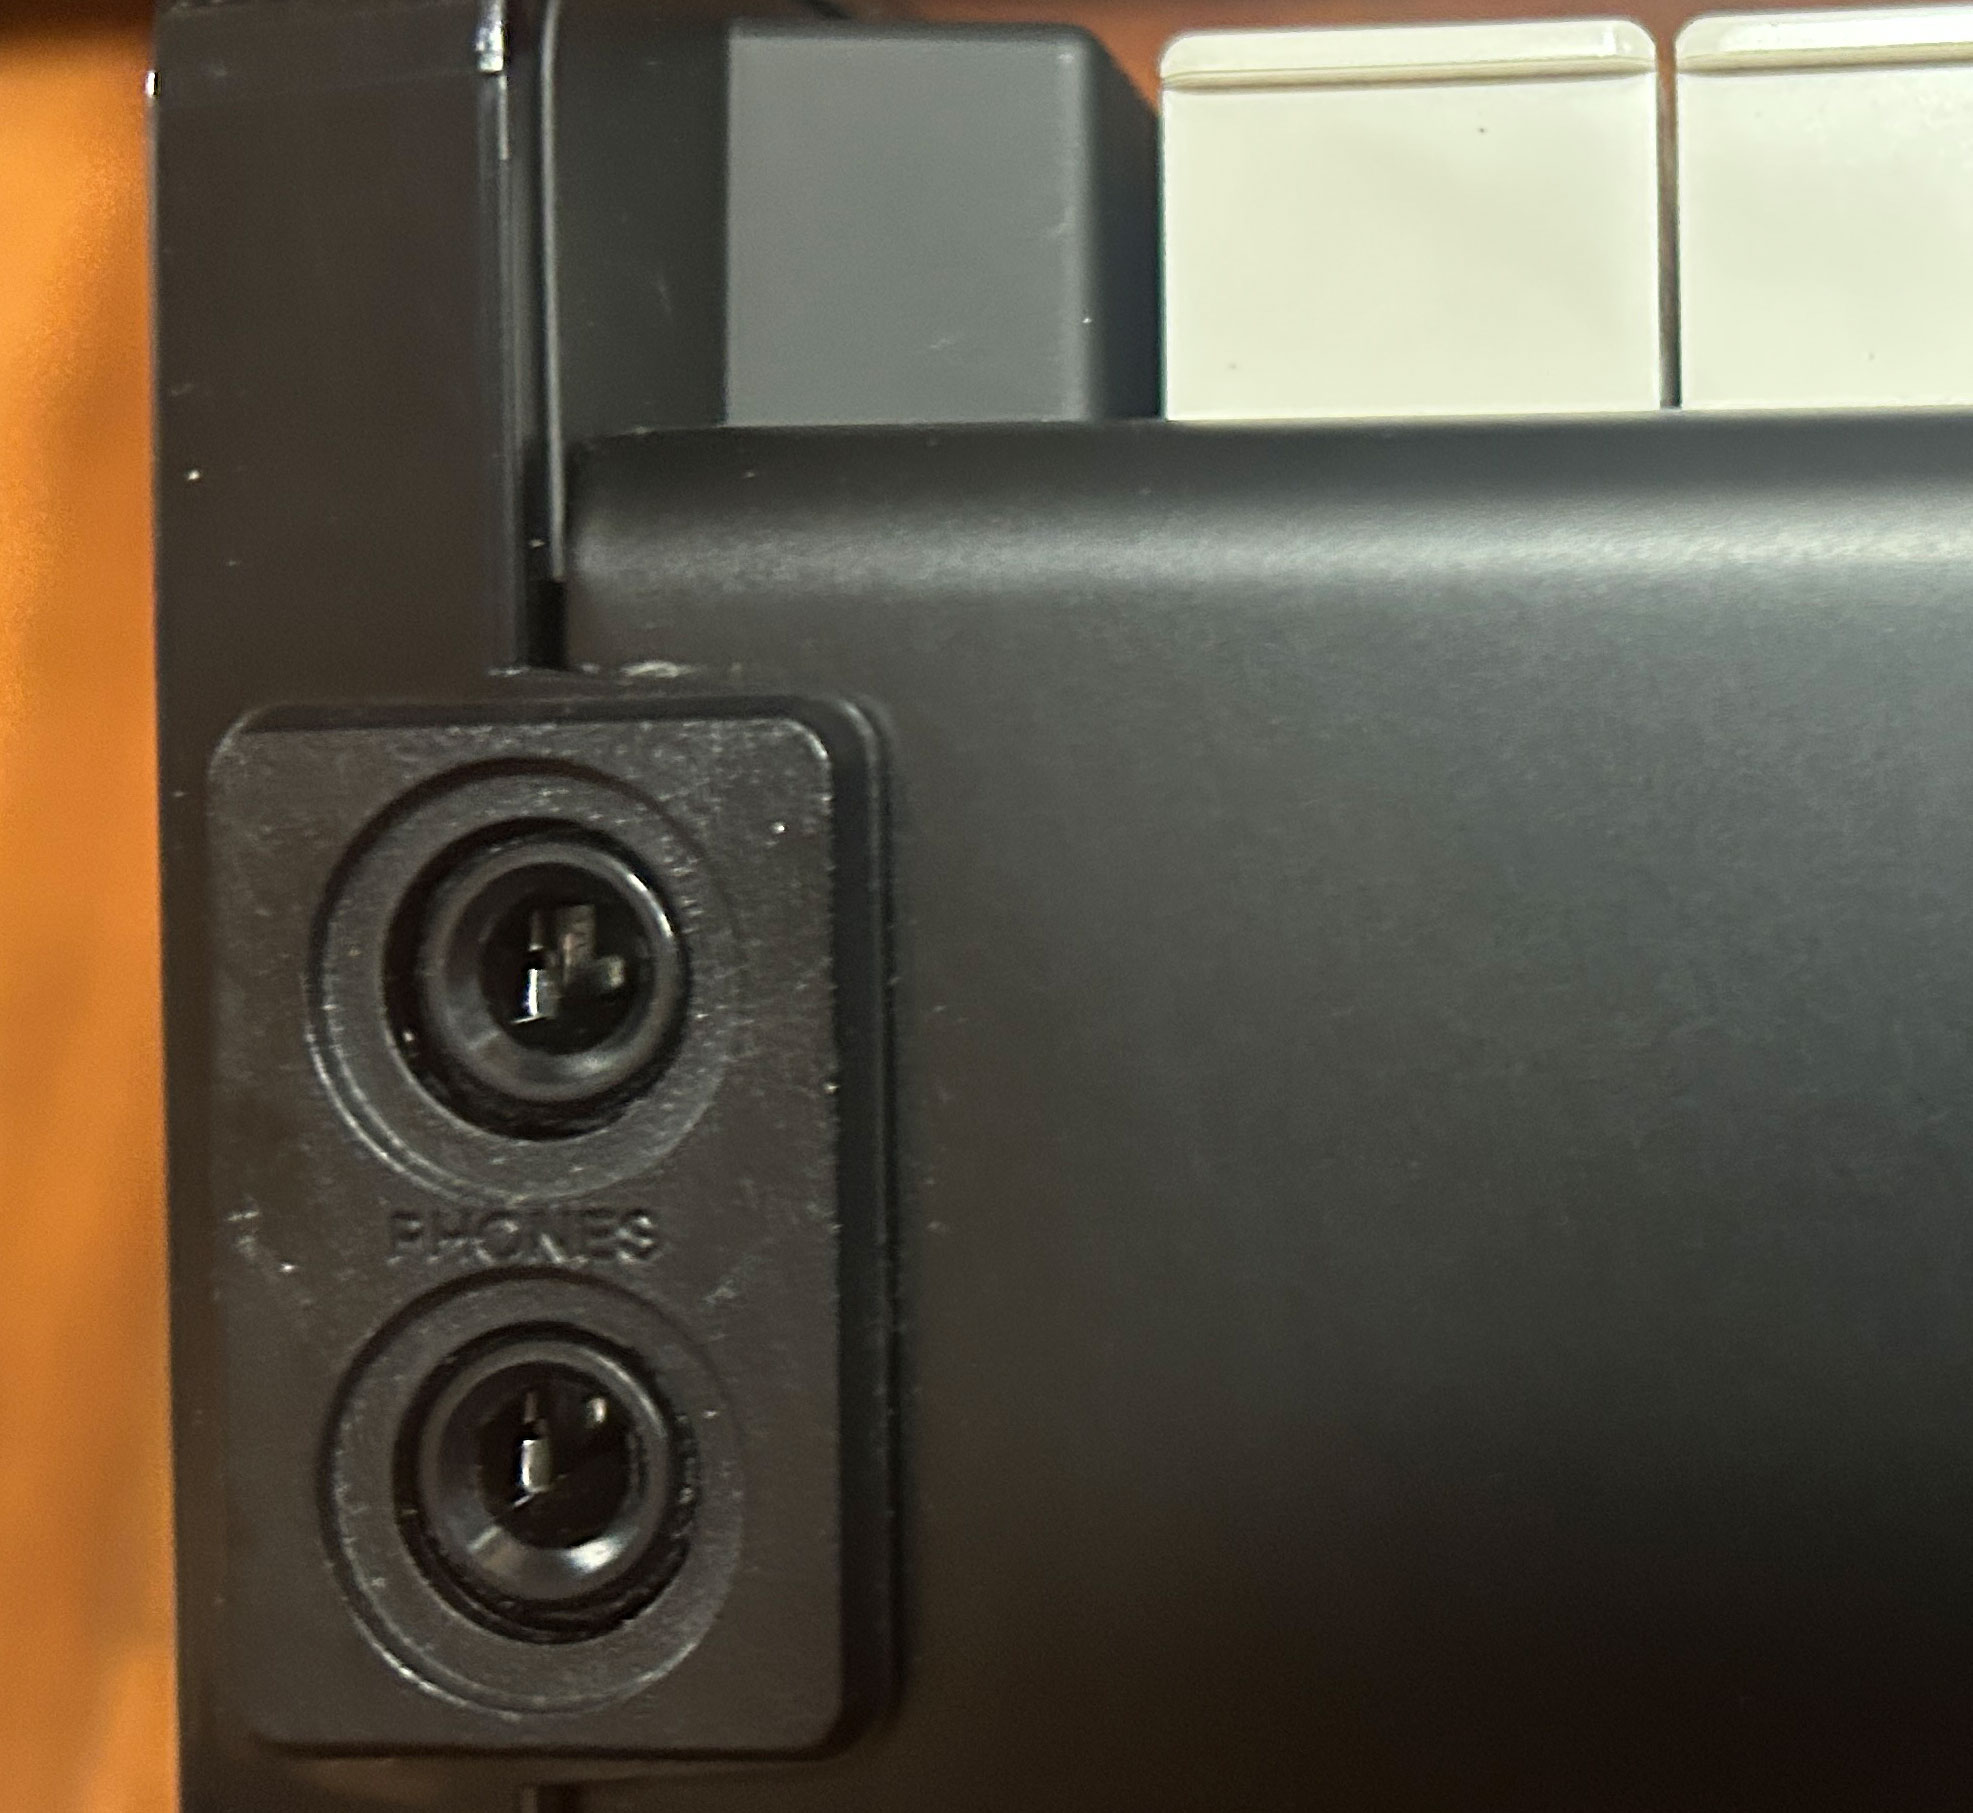
On the back of the 525 we have:
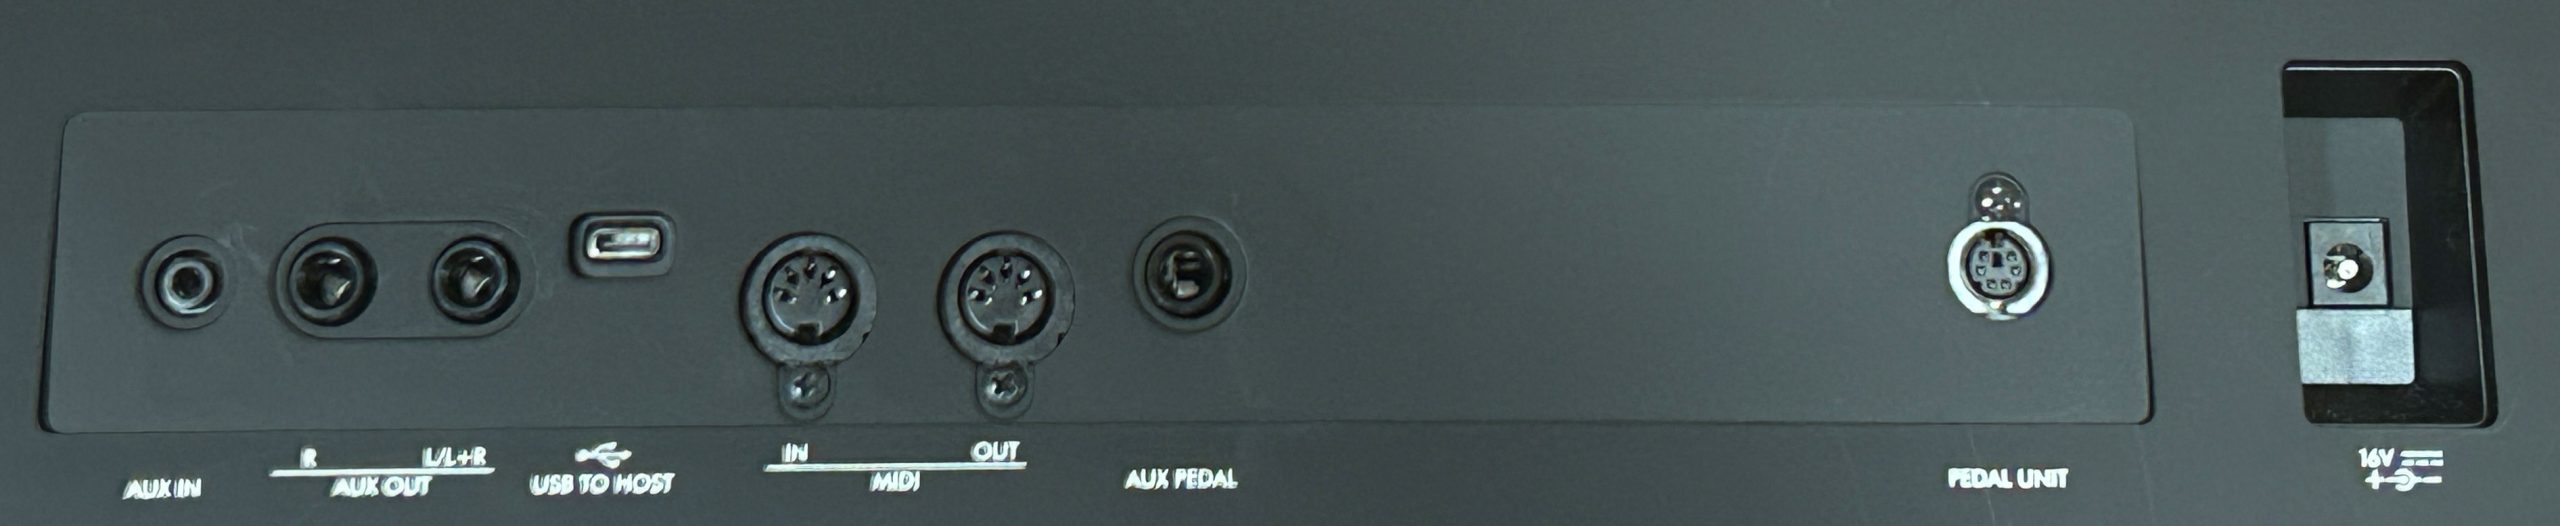
- 1/8” aux in port to stream in external audio from a device like an iPad
- 1/4″ L/R line out ports for proper connections to external audio equipment like amps, PAs, mixers etc
- USB to host port (which has thankfully been upgraded to USB-C); and just like the P-225, this not only transmits MIDI but also transmits AUDIO, and does so in BOTH directions; this gives you another option over the aux in for streaming audio INTO the piano, but it more importantly allows you to create high quality audio recordings on an external device using just a USB cable as opposed to needing an external audio interface
- Then next to the USB to host port are 5 pin MIDI in and out ports which allow you to use another keyboard to trigger sounds within the P-525, or use the P-525’s action to trigger sounds on another keyboard or device (given the P-525 has great piano action and great piano sounds, the most likely way that I would use the MIDI ports would be to use a light synth or organ action MIDI controller to trigger non piano sounds such as the organs on the P-525)
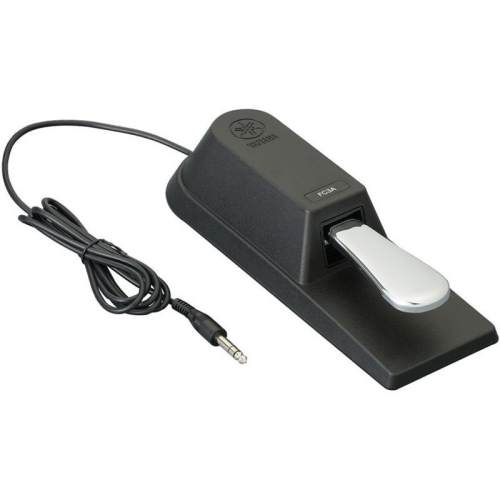
- Then we have a ¼” generic sustain pedal input; the P-525 does actually come with a REALLY nice pedal, Yamaha’s FC3A pedal, which supports half pedaling. This is nice touch from Yamaha, since the P-515 came with a less expensive pedal (the FC4) that did NOT support half pedaling
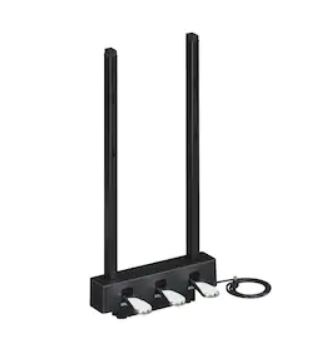
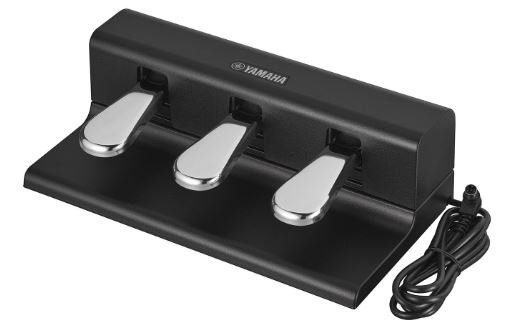
- Then we have a triple pedal input port which can be used with Yamaha’s LP1 triple pedal (this one requires the wooden L-515 Yamaha stand) OR (and what I would recommend) the newer PORTABLE FC35 triple pedal unit. And while I’m not accomplished enough of a pianist to use soft or sostenudo pedals, if you’re planning on using the organ voices, I would still highly recommend picking up a triple pedal, because you can configure each pedal to do things such as flip the rotary speed – you CAN set up the aux pedal (the single pedal) to flip rotary speed, but NOT AT THE VOICE EDIT level; only global which means it wouldn’t function as sustain on piano voices
- And last but not least, the P-525 is also equipped with BlueTooth audio in, so yet another option for streaming audio INTO the piano
So the only connectivity option that I can even THINK of that the P-525 DOESN’T have is a mic input, which might lead some buyers to consider options like the Roland FP-E50, FP-60X or FP-90X. That being said, I USED to make a “big deal” about keyboards that have mic inputs; after having played in bands for a few years now? I have NEVER used a mic input on a keyboard; my mic always just goes directly into the main mix with everyone else. I guess if I started doing smaller solo gigs at cafes or busking, then a mic input would be of more use.
But overall, the connectivity on the P-525 is pretty solid.
Other Features
Portability
So the “P” in Yamaha’s P-Series of keyboards DOES stand for “Portable” but at 48 pounds? Well that’s up to YOU how portable the P-525 is. For me, I would never haul something that heavy to gigs, but . . . that’s just me. The dimensions of the P-525 are pretty much the same as the prior model at 52.5″ long x 16″ deep x just under 6 inches thick. It is pretty deep, but that’s fine by me, because much of that depth is due to the P-525 having a nice long pivot length on the keys, which greatly improves the action. So if you were to gift me a piano for home and asked if I wanted a P-525 or a P-225 I would choose the P-525; if it was for gigging I would definitely stick with the P-225, just for that weight difference.
Speakers
The speakers on the prior P-515 model were already great, but Yamaha has upped the game here by quite a bit. There are 4 speakers total on the P-525: each side has a 20 watt, 12×6 cm speaker as well as a 6 watt, 2.5 cm tweeter for a total of 52 watts! So if you do decide to gig with the P-525, these speakers will be a decent option for monitoring your sounds on a bigger stage, or even being powerful enough to be used alone (in a smaller more intimate setting like a cafe). The speaker design includes some bass reflex technology; that and the fact that the P-525’s case is quite solid and heavy duty make these speakers sound fabulous; they are powerful, they capture bass and high end beautifully, and they get loud. And the speakers not only face the player (thankfully; I REALLY don’t like backward or downward facing speakers) but Yamaha took it a step further and angled them slightly towards the player.
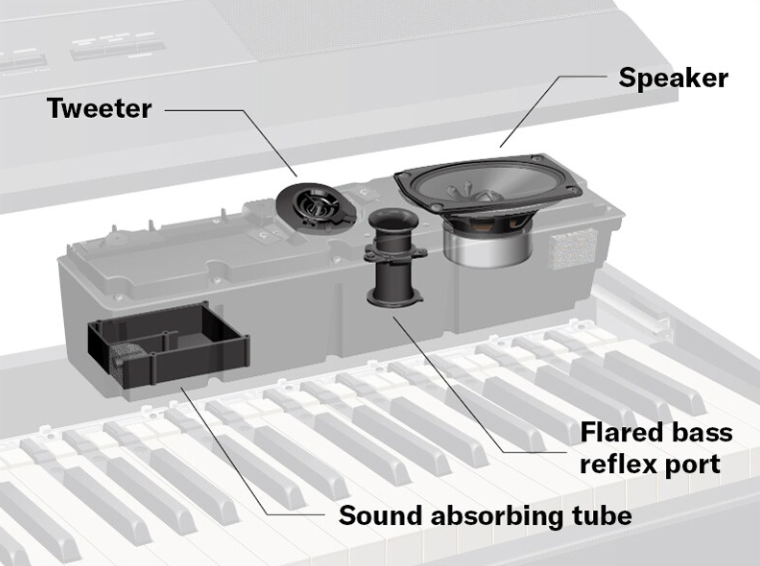
Here is a quick demo on the speakers (just as picked up by the built in mic on my iPhone), and I will also try to include the Sound Boost feature.
Music Rest
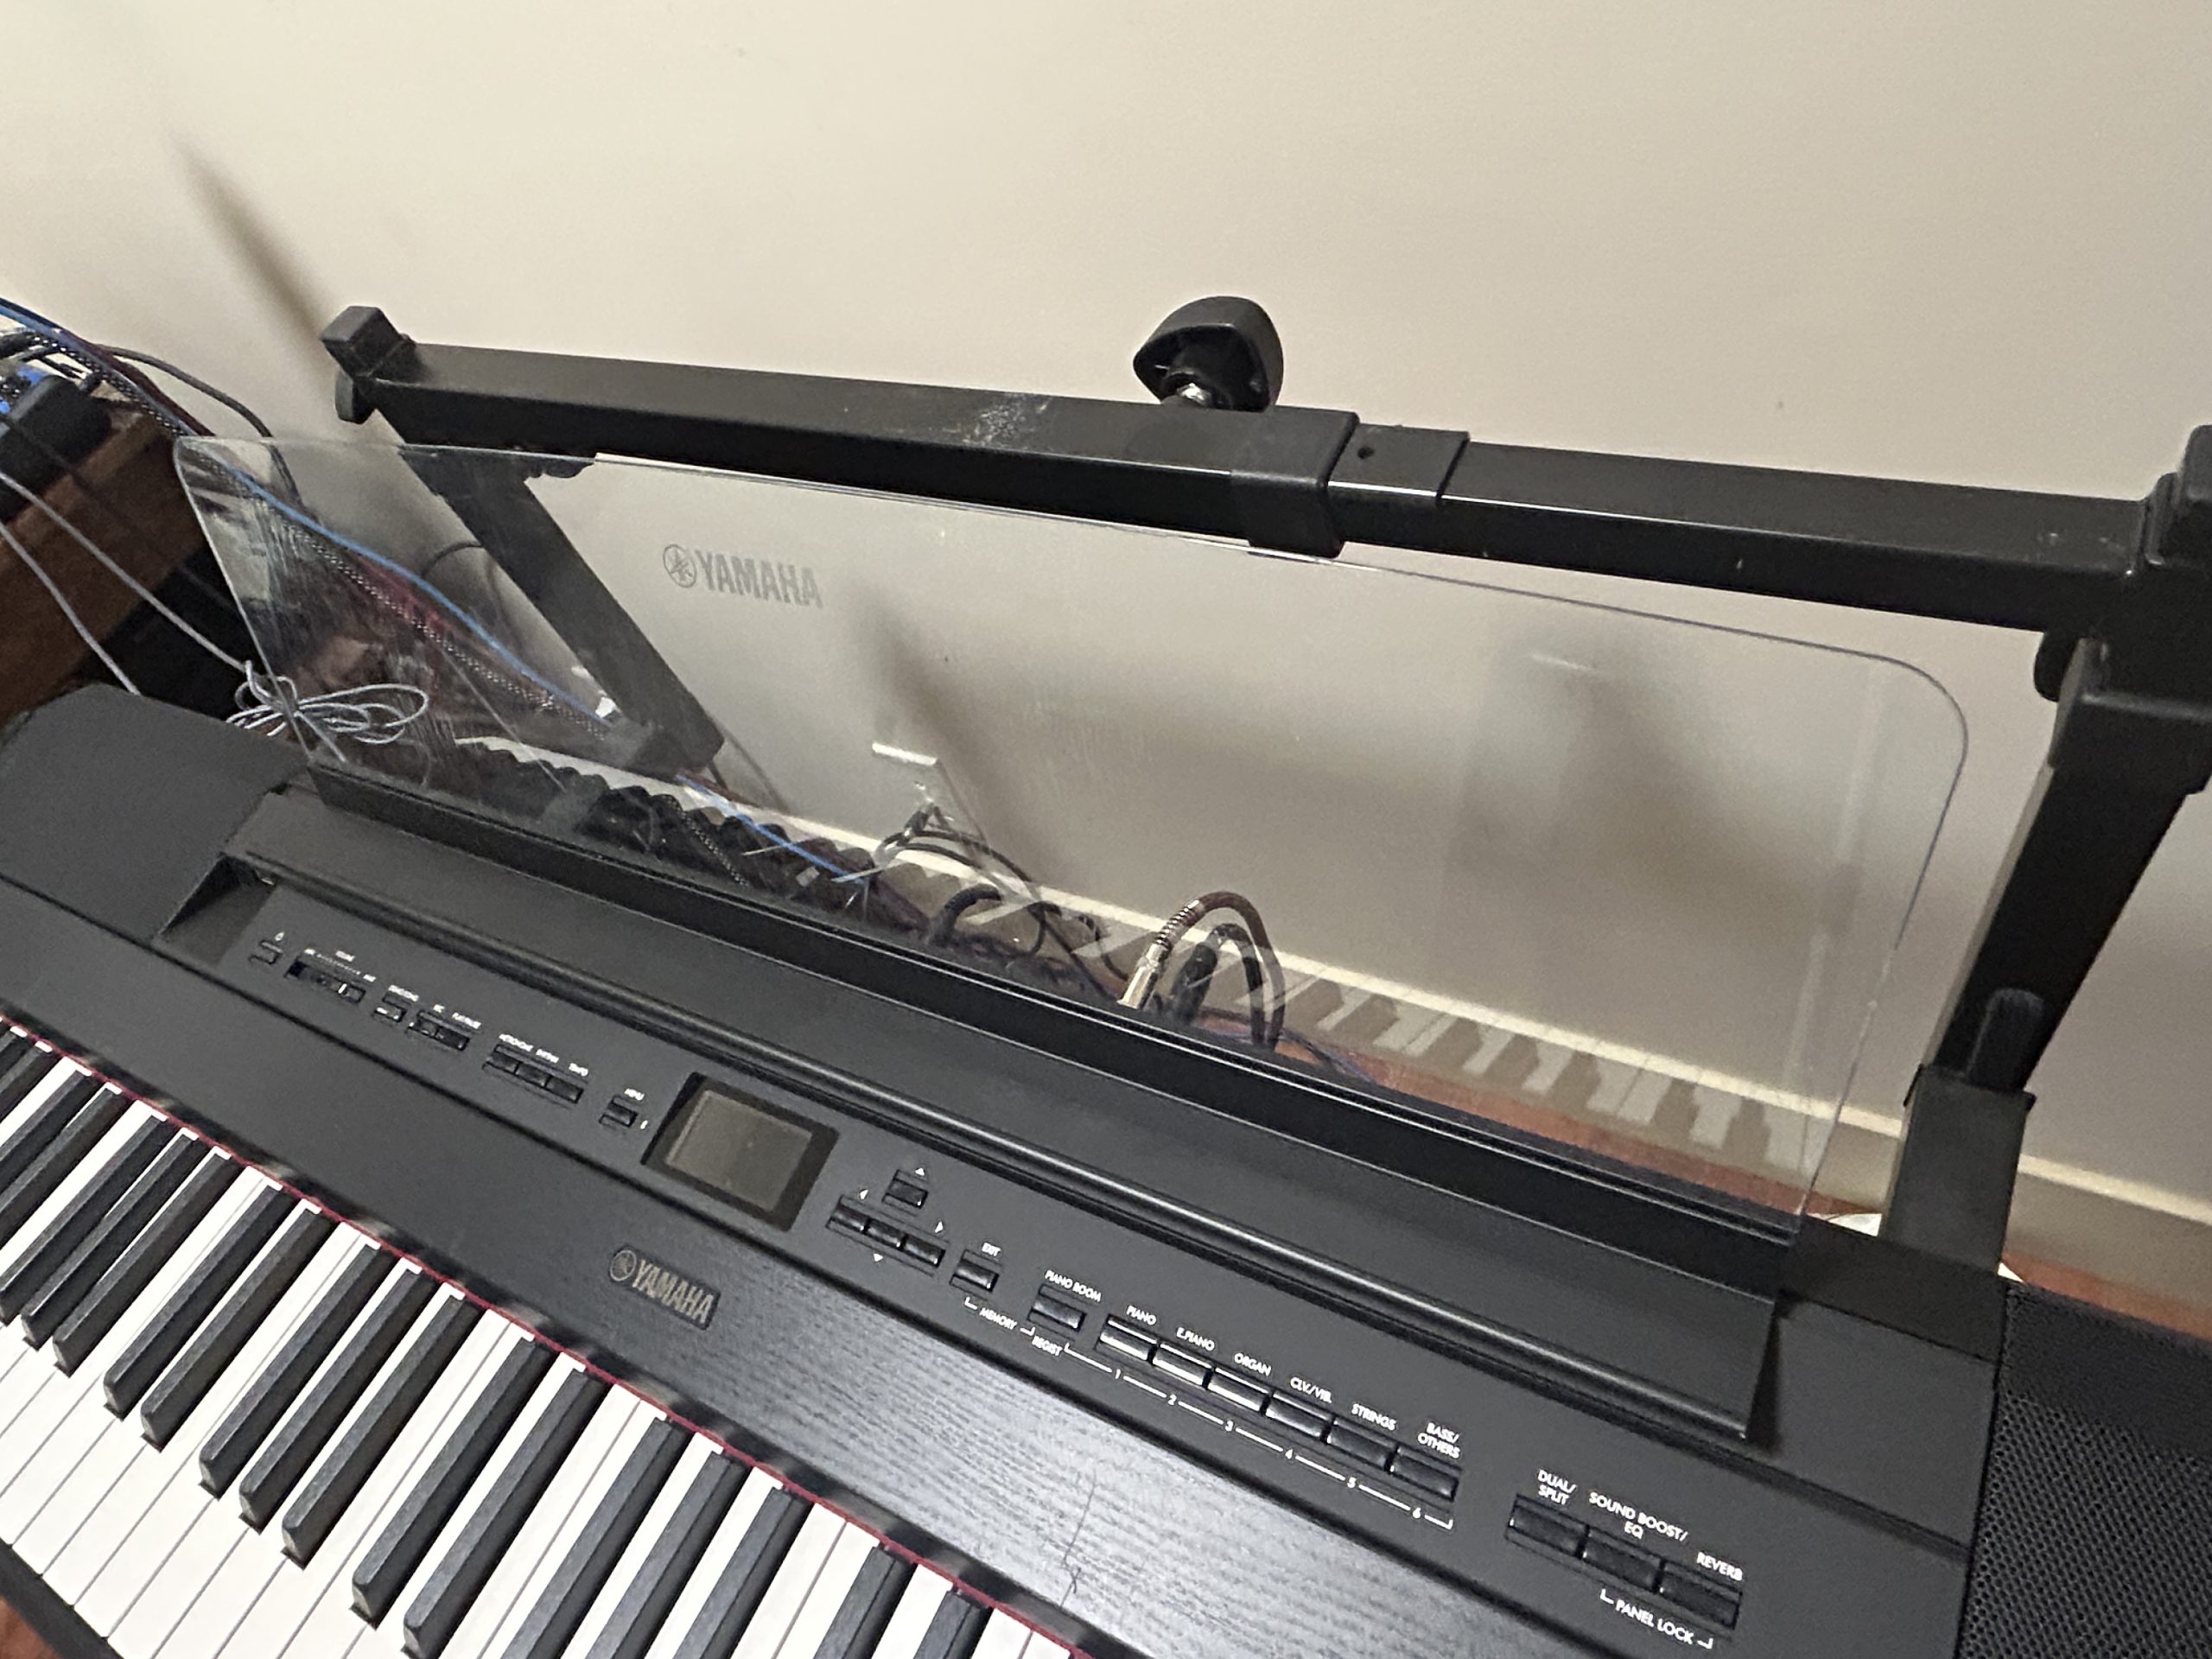
I don’t think I’ve ever mentioned a portable piano’s music rest as a “feature” before, but . . . this music rest is REALLY impressive! It’s super wide, with lots of room for multiple books (or in my case an iPad and MORE), it’s heavy duty and REALLY stable. It’s a shame the music rest on my rental unit (which has definitely been put through its paces) is kind of scratched up which makes it not look as good as it should in the photo; but if you buy a new P-525, you will LOVE the music rest!
App Compatibility
Yamaha Smart Pianist
The Yamaha P-525 is compatible with Yamaha’s FREE app Smart Pianist. This is by far the best companion piano app (built by a piano manufacturer) that I’ve ever come across; it blows away apps from Roland or Casio. It provides a nice visual interface to make controlling your piano, choosing voices, changing settings etc MUCH easier (although it does have a bigger impact on pianos that have lesser onboard user interfaces). It also has some very cool extra features, most notably (in my opinion) the Chord Tracker which allows you to import a sound file and have the app generate a chord chart you can play along with which is awesome.
Yamaha Rec’N’Share
The P-525 is also compatible with Yamaha’s (also free) Rec’N’Share app. This app makes it easy for you to take advantage of the audio interface built into the P-525’s USB port and EASILY make piano performance videos with just your phone and a USB cable connection (no external audio interface is needed!). You CAN do the exact same thing just with your phone’s built in camera app, but Rec’N’Share does have some extra features that are specific to doing this, so it is a nice alternative.
Any Negatives?
Overall I really like the Yamaha P-525, but no keyboard (sigh 😉 is ever perfect – the only negatives in my opinion are:
- the weight at 48 lbs; although this is only a negative to ME because I don’t want to carry something that heavy to a gig – the reason it’s heavy is BECAUSE of the Grand Touch S action which IS FANTASTIC so . . . if you want the high end action, you have to live with the weight
- the registration memory system was badly needed on this keyboard (especially if you DID want to gig with it), but it really wasn’t implemented well – not the end of the world, but Yamaha should be doing this better (maybe next model)
So overall, if you want a piano with REALLY good key action, and great sounds? I don’t really have much in the way of negatives to offer.
The Competition
Roland FP-60X ($1100 USD) or FP-90X ($2300 USD)
Roland’s higher end FP models are keyboards I have yet to review, so I can’t really offer much here unfortunately. The Yamaha P-525 at $1700 USD lands right in between the FP-60X at $1100 USD and the FP-90X at $2300 USD, so at least price wise, it doesn’t have a DIRECT competitor here; most reviewers that do compare these models tend to compare the P-525 against the FP-90X so if that means anything, the Yamaha is less expensive.
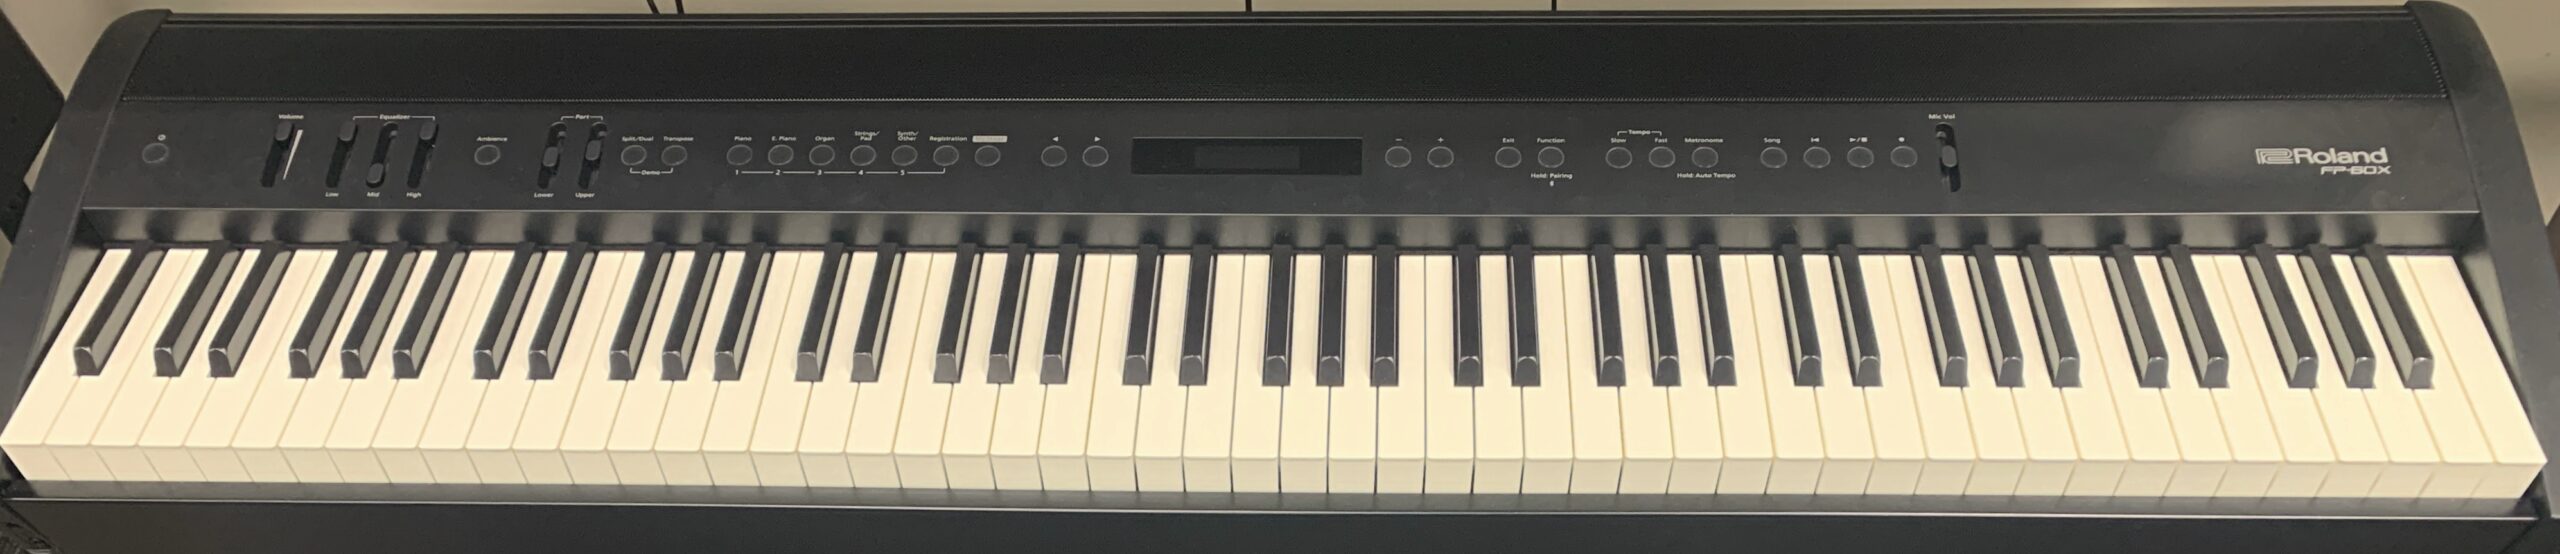
The FP-60X uses the same PHA4 triple sensor action found in the FP-10 and FP-30X (which MANY people really like – I don’t), and the FP-90X uses a higher end PHA50 action which doesn’t have solid wood keys, but does have keys with wooden sides. Both these models have mic inputs, and good user interfaces with EQ and relative volume sliders right on the front panel. The P-525 does offer the onboard rhythms and accompaniment though, which you can only access on the Roland models with an app (although I wouldn’t bother personally – the Roland app isn’t the greatest).
So as far as comparing these directly, it probably depends on your personal preferences for the key actions & sounds, whether the mic input matters to you, and how much you want to spend.
Casio PX-S5000 ($1300 USD) or PX-S6000 ($2000 USD)


There are new higher end models in the Casio Privia lineup: the PX-S5000, PX-S6000 & PX-S7000. The Yamaha P-525 at $1700 USD also lands in between the PX-S5000 at $1300 USD and the PX-S6000 at $2000 USD. These are also models that I have yet to review, I’ve only played them briefly in stores so I can’t offer a qualified opinion on these either. What I can say is that I have always been a fan of the light, fast and responsive Smart Scaled hammer action found in the cheaper PX-S1100 / PX-S3100 models (I used to own both of those), and that the new “Smart Hybrid Hammer Action” with a hybrid of wood and plastic found in these higher end models feels even better to me. The other thing to note is that both of these are significantly lighter and more portable than the P-525: the PX-S5000 is only about 25 lbs, and the PX-S6000 is about 32 lbs, and both of these keyboards can run on batteries.
But without knowing anything further, I can guarantee you that I would only consider the PX-S6000 as a worthy competitor for the P-525, because the PX-S5000 has the same SUPER minimalist user interface that the PX-S1100 has, which requires using the dreaded key combinations to control your settings. I loved the key action and sounds on my PX-S1100 but the lack of a user interface drove me to trade it in on a PX-S3000. I have been watching my local music store’s stock to look for a PX-S6000 to rent and review; hopefully that will happen; but for now, the best I can offer is the PX-S6000 will cost you a bit more, but have a much lighter key action and offers more portability.
Yamaha P-225 ($750 USD)?
So what about the Yamaha P-225 at less than half the price of the P-525? The P-525 is obviously a much higher end instrument, but . . . is it higher end enough to justify the price difference? That totally depends on you and your needs and preferences. For me? I would opt for the P-225, because I prefer lighter key actions, and because I would want a more portable piano to take to gigs (the P-225 weighs half what the P-525 does). And I’m also not an accomplished pianist who can really take advantage of the higher end key action on the P-525. If you are such a player, then you will definitely prefer the P-525 for the action alone.
Yamaha P-515 (??? USD)
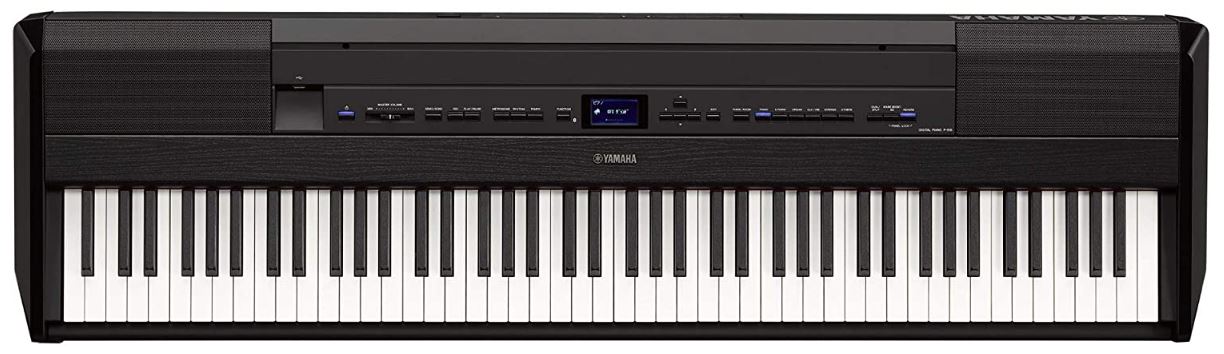
What about the prior version, the Yamaha P-515? That completely depends on if you can find a new one on deep discount, or a used one in good condition at a good price. The P-515 was also a great piano, but the P-525 does offer an improved key action (which is a BIT lighter; that’s a big deal for me), bigger speakers, a USB-C connection and registration memory (even though it’s not implemented as good as it could have been) so if I was looking for a high end piano for home use (because I’m not carrying either of these to a gig) I would definitely opt for the P-525.
Yamaha P-525 – The VERDICT
The verdict is easy on the Yamaha P-525 is easy; this is a fantastic high end piano with a fabulous key action, great sounds with tons of available deep dive piano customization, a great user interface and handy features like built in rhythms and BlueTooth audio in!
I can HIGHLY recommend the Yamaha P-525, especially if you’re looking for a piano with a VERY high end key action!
Thanks so much, and happy keyboard playing! (and keyboard shopping 😉 )
Check out current pricing in your area:
Piano Training I Recommend
I’ve taken a number of online piano courses and tried various piano learning apps; the ones I’m listing here are my favorites and I can highly recommend any of these if you are looking for some online training to get started on learning piano, or to take your current skills to the next level.

Bird’s Piano Academy is one of my absolute favorite online piano programs. Arthur Bird has created multiple courses on getting started learning piano quickly as well as great intro courses on Blues, Jazz and more. And his courses are chord based, so you don’t have to read sheet music which is AWESOME and definitely the fastest way to learn to play modern music. You can go with a subscription that includes ALL his courses, or you can buy individual courses a la carte with LIFETIME access – HIGHLY RECOMMENDED!
If you’re looking for the least expensive way to get started on piano, Pianoforall is a great option. It’s a unique course created by Robin Hall that uses downloadable eBooks with embedded videos and audio instead of a website.
This course is an amazing option for learning piano from beginner up to being able to perform; it teaches multiple genres of music and focuses on how to be a “one person band” on the piano. This course is taught by pro pianist Steve Lungrin – Steve has been teaching and performing his whole adult life and is a fantastic instructor and performer.
I took this course from 2020 to 2021 and it elevated my playing from a very basic level to being able to play songs in multiple genres.
I was super excited when Simply Piano added the “Chords Path” to their super popular piano training app (iOS or Android); this path allows a new student to get started learning piano using a chords based approach (which I HIGHLY recommend over a traditional approach). Learning to play using chords is by far the easiest and fastest way to learn to play modern songs (MINIMAL sightreading ability is needed). I did the entire chords path, and can highly recommend that you check it out (you will get a trial period so why not?)
This is a fantastic option if you are mostly interested in rock music. This course was created and is taught by Marine Lacoste, who is not only a fantastic instructor & pianist, but she is also a very accomplished hammond organ player – she performs regularly with her own band, as well as playing keys regularly for multiple recording artists on tour. I started this course in 2023 when I joined a band, and it is helping me greatly in taking my playing to a new level. And Marine is constantly adding new content, and is very active on the platform.
If you sign up for Online Rock Lessons yearly subscription, use code PIANOTONE at checkout to let Marine know I referred you, and she will give you some free bonuses!

This is a fantastic (but pretty unique) online program for taking your piano and organ playing skills to the next level, developed by pro piano, keyboard & Hammond organ player Mike Little. Mike shares tips & tricks accumulated from over 30 years of pro touring, gigging, studio & production experiences. This course isn’t for a COMPLETE beginner, but you don’t have to be a super accomplished player either, to get TONS of value from this program!

Ultimate Piano isn’t an actual course to learn how to play, but it IS a really helpful TOOL for piano students. You connect your keyboard to your computer, go to Ultimate Piano’s website (so NOTHING to install!) and you have a ton of helpful training and exercises at your disposal, as well as built in piano sounds. With the help of on screen light up keys, you can learn and practice scales, chords and even ear training and you can play along with MIDI or audio files, and even YouTube videos to practice songs!