
This is my in depth review on the Casiotone CT-S500 & Casiotone CT-S1000V keyboards. So right off the bat, I’m reviewing these 2 keyboards in ONE review, because they are ALMOST IDENTICAL. My personal preference would actually have been to JUST review the CT-S500, but I didn’t have access to one to rent or borrow, so when my local music store got a used 1000V that I WAS able to rent, I immediately did; so that I could just review both keyboards at once. The only difference between these 2 models is the 1000V adds vocal synthesis features; so just a heads up, I will be focusing this review on the common features between the CT-S500 and CT-S1000V, so I WON’T be going into the vocal synthesis features in much detail in this review. And even so, there is still a MASSIVE amount to go over with these keyboards, so just a heads up – this review will be on the long side.
Differences Between CT-S500 & CT-S1000V?
So what ARE all the differences? As I mentioned, the 1000V adds vocal synthesis features, which allow you to use the keys on the keyboard to have the keyboard “sing lyrics” back to you, and there are tons of settings and customization that you can use with that. The only other functional difference is that there are 2 quick access buttons on the CT-S500 that are used to access surround sound and active DSP that are repurposed on the 1000V to choose between playing the instrument tones or the vocal synthesis. I’ll talk about this in more detail later in the review, but I think Casio made a big mistake with these buttons on the 1000V; first of all, the keyboard STARTS in vocal synthesis mode (I highly doubt the majority of people would prefer that), and losing the dedicated Active DSP button is actually pretty annoying. They should have left the Active DSP button, and just repurposed the Surround sound button to toggle back and forth between the vocal synthesis and instrument modes (and made the instrument mode the default). BUT . . . I will show some workarounds to mitigate that issue a bit later 🙂


And, the 2 customizable knobs on the CT-S500 (K1 & K2) are used for the same things on the CT-S1000V while in instrument mode, but have different uses when used with the 1000V in “Lyrics” (vocal synthesis) mode. Beyond that, the only other difference is the colour scheme, with the 1000V being red and black and the 500 being blue and black.
Oh WAIT! One More BIG Difference? THE PRICE!
So what does this vocal synthesis feature cost you? Well at current prices, the CT-S500 sells for about $380USD, and the CT-S1000V sells for about $500USD, so you’re paying an extra $120USD (0r 30% MORE) just to get vocal synthesis . . . So is it worth it? Well, that depends on your interests; to me, the vocal synthesis feature is kind of a gimmick and NOT AT ALL worth the extra money; but . . . if it’s something you want, then by all means, go grab a 1000V. When I was researching prices on the 2 models, I noticed pretty much all the major retailers sell (and stock) the CT-S500, but the 1000V was challenging for me to even find on a retailer’s website, which might indicate that others agree with my opinion on the vocal synthesis and that it hasn’t sold well; but that is JUST a guess on my part, so who knows. Anyhow, with all of that out of the way, let’s get into the review.
The Casiotone Line-Up
So where do the CT-S500 and 1000V fit into the Casiotone lineup? Well . . . they’re at the top; these are the flagship models for Casiotone. There are 2 “groups” of Casiotone keyboards; the entry level models (CT-S100, 200 & 300), which use significantly older technology and features (including a significantly lesser sound chip). I reviewed the CT-S300 VERY early on in my channel, here is a link if you want to check that out. Then we have the new models that use the MUCH higher quality AiX sound chip. There is the CT-S1, which is a unique model in that it has no menu screen, just a button driven user interface, and no rhythms or accompaniment; it’s meant to be more of a “players” keyboard; I reviewed that as well (very favorably I might add); here is a link to that review.

Then we have the CT-S400 series (there ARE some minor variations on the 400 you can look up on Casio’s website), which also uses the AiX sound chip, but like the entry level series, also has a menu screen as well as rhythms and accompaniment (although the menu screen, user interface, and all features are significantly upgraded from the entry level Casiotones).
Then we get to the CT-S500, which builds on the CT-S400 by adding more polyphony, tone & effects editing, live control knobs, but most importantly (at least in my opinion) a 2nd pedal port and proper L&R line out ports. Then, as mentioned above, the CT-S1000V adds the vocal synthesis features.
Key Action
Ok so the CT-S500 & 1000V both have 61 box shaped (so piano style) synth action keys, with a matte finish. Now while the keys are marketed as “full-size”, they are actually slightly narrower, with an octave width of 160-161 mm as opposed to a “true full-size” width of 164 mm found on acoustic and fully weighted digital pianos. I have to mention here, that I was expecting the octave width to be 159 mm (which is the most common synth action “full size” width), so that extra mm or 2 actually does move the width a LITTLE BIT closer to the proper 164.
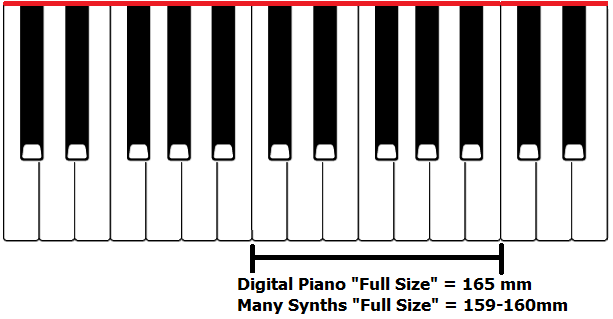
Here is a photo comparing the octave width on the CT-S500/1000V with the Roland GO:Keys 5 (which is a full 164mm octave width); you can see that the GO:Keys is a bit wider, but it’s not AS much of a difference as it is with other keyboards (Yamaha PSR-E for example) that are 159 mm.

Now I have talked about octave widths a LOT on my channel, some people notice it, some people don’t, some people care about it and others don’t. I’ve always preferred the 164mm width myself, but it is a personal thing. And, I have to remember that I probably notice this since I’m always playing different keyboards on my channel, but for most people – if you get one keyboard you’ll likely get used to it and be just fine either way.
So key width aside, how does the action feel? Well, the key action on the CT-S500 & 1000V feels pretty much identical (to me) as the key action on the Casiotone CT-S1, which I’ve ALWAYS REALLY LIKED. It’s not weighted or semi-weighted, but the keys do offer enough resistance to give it an ALMOST semi-weighted feel, which does make it easier to play piano voices with some control and expressiveness. It’s a FAR better key action than you will find on the Yamaha PSR-E series, and it’s very comparable to the new Roland GO:Keys keyboards. I was super curious to finally compare the action side by side with my GO:Keys 5, and they have a VERY similar playing feel, with the GO:Keys offering a SLIGHTLY “stiffer” resistance, but less key travel than the Casiotone. To be honest, I was expecting to totally prefer the GO:Keys action (mostly because of the octave width), but . . I don’t! I actually prefer the playing feel on the Casiotone, especially for organ slides & palm smears, but also for fast piano passages like scale runs. And the fact that the octave width is just a TINY bit closer to 164 mm also helps. And as I mentioned, the Casiotone also has a deeper key travel than the Roland, which might also be helping my control a bit.
So to sum up, I REALLY like the key action on the CT-S500 & 1000V. It’s smooth, easy, fun & fast to play, and offers a much more “piano-like” experience than most other synth action keybeds, like the ones found on Yamaha PSR-E series keyboards.
Sounds
The CT-S500 & CT-S1000V both have 800 instrument tones (so basically more than most people, (me for SURE) will ever need or likely even use) and the CT-S1000V adds another 100 lyric tones for the voice synthesis. There is a HUGE variety of tones available that are conveniently grouped into categories, including 31 pianos, 29 electric pianos, 38 organs, and tons more including harpsichords, clavs, accordions, guitars, bass, synth, strings, brass, sax and . . . the list goes on (there are also drum sounds and even sound effects). There are also quite a few ethnic instruments, grouped into Indian, Indonesian, Arabic, Chinese, Brazilian and more. It should also be noted that included in the 800 tones are well over 100 general MIDI tones that won’t be anywhere near the quality of the main AiX tones, but they do provide additional options for you.
The voices can be layered or split, with an assignable split point, and you can also layer 2 upper voices within a split with a lower voice, so super cool. Also, there are some voices that are “advanced” voices which have some type of extra features depending how you play; for example there is piano-pad advanced voice that only plays the pad if you play 3 or more notes at a time. Now there are clearly FAR too many voices to demo here, but I will try to demo a few of the pianos, electric pianos and organs, and a few other voices (as well as some splits and layers).
So, what did you think of the sounds? As with alot of the newer keyboards in this price range, voices on entry to mid level main brand keyboards are getting to be really good, and can almost compete with digital pianos and keyboards that sell for quite a bit more. Piano sounds are pretty personal; I’ve always preferred brighter piano sounds that cut through a mix well, so I’ve always been partial to Yamaha pianos as opposed to Roland pianos, which tend to be warmer and have more emphasis on low end. And to be honest, my personal preference would rank most of the Casiotone’s pianos above the Roland GO:Keys pianos for that same reason; they’re brighter and crisper sounding. But as I said, that’s all personal preference. I also quite liked a number of the electric pianos, and the organs weren’t bad for purely sampled ones, and it’s nice that it’s so easy to enable a rotary speaker DSP that is automatically assigned to the live control knobs (more on that in the user interface section).
As far as the other sounds go, they’re OK, but things like brass, woodwind sax etc don’t compare to the equivalent sounds on Yamahas (Yamaha has always led the way with those types of sounds in my opinion). And I also found some relative volume discrepancies with the bass guitar sounds; they’re all quite low volume in a split even when their relative volume is maxed out; you’d almost need to lower the relative volume of the main voice and then raise the overall keyboard volume to compensate for that. But at any rate, my verdict on the instrument sounds on the Casiotone CT-S500 & 1000V? Overall pretty good, but it’s cool that the best sounding ones are also the most likely to be used (so pianos, electric pianos and organs). These are totally usable (in my opinion) for recording, or even for jamming or gigging with a band, so great job Casio. As far as the vocal synthesis “sounds” go, I’ll demo those later in this review when I go over that feature on the 1000V.
DSP & Effects
So I’ve never been the type who bothers tinkering with their sounds with DSP effects; for me, adding some reverb is usually as much tinkering as I can be bothered with. But if you ARE into modifying your sounds? You’ll enjoy the Casiotone CT-S500 & 1000V; you’ve got 24 options for reverb, 12 for chorus, 15 for delay, and then to top that off there are 100 DSP effects available! There are all the usual suspects in there, compressors, phasers, flangers, wah, distortion, rotary speaker, drive, delay etc (way too many to list – check the manual on Casio’s website if you need a full list).
The reverb, chorus and delay are global effects that are a little bit buried (by default) in the menu system, you need to do a bit of menu diving to access those, which is where you can choose the TYPE of reverb, chorus or delay. I’ll go over that in more detail in the user interface section, as well as how you can customize the live control knobs to adjust the LEVEL of your chosen reverb, chorus or delay.
And for the DSP’s, on the CT-S500 there IS a dedicated button to access DSP options (and that button also toggles your current DSP on and off); on the CT-S1000V though, that direct access button was repurposed to choose “instrument” voices (as opposed to the vocal synthesis), which is actually pretty annoying, at least to me. As a result, on the 1000V, accessing DSP options (AND turning them on or off) ALSO requires some menu deep diving; as I mentioned at the start of this review, it would make much more sense to have left the Active DSP quick access button alone, and just repurposed the Surround sound button to toggle back and forth between the vocal synthesis and instrument modes (and made the instrument mode the default).
Now this brings me to a specific setting I wanted to mention that you’ll probably want to know about, especially if you have a 1000V without that direct access DSP button. And that is the HOLD setting. So by default, the live control knobs are set to control cutoff, resonance and modulation; if I go into the menu and find DSP, and go choose one, let’s say a phaser – nice thing Casio did with the DSP effects is automatically change the live control knob functions to control DSP parameters for that effect. So now, when I move the K1 knob it controls the rate for the phaser – so that’s great, except . . . if I press the HOME key or the TONE key to get back to the instrument screen, that disables the DSP effect! Now on the CT-S500, you have that quick access button to enable or disable your DSP, but without that button on the 1000V, this can get pretty annoying! So that’s where the HOLD feature can help (at least a bit); if I go back into the DSP menu (as soon as I do, that enables DSP again), and press HOLD then that will keep your DSP activated, even when you go back out to the instrument screen. So that helps, BUT this is only a partial solution; now the DSP effect you chose will also be left ON even if you switch voices. I think removing the direct access DSP button on the 1000V was a pretty big oversight by Casio.
User Interface & General Function
Ok so Casio decided to go with a minimalist user interface on the CT-S500 & 1000V, and I’m not a huge fan of that approach, especially for arranger keyboards with TONS of voices, styles, effects and features. While the marketing departments might think it results in a cleaner, “prettier” LOOK to the keyboard and as a result will sell better (and what do I know, maybe they’re right . . .), I’m sorry, it’s just not intuitive, and not as functional or user friendly – menu deep diving, even when you’re familiar with the keyboard, is always slower. I’ve reviewed TONS of keyboards and digital pianos, and have gotten reasonably good at navigating around a keyboard I’m not familiar with pretty quickly, but that was NOT the case with the CT-S1000V; it took me some time playing around with the keyboard, reading through the manual, and watching a lot of YouTube videos before I started to get at all comfortable with the flow of the user interface and menu system.
The approach Casio took to minimize the panel buttons is a context sensitive “on-demand” screen, where you have 5 buttons below the screen that will perform whatever functions are indicated on your current screen – now other keyboards do that as well (including the new Roland GO:Keys), except I think Casio took this approach a bit too far. Given the lack of direct access panel buttons on the Casio, you will often run into situations where you have to load one screen to set something, then leave that screen to load another to be able to set something else, and then return back to the first screen, etc. For example, you can’t have your rhythm controls (so start/stop/fill in/change variation etc) available at the same time as the instrument screen to choose a voice.
Now that being said, once I got a bit more comfortable with the user interface & menu system, I was able to move around a bit more easily, but . . . I would still prefer even a FEW more dedicated buttons on the front panel to make things easier, for example:
- octave shift and transpose buttons
- a dedicated DSP on/off button on the 1000V (like we have on the 500)
- some way of immediately opening up the voice categories to look for a new voice; there is an “on-demand” category +/- button, but it’s not accessible until you turn the dial on the instrument screen
- dedicated buttons for controlling rhythms & accompaniment (as I mentioned above you can’t have those available at the same time as anything else)
OK, so with all that in mind, let’s take a general look at the user interface . . .
On the far left we have a pitch bend wheel, and this small knob is our K3 (3rd live control knob); we have the master volume and the power on button. Then we have the K1 & K2 knobs (so the other live control knobs that we can assign things to; note that on the 1000V these knobs will have different uses for the lyrics mode as opposed to the instrument mode), then we have a quick access button to get to the “Home” screen and the “Menu” screen. Then on the CT-S500, we have the direct access buttons to enable surround sound and DSP effects; remember those buttons on the 1000V are unfortunately both taken up just to choose lyrics mode or instrument mode.
Then in the centre we have the screen and the 5 context sensitive buttons, whose use will change depending what screen is currently displayed; to the right of the screen is a dial to scroll through selections, then on the right side we have the “Tone” button which will take you back to the instrument screen, and there is a light below this button indicating if you are currently using one of the “advanced” tones. Then we have buttons for accessing the rhythm features, registrations, starting and stopping rhythms, setting the tempo and recording.
OK so by default, when you turn on the CT-S1000V, you’re actually in lyrics mode, not instrument mode (which I find surprising and a bit annoying actually). To switch to instrument mode, all I need to do is press the instrument button; but since I never plan to actually use the vocal synthesis features, I’d like to be in instrument mode when the keyboard is turned on; so, this is a good time to talk about the “My Setup” feature. These keyboards allow you to save 4 different “setups” that you can assign names to and load at any time, including when the keyboard is turned on. These shouldn’t be confused with registrations, which are meant to store performance settings (so voice, rhythm and other settings used for a song); the My Setup does store those settings as well, but also stores more global keyboard settings, so think of it as more of a “general environment” you want your keyboard to be setup for. There are 4 built in My Setups – I’ll press HOME and then MY SETUP; I can scroll between Piano, Organ, Elec Piano and Sax; I’ll choose Piano and press LOAD AT POWER ON. Then if I turn the keyboard off and on again, now it loads in instrument mode instead; so keep in mind you can make all sorts of setting changes, and save those to a My Setup and either load it when you need it or load it at power on; so super cool you can do that.
Ok so the Home menu allows you to configure what each of the 3 live control knobs do, relative volumes between voices and accompaniment, configure your wireless pairing, work with My Setup, and access demo songs. Now another SUPER cool thing about these keyboards is you can customize what these 5 buttons do! For example, I’d NEVER listen to demo songs, and I don’t need to have quick access buttons to BlueTooth setup or My Setup, so I can change those 3 buttons to do things that I’m more likely to need on the fly; I’ll show how to do this as I go through the Menu button.
So the Menu button has a TON of things you can do (notice the left and right arrow buttons to navigate to additional selections). In the interest of saving time, ‘m not going to go through all of these, but will show you some of the important ones. The first important one (especially for the 1000V) is the button for Active DSP (pressing that is the equivalent of pressing the quick access panel button for Active DSP on the CT-S500; this enables DSP and opens up the menu you can use to choose and configure your DSP, what the knobs do etc); we already looked at that in the DSP section of this review so I’ll just move on to the next screen which has a couple of useful items; the first is balance; this allows you to adjust relative volumes of the 3 parts and the accompaniment, we have a button for setting up octave shifting for your voices and parts. The next screen includes a pedal configuration button, which is where you can configure what each pedal does and what voices or parts the pedals apply to. Then the next screen allows you to configure what the 3 live control knobs do; you can set these up to do things like cutoff, attack, release, part volume, reverb levels etc, which is cool, but if you have a DSP effect active, then these knobs will be used to control parameters for the chosen DSP instead (and thanks to Casio for setting those parameters up FOR us; when you choose and enable a DSP, the knobs will automatically be configured properly). Then a couple screens over, we have the Sys FX button – this is how you setup those global effects I was mentioning in the effects section of this review; so here is where I can choose a TYPE of reverb, chorus and delay (to set the LEVELS of each of those effects, I would configure one of the live control knobs for that). The next screen includes a wireless button to setup BlueTooth, as well as a Media button for working with data on a flash drive. Then the final screen has a Setting button where you can setup all sorts of things (that I think should have been actual buttons on the front panel) like transposing, split point, choosing a chord fingering option for rhythms etc. Then we get to this HOME CSTM button – now THIS is super cool – this is where you can customize the 5 buttons on your Home Screen. If I press HOME you’ll see I have Knob, Balance, Wireless, My Setup and Demo. Well, back in HOME CSTM, I can customize these buttons! I’ll press 5 BUTTON and choose button 5 which is DEMO and switch it to SETTING ON MENU. Now, when I press HOME I have a SETTING button which gets me quickly into those settings options like Transpose. SUPER cool that you can do that.
So now to the buttons on the right, the TONE button just returns you to the instrument menu, if I press RHYTHM then the accompaniment menu appears where I can work with styles, trigger fills and variations etc, and then the REGISTRATION button allows me to save or load one of my 64 registrations (more on both of those features when I get to those sections in this review). Then there is a PLAY/STOP button for the current style, a tempo button to set the tempo, and a record button (once again, I’ll get to that a bit later in the review).
OK so my verdict on the user interface on the Casiotone CT-S500 & 1000V? As you can probably guess, I’m not a big fan of minimalist interfaces like this that require so much menu diving; that being said, for a minimalist user interface . . . it’s not the worst I’ve seen, and once you get used to it, you . . . get used to it. And the ability to add at least a couple of custom menu buttons to the Home screen does help . . . a bit :). But, all that being said? Given that the CT-S500 has good sounds, good key action, L&R line outs, live action knobs and 2 pedal ports? It’s kind of a shame Casio went this minimal with the user interface; they COULD have had a fantastic budget stage keyboard here; but the lack of quick access controls really does limit that.
Rhythms & Accompaniment
So the Casiotone CT-S500 and 1000V come with 243 rhythm styles, with 2 variations of each. To access the rhythms, press the RHYTHM button and the context sensitive menu switches to buttons for turning on an intro, switching between variations, trigger a fill-in, setting synch start and toggling the accompaniment on or off. To start and stop playback, there is an actual panel button for that, and there is also a panel button for setting the tempo. So before demo’ing one, I’m going to switch off this “Future Disco” to something else – now as with the tone selection, you don’t have access to the category buttons until you move the dial (one of the drawbacks of a minimalist user interface). Once I move the dial, the buttons switch to navigation buttons where I can move one by one or go by category – there really should be a list view here though, because I’m not sure the categories are super accurate (for example, there is no blues category, and there are “bluesy” rhythms in the pop, rock, 8 beat and 16 beat categories). Anyhow, I’ll go to the rock category and choose BoogieBlues2, then press BACK to get back to the rhythms menu. So if I press play, it starts up, I can switch between variations V1 and V2, trigger a fill (this is actually a feature I wish Yamaha PSR-E series keyboards had – to get a fill on those you have to switch variations), To switch on accompaniment, I press that button and an A appears on screen. Now I can star fingering chords, and the chord being recognized is displayed on screen. Then I can trigger an ending if I like. Now one thing I noticed with intros, is if I press that button to have an intro into V1, it works fine, but . . . if I don’t want an intro, I can’t press that again to disable it (I have press the variation button instead – works fine, just not very intuitive).
So what about chord detection modes? To access those, you press MENU and then scroll to SETTING, and then to CHORD MODE, where you can choose between:
- Fingered 1 & Fingered 2:
- these are the “usual” modes, where you finger full chords on the left side of the keyboard to control accompaniment while you play whatever you like on the right
- Fingered On Bass
- this mode allows you to trigger slash chords using chord inversions; for example if I enable this mode and play a root position C chord, I get a C chord with C in the bass; if I play an inversion with E as the lowest note, this gets treated as a C over E slash chord, telling the bass player to play an E
- Fingered Assist
- this is one of those “wizard” modes that I REALLY disapprove of, because it allows you to play a chord with fewer keys being pressed, but trains you to play notes that aren’t actually part of a chord to trigger that chord; for example to play a minor chord, you play any root note and the closest black key to the left (this just creates bad habits in my opinion)
- Full Range Chord
- this is a welcome mode for me since I play piano style, and I WANT to hear what my left hand is playing; this mode uses the entire keyboard range to detect chord changes (but keep in mind, you still need at least 3 notes pressed at the same time to detect a chord change)
- Casio Chord
- this is yet another “wizard” mode for chord detection that I do NOT recommend
So my verdict on the rhythms & accompaniment on the CT-S500 & 1000V? Well, it’s nice that it exists, and I like the fact that you can trigger a fill without switching variations and that there is at least one full keyboard chord detection mode, but . . . you can’t mute any style parts like you can on the competition, and the minimalist user interface makes it a bit clunky to use.
Connectivity
So for connectivity, the Casiotone CT-S500 & 1000V have a fair bit, but they are still missing something that more and more of the competition has.
- 1/8″ stereo headphone port (I do wish this was 1/4″ but it works fine)
- 1/8″ stereo auxiliary in port to stream audio into the keyboard (play along with backing tracks, YouTube, online lessons etc)
- proper 1/4″ L & R line outs for connecting to external audio equipment (this is a BIG thing missing from the Casiotone CT-S1)
- 1/4″ sustain pedal port (no pedal is included) to connect either a Casio pedal or a generic sustain pedal with a polarity switch
- 1/4″ pedal port to either connect another “switch” type pedal (so . . . sustain pedal) OR an expression pedal; note that if you connect another sustain/switch pedal, it can only be used for sustain, soft, sostenudo, starting/stopping rhythms, playing a fill, or holding the arpeggiator (you cannot use this as a foot control switch to turn effects on or off etc like a rotary speaker)
- USB to host port to transmit MIDI data to a device; note that this is a micro-USB port (instead of the more common USB-B (printer style) port. Also, note that this port only transmits MIDI, NOT audio, which is the missing feature I mentioned earlier; Yamaha has been including audio in these connections in most of their keyboards for years, and other manufacturers including Roland have FINALLY started following suit – I’m not sure why Casio is still ignoring this, because it’s a HUGE plus
- USB to device (so type A flash drive style) port; you can use this port to store and replay MIDI songs, to import WAV files for sampling your own sounds, to back up registrations and data, and also to connect the Casio WU-BT10 wireless MIDI and audio adapter

So both the CT-S500 and 1000V include the Casio WU-BT10 wireless adapter (it was an optional purchase with other Casiotone keyboards), which is cool – when you connect this, you can easily pair a device to transmit audio wirelessly into your keyboard (as an alternative to using the wired aux in port), and you can also transmit MIDI wirelessly TO your device to use with MIDI compatible applications. You pair the audio connection as usual in your device’s BlueTooth settings, but you won’t see the MIDI connection there . . .
You DON’T use the “BlueTooth connections” on your device to connect MIDI; you look for settings WITHIN YOUR APP TO CONNECT TO THE KEYBOARD!
I was skeptical, but went into GarageBand on my iPad; went to Settings (the gear icon in the top right), then Advanced Settings, then BlueTooth MIDI devices and . . . there it was, and it works as expected once you connect!

Now while being able to stream audio in to the keyboard wirelessly is pretty convenient, I almost never recommend using BlueTooth MIDI for recording, simply because there is always some lag. But I have to admit, there was considerably less lag with this adapter on the CT-S1000V than I usually see with keyboards that have built in wireless MIDI (I still would personally never use it anyways, but thought I’d mention that).
So overall the connectivity on the CT-S500 & 1000V is pretty good; most notably there are proper L&R line out ports, and a couple options for streaming audio in to the keyboard. It’s a shame it has no mic input and no audio interface built into the USB port though 🙁
Recording
You have 2 options for recording on the CT-S500 & CT-S1000V; you can do a quick simple recording, or record up to 5 multi-track recordings. The simple recording is a great and easy way to quickly capture an idea (for that next hit song of yours!); just get your tones and rhythms set up, press RECORD and then either start playing or start the rhythm and start playing, and press RECORD again when you are done. Then you can replay it, and you can also actually copy it over the to multi-track section if you like. To get back to your recording later, press MENU, then scroll to SONG, and you can find your recording and replay it.
To access the multi track recordings, you LONG press the RECORD button instead. I’m not going to demo this in this review, it will just add to much time to the review, and it’s not a feature that I would really recommend using anyways; while there is SOME editing available (you can overdub tracks), the editing is VERY limited, and alot more clunky and challenging to use effectively than just using a DAW (Digital Audio Workstation) app like GarageBand on a device where you have a nice graphical user interface, easy ability to cut, copy and paste etc.
Registrations
Ok so for registrations, i like how Casio implemented this – the CT-S500 and 1000V have 64 registration slots available (FYI some of these come preloaded from the factory, but you can overwrite them), split into 16 banks of 4 registrations each. So let’s just create one to demo this; I’ll turn on layering and go to the pad category and choose Xenon pad, then I’ll turn on splits to enable a bass and choose the ride bass. Then I’ll go to the rhythms, and choose R&B Pop shuffle, and turn on accompaniment and synch start. Now if I press REGISTRATION you can see I’m on Bank 1 and there are buttons for each of the 4 registrations within that bank; I can use the wheel to scroll between banks. I’ll go to bank 16, and press the arrow to open the menu allowing me to store my current settings. I’ll press STORE and then choose bank 16-1 and confirm my choice.
Now I’ll scroll back to bank 1, and press 2 to recall bank 1-2; if I press the TONE button you’ll see I have a Saw Lead voice, splits and layers are off and the rhythm is Rock Anthem. If I press REGISTRATIONS again, go to Bank 16 and press 1 to load 16-1, the settings I saved will load, so super easy to use. And the nice thing about this is that you have really quick and easy access to 4 registrations at a time within a bank, so if you need to switch quickly to a related set of settings, it’s easy to do that. The only thing missing here that WOULD have been a nice add is to allow you to name your registrations so you don’t have to memorize the banks and registration numbers.
Lyrics Mode (Vocal Synthesis): CT-S1000V Only
So as I mentioned at the start of this review, I’m not going to demo the vocal synthesis feature in too much detail in this review, I really wanted to focus the review on the features that are common with the CT-S500 that “keyboard players” would be interested in, which (at least to me) doesn’t include the vocal synthesis.
But the basic idea of this feature is, when you are in lyrics mode, you choose a lyric (basically a phrase), and then you can choose a “vocalist” (so things like choir, trio etc). Then you can modify that voice using the live control knobs to (supposedly) adjust the gender and age, portamento etc. Play mode allows you to choose between having the entire phrase sung monotone on the note(s) your holding down, or you can choose a note per syllable instead so you can spread the lyrics out over multiple notes. And, you can also use normal tones for layering and(or) splits, and you can also play with accompaniment. So one quick example for you here: I’ll turn on accompaniment first, then I’ll go back to the Lyrics menu and I’ll choose “Dance With Me” as the lyric, I’ll set the play mode to note, and I’ll enable a layer (I’ll just use this strings voice that appears by default). Now let’s start the rhythms, I’ll finger some chords with my left hand and play this phrase with my right. So that seems to work fine; now do note, there is a TON of customization you can deep dive into if you like into how to modify the voices, the syllables, all sorts of stuff – I won’t be demo’ing that here, but feel free to dive into the manual and YouTube tutorials on this feature if you’re interested.
Now the first 100 lyric slots are supplied with the keyboard, then slots 101-150 are user slots where you can apparently use the Casio Lyric Creator app to create lyrics (and you can specify all sorts of details in there like syllables, rests etc) and then transfer that to the keyboard into one of the slots (note that this cannot be done with BlueTooth, you have to connect your device to the USB to device port with a micro USB cable and any necessary adapters (so for example, you’ll need a lightning adapter for an iPhone).
So I did create a quick phrase on this app on my iPhone and spent some time trying to get the transfer to work, and kept running into some type of data transfer error, but I didn’t want to waste too much time on figuring out what the issue was, so that’s as far as I took that; I’m sure it works fine once you troubleshoot any issues if you run into them.
Other Things To Mention
Speakers
For speakers, the Casiotone CT-S500 and 1000V have 2×2.5 watt speakers for a total of 5 watts. While this is clearly not alot of speaker power, as with the Casiotone CT-S1, these are bass reflex speakers (so there are vents in the chassis meant to enhance the lower end) and they produce a VERY surprising output. The speakers are way louder than you would expect, they actually sound pretty nice & clear, and they don’t distort. Casio did a VERY good job with these speakers, it’s a shame they didn’t just bump up the wattage more, but still – great job. That being said, for any kind of performance, you will still need external amplification. Here’s a quick demo of the speakers, just as picked up by my iPhone’s built in speakers.
Sampling
The CT-S500 and 1000V have a sampling feature built in that I didn’t include in this review, to try and keep the review length down as much as possible. But just to quickly sum this feature up, you can record sounds played on a device using the auxiliary in port or import sounds from a flash drive, and store them as sampled melody tones or drum tones, and then play them back with the keyboard.
Portability
You can probably tell by just looking at the Casiotone CT-S500 and 1000V that they are super portable; they only weigh about 10 lbs, and are super compact at 36″ long x 10.5″ deep x a crazy thin 3.5″. And on the back there are pegs for attaching a guitar strap (you could play it as a keytar or just carry it around that way), and it also can run on 6xAA batteries so . . . SUPER portable.
GREAT Support
So I’ve reviewed alot of Casio and Casiotone products, and this is the first time I’m mentioning this (sorry Casio, probably should have mentioned this by now). If you are stuck on how to do something, and post your question in a Casio keyboard FaceBook group, or popular keyboard forum, you will very likely get help and suggestions from actual Casio representatives VERY quickly. I can’t say the same for any other manufacturer, so GREAT job Casio, it’s much appreciated!
What’s Missing?
There isn’t really much that is “notably missing” from the Casiotone CT-S500 & 1000V; there are a couple of features that the competitors have that I would consider “cool bonuses” on those keyboards as opposed to something that’s “notably missing” on the Casiotones; I will get to the competition in a bit. But one thing that I do think Casio really should have included is an audio interface built into the USB port; this feature adds SO much cool and useful functionality; you can send audio directly to a recording device WITHOUT needing an external audio interface (for example, you can record a performance video with high quality direct audio just with your keyboard and phone). Yamaha has been including this in most of their keyboards and digital pianos for years, and Roland and other manufacturers have finally started following suit – I really wish Casio would catch up and start doing this as well.
The Competition
The main competitors for the CT-S500 and 1000V would be the new Roland GO:Keys 3&5, and the Yamaha PSR-E473 & EW425. In the interest of comparing apples to apples, I’m going to ignore the GO:Keys 3 (since it has no L&R line outs) and I’m going to ignore the PSR-EW425 (since it has 76 keys); and, I’m also going to ignore the CT-S1000V since it costs an extra $120USD just for vocal synthesis (and it’s the only keyboard out of all of these that has that feature).
Casiotone CT-S500 ($380 USD) vs. Yamaha PSR-E473 ($400 USD)
The most direct competitor for the CT-S500 would be the Yamaha PSR-E473; these 2 keyboards sell for almost the same price and have very similar features.

I was (and still am) SUPER impressed with the PSR-E473/EW425 and said in my review on those keyboards that they are the best value budget gigging keyboards available (as long as you aren’t looking for a fully weighted key action). But I have to say, I think the CT-S500 is a worthy competitor! The sounds on both are great, so I’m not going to bother comparing that here (I REALLY like the main piano and electric piano sounds on both of these keyboards), I’m more focused on functionality (I will include sound comparisons when I do a direct video shootout between these keyboards). Here are the advantages each keyboard offers:
- CT-S500:
- MUCH better key action for piano players & organists; the keys are piano shaped instead of diving board, they feel semi-weighted, and while they aren’t TRUE full size keys, the octave width is still a bit closer to full width than the Yamaha is
- More portable (much less bulky and lighter)
- Far better chord detection options, including full keyboard and fingered on bass options
- 64 registrations vs 32 on the Yamaha
- Expression pedal input
- BlueTooth audio in
- PSR-E473 Pro’s:
- Mic input with effects for singing along
- Audio interface built into the USB port
- Ability to mute style parts
- Can revoice style parts
- Better MIDI recording functionality (can punch in, edit etc)
- User interface has WAY more direct access buttons; still some menu diving required, but the Casiotone still requires far more menu diving
So as impressed as I was with the Yamaha PSR-E473 & EW425 when they were released, I think the Casiotone CT-S500 is a worthy competitor. Which one is best for you will depend on what features are more important to you; if it’s a good key action, choose the CT-S500, if the mic input, audio interface and better user interface are more important, lean towards the Yamaha.
Casiotone CT-S500 ($380 USD) vs. Roland GO:Keys 5 ($500 USD)
As I mentioned in my review on the Roland GO:Keys 5, I do think this is the best keyboard out of these 3, BUT . . . it’s $120 USD more expensive than the CT-S500 or PSR-E473, so . . . not exactly apples to apples.

Here are the advantages each keyboard offers (I do prefer the sounds on the Casio over the Roland, but that’s personal preference so I’m not listing that here):
- CT-S500:
- the key action is comparable to the Roland GO:Keys; both are piano shaped and offer enough resistance to feel almost semi-weighted. Now while I SHOULD prefer the GO:Keys action since offers a TINY bit more resistance and the keys ARE a true full size octave width? I DON’T! I actually prefer the key action on the CT-S500 & CT-S1000V. I don’t know how to put it into words, I just enjoy playing this action more (it is really hard to describe synth actions); part of it might be that the Casiotone key action has a deepet travel than the GO:Keys, which helps with my control?
- both keyboards have low wattage bass reflex speakers, but the speakers on the Casiotone are FAR better; they are surprisingly loud, they sound clear and crisp and they don’t distort (the Roland’s speakers sound much less clear and can distort at high volumes)
- it’s $120 USD cheaper, and includes a music rest in the box, the Roland does not
- GO:Keys 5 Pro’s:
- Mic input (& additional headset mic option) with effects for singing along
- Audio interface built into the USB port
- Chord sequencer
- Ability to mute style parts
- 256 registrations (“scenes”) vs. 64 on the Casiotone
- Much better user interface; it has JUST enough useful direct access buttons; still some menu diving required, but the Casiotone still requires far more menu diving
So in comparing the CT-S500 with the GO:Keys? That mostly comes down to “are the extra features worth the extra $120 USD“? That’s a tough one for me, since I do like the extra features and I prefer the GO:Keys user interface? I really do enjoy the key action on the CT-S500 & 1000V . . .
Casiotone CT-S500 & CT-S1000V – THE VERDICT
I HIGHLY Recommend the Casiotone CT-S500 if you’re looking for an inexpensive, super portable keyboard with a good non-weighted key action
The CT-S500 is a great choice, and you could easily get away with this keyboard as a cost effective gigging option.
- Tons of great sounds
- Piano shaped keys with a semi-weighted feel
- L&R line outs for connecting to external audio equipment
- 3 Configurable live control knobs
- 2 pedal inputs
- 64 registrations to save your setups
- BlueTooth audio in
- Fantastic sounding speakers (for a 10 lb keyboard)
- Light, small and super portable (runs on batteries)
So . . . What About The CT-S1000V?
Given that the CT-S1000V is $120USD more than the CT-S500, and all it adds is vocal synthesis and actually takes away a useful panel button?
Unless you REALLY want the vocal synthesis features, I would NOT recommend the CT-S1000V!
To me, that extra $120USD is a waste of money unless those features are important to you.
Thanks so much, and happy piano playing! (and piano shopping 😉 )
Links To Check Out Current Pricing:
(please note that as an affiliate I earn from qualifying purchases)
Piano Training I Recommend
I’ve taken a number of online piano courses and tried various piano learning apps; the ones I’m listing here are my favorites and I can highly recommend any of these if you are looking for some online training to get started on learning piano, or to take your current skills to the next level.
Bird’s Piano Academy is one of my absolute favorite online piano programs. Arthur Bird has created multiple courses on getting started learning piano quickly as well as great intro courses on Blues, Jazz and more. And his courses are chord based, so you don’t have to read sheet music which is AWESOME and definitely the fastest way to learn to play modern music. You can go with a subscription that includes ALL his courses, or you can buy individual courses a la carte with LIFETIME access – HIGHLY RECOMMENDED!
If you’re looking for the least expensive way to get started on piano, Pianoforall is a great option. It’s a unique course created by Robin Hall that uses downloadable eBooks with embedded videos and audio instead of a website.
This course is an amazing option for learning piano from beginner up to being able to perform; it teaches multiple genres of music and focuses on how to be a “one person band” on the piano. This course is taught by pro pianist Steve Lungrin – Steve has been teaching and performing his whole adult life and is a fantastic instructor and performer.
I took this course from 2020 to 2021 and it elevated my playing from a very basic level to being able to play songs in multiple genres.
I was super excited when Simply Piano added the “Chords Path” to their super popular piano training app (iOS or Android); this path allows a new student to get started learning piano using a chords based approach (which I HIGHLY recommend over a traditional approach). Learning to play using chords is by far the easiest and fastest way to learn to play modern songs (MINIMAL sightreading ability is needed). I did the entire chords path, and can highly recommend that you check it out (you will get a trial period so why not?)
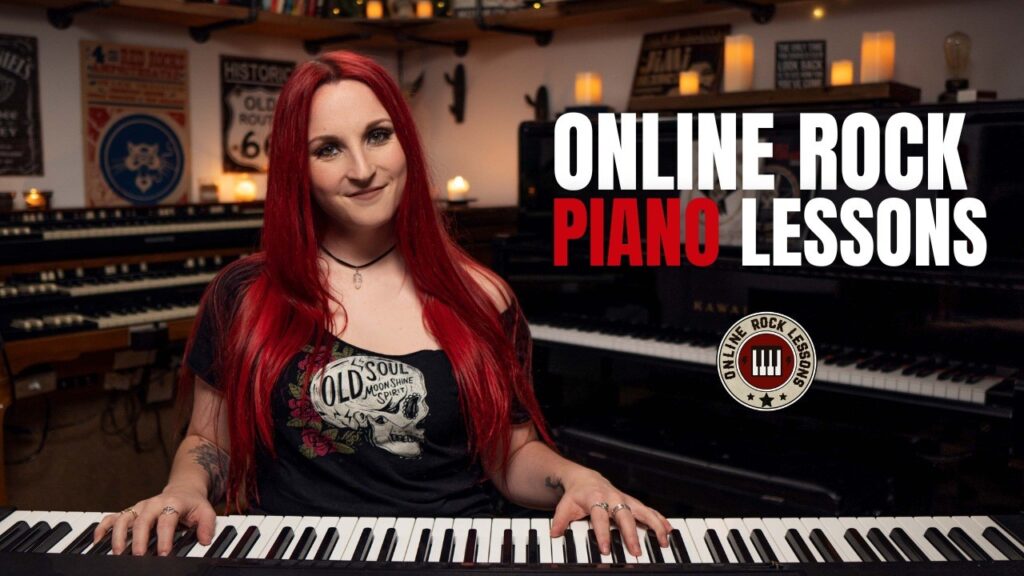
This is a fantastic option if you are mostly interested in rock music. This course was created and is taught by Marine Lacoste, who is not only a fantastic instructor & pianist, but she is also a very accomplished hammond organ player – she performs regularly with her own band, as well as playing keys regularly for multiple recording artists on tour. I started this course in 2023 when I joined a band, and it is helping me greatly in taking my playing to a new level. And Marine is constantly adding new content, and is very active on the platform.
If you sign up for Online Rock Lessons yearly subscription, use code PIANOTONE at checkout to let Marine know I referred you, and she will give you some free bonuses!
This is a fantastic (but pretty unique) online program for taking your piano and organ playing skills to the next level, developed by pro piano, keyboard & Hammond organ player Mike Little. Mike shares tips & tricks accumulated from over 30 years of pro touring, gigging, studio & production experiences. This course isn’t for a COMPLETE beginner, but you don’t have to be a super accomplished player either, to get TONS of value from this program!

Ultimate Piano isn’t an actual course to learn how to play, but it IS a really helpful TOOL for piano students. You connect your keyboard to your computer, go to Ultimate Piano’s website (so NOTHING to install!) and you have a ton of helpful training and exercises at your disposal, as well as built in piano sounds. With the help of on screen light up keys, you can learn and practice scales, chords and even ear training and you can play along with MIDI or audio files, and even YouTube videos to practice songs!