
Welcome to my IN-DEPTH review & tutorial on my latest digital piano purchase, the Casio PX-S6000! This is the best quality fully weighted digital piano I’ve EVER owned, so I was super excited to check it out. This review is quite in depth and it IS pretty long so I’ve added chapter links below so that you can jump to topics you’re most interested in, or watch parts and come back later to watch more. I did also post a much shorter “initial reaction” review on my YouTube channel which I will link to below if you’d rather check that one out.
So with all that out of the way? Let’s jump in to the review!
Casio Privia Lineup
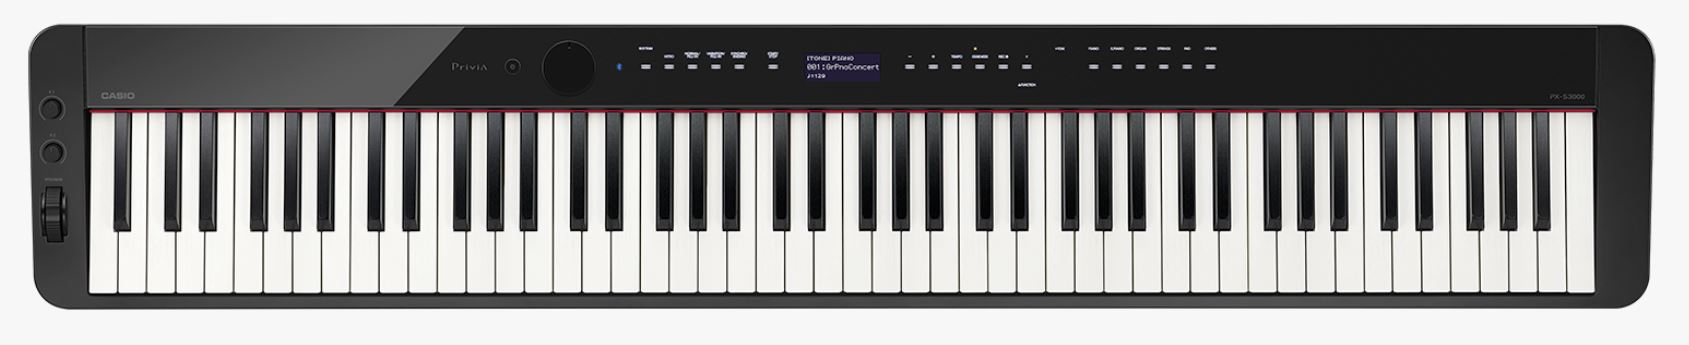
So in 2022, Casio added 3 new digital pianos to their SUPER popular Privia lineup; the PX-S5000, PX-S6000 & PX-S7000. These models are all MUCH higher end than the existing PX-S1100 & PX-S3100, with significantly improved key action, some improved sounds (the main piano sound in particular) & some other new and improved features. I previously owned both the Casio PX-S1100 & Casio PX-S3000 and gave both very positive reviews (click the links to check those out if you like).
Existing Models:

New Models:


So I will be going over the differences between these 3 new models over the course of this review, but to quickly sum it up:
- all 3 models have a significantly upgraded key action and main piano sample
- the PX-S5000 shares the identical SUPER minimalist user interface & general feature set with the entry level PX-S1100, while the PX-S6000 & PX-S7000 have a brand new case design, tons of features & a really cool and unique CUSTOMIZABLE user interface and workflow
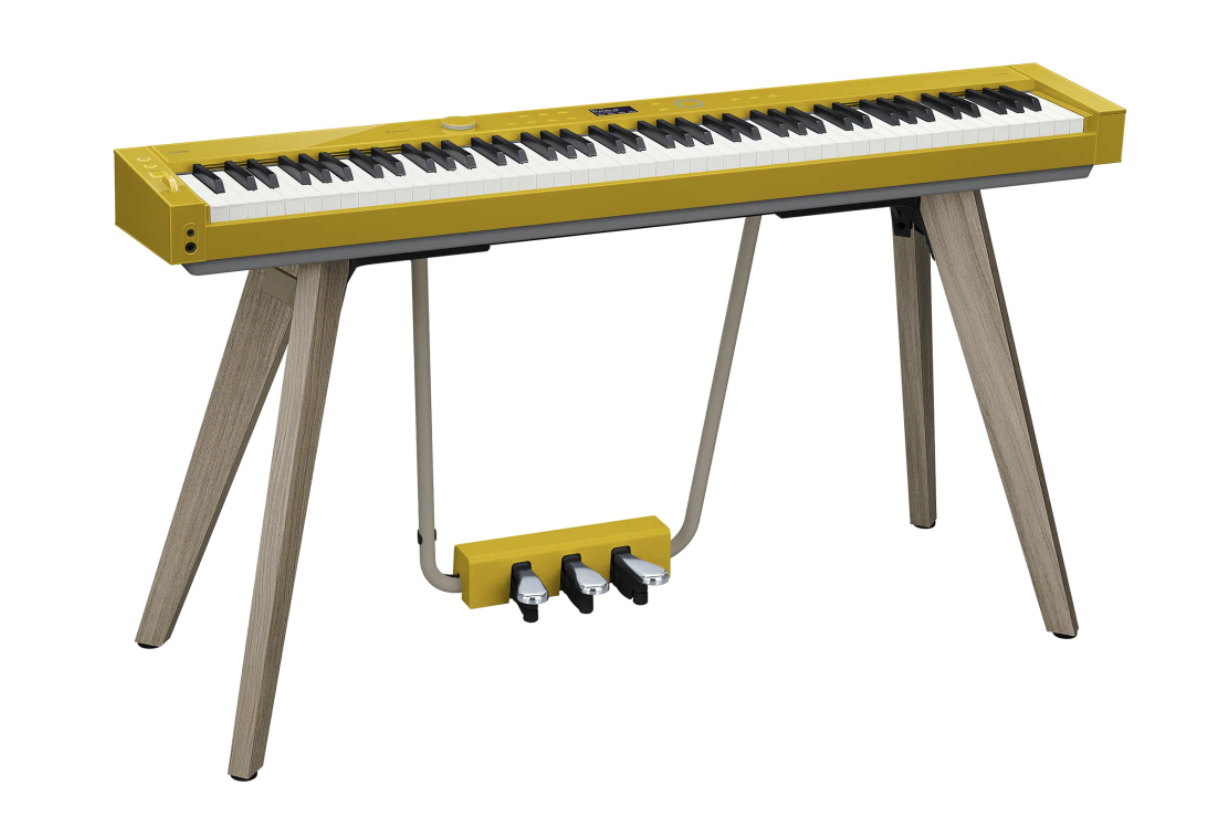
- the PX-S7000 is only sold with a REALLY nice wooden stand with an integrated triple pedal unit
- the PX-S7000 has 50 more voices than the PX-S6000, including a couple more main piano samples, as well as some pre-effected “Best Hits” pianos that sound like pianos from famous songs
- the PX-S6000 allows you to customize your DSP effects & includes live control knobs (the more expensive PX-S7000 does NOT allow you to customize your DSP effects and instead of live control knobs, it has live control buttons that have limited functionality)
NOTE: While most of this review will also apply to the PX-S7000, and while I will try to note small differences between the PX-S6000 & PX-S7000 during the course of this review, I may miss some small differences here and there; but everything in this review definitely does apply to the PX-S6000.
So which one should you consider? You’ll learn much more as I go through this review, but to sum it up:
- PX-S7000: is geared towards home use, with the integrated stand, and DSP effects “baked in” to your sounds from the manufacturer
- PX-S6000: is geared towards gigging players with customizable DSP effects, and more live control options
- PX-S5000: is geared towards those who want to take advantage of the new key action and sounds, but mostly just want to play piano and are fine with a VERY basic user interface and feature set for less money
Key Action
In the prior models, Casio used their dual sensor “Smart Scaled” hammer action, which I quite enjoy; it’s a lighter action that I’ve always found to be responsive and fun to play, especially fast passages in rock, blues and pop piano. It has received some criticism though, because the slim design results in a shorter pivot point (which results in the keys being harder to play as you play INTO the keys), and also because Casio apparently weighted the black keys differently than the white keys to try and help compensate for that. All that controversy aside, it never affected my playing when I owned those pianos.
These new Privia pianos use Casio’s new “Smart Hybrid Hammer Action” keybed, which is a significant upgrade. Instead of using 3 sensors (which most competitors do in their premium key actions) Casio has used a dual sensor mechanism that’s combined with digital control technology. So basically, instead of using 3 physical sensors to detect movement in the keys, they are using 2 sensors and software to do the same thing, which is capture your expressive playing at different velocities at much higher detail. So instead of using a 3rd sensor to help determine the position of a key, the Casio uses software to calculate the exact position at all times, which makes quick repetitions just as easy to perform (or possibly even easier) than on a triple sensor key action.
They’re also incorporating “Digital Scaling Technology” which means volume levels are controlled individually for each key on the keybed based on how you play, with the touch weight varying as it does on a real piano. The keys are made from a wood (I believe it’s spruce) and resin composite; so while the keys are not solid wood like some of the competition (such as the Yamaha P-525), the wooden sides do affect the action in a positive way, in that they even out weight distribution (as opposed to having it focused just on the position of the weight itself) and also provide a dampening effect (so my initial thought that this is just a gimmick is NOT correct).
So all of the fancy specifications aside, how does it feel to play? I LOVE this key action. I sat in a music store with my headphones on and played a PX-S7000 and a PX-S1100 back and forth for about 30 minutes, and . . . WOW! I do still enjoy the prior action . . . but there really is no comparison here. You can IMMEDIATELY tell the Smart Hybrid action is a PREMIUM key action; it feels VERY solid and well built, there is NO side to side play, it feels really comfortable and well dampened at the bottom of the key stroke (by the way these keys make virtually NO noise when you play), it’s noticeably less . . . “bouncy” than the prior action and it is SUPER responsive and SO easy to reach a really wide dynamic range. I find it to be an absolute blast to play. While I was in the store doing these tests, I also spent some time comparing the new Casio action with the Yamaha P-525 which I recently reviewed; I love the key action on the P-525 as well, it is also a fabulous premium key action, but I’ve always liked lighter actions, so . . . I prefer the Casio Smart Hybrid key action. I also (briefly) compared it to the PHA4 action on the Roland FP-60X, but unlike many people out there, I’ve never enjoyed that action so that was a short comparison.
So what about the pivot point issue and playing into the keys? I have no idea if Casio increased the pivot length on the Smart Hybrid action or not; the case is still super slim, so if they did lengthen it’s probably not likely by much. But either way, when I tested playing into the keys back and forth in store with the PX-S7000 and PX-S1100, the issue IS still there, but it IS less pronounced on the premium keybed. I only noticed this issue on the prior keybeds if I was consciously looking for it, and it never effected my playing – there is absolutely NO WAY I would notice this playing the PX-S6000. That being said, if you are an accomplished classical or jazz pianist that regularly plays on acoustic pianos, you might want to test this action out for yourself – which is actually true of ANY key action.
I’ve now had the PX-S6000 for almost a month, and the more I play this keybed the more I like it. For me, this is the most premium key action I’ve ever had on a piano that I own, and I absolutely LOVE it.
User Interface
Ok now on to the user interface; just an FYI – other than some differences in the options within menus & the PX-S6000’s live control knobs, most of this will also apply to the PX-S7000. As with the existing Privia models, these new models also use capacitive touch controls, but the navigation and workflow has been SIGNIFICANTLY improved with the addition of a capacitive touch RING. And, this user interface has some real cool tricks up its sleeve – you can customize this interface to best meet your own needs using what Casio calls “Function Button Sets” (or “F button sets”), which allow you to create your OWN shortcut menus to all sorts of settings and functions, and have these be quickly accessible using the F1 to F4 buttons. The Function Button Sets are so useful and important enough that I’ll go into detail on that AFTER I’ve first given you a quick overview on the user interface and how it works.
UI Overview
The left side has the on button & a big volume knob (which I much prefer over a volume slider, or those awful up and down volume buttons on the Roland FP-30X). There is a play/stop button that’s used for controlling the playback of built in songs, the metronome & built in drumbeats as well as your MIDI or audio recordings. Then we have a record button for recording onboard single track MIDI recordings or recording audio files to a flash drive. Then we have a function button to access the main menu (which I’ll be going through in a bit). Below that we have 4 buttons labelled F1 to F4 that are context sensitive; what they’ll do is always indicated at the bottom of the menu screen. So for example, if I press F3 that enables SPLIT mode; you’ll see the screen has now changed to show “L” for lower instead of “U1” for upper, and the lower voice (which defaults to a bass guitar) is now what the touch ring will control. And, the “F3” on the screen will now have square brackets around it indicating that this feature is turned on.

As for the menu screen itself, while I always wish screens could be bigger and display MORE information, Casio has done a pretty good job of displaying the information you need for the task at hand. Something you’ll need to know right off the bat with this user interface is how to use the touch ring to toggle between two places; the tone selection and Casio’s “Function Button Sets”. If you look at the screen, you’ll see a circle at the top with “U1 001” beside it (that stands for “Upper 1, so . . . the main upper tone, and “001” is the current tone’s number); so this is the tone selection zone. Then we have a circle at the bottom with “01 Standard” beside it, which stands for “Function Button Set 01”. I’ll be going into function button sets in detail later in the review, but what you need to know for now is whichever one of those circles has another circle around it is what the touch ring will affect. You can move the focus of the touch ring between those two choices by tapping it at the top or the bottom. So when the focus is on the top, I can tap the ring on the left or right, or rotate the ring to move through different tones; if I tap the bottom, then the focus moves to those “Function Button Sets”, and now the touch ring will navigate through those instead.
Then to the right of the menu screen there’s an EXIT button to leave a menu or move back UP within a menu tree, and an ENTER button to move DOWN within a menu tree or to confirm a choice. To the right of the touch ring, we’ve got tone category buttons that make it easy to navigate through and find different tones quickly. So I can press PIANO to move between the 2 piano categories, or E PIANO to move between the 2 electric piano categories, or press OTHER to move between the remaining categories. Once I’m within a category, I can use the ring to move between tones, or I can press ENTER to display a list on screen of categories and then ENTER again for a list of tones within that category to help me find what I’m looking for.
Function Menu Overview
So now I’ll go back to that FUNCTION button which accesses the main menu system. When I press this, you’ll notice that the available front panel buttons will change – this happens alot as you perform different functions; it’s actually quite helpful to keep you focused on the task at hand – Casio did a good job with this. So you can use the touch ring to move up and down within menus, the ENTER button to drill down, and the EXIT button to move back up within the menu tree. I’ll be going through alot of these menus in more detail during the review, but everything you would typically need to do is in here and it’s well organized and pretty easy and intuitive to find what you’re after.
- Sound Menu: acoustic simulator for tinkering with your main piano sound settings, adjusting reverb, chorus & surround sound options, DSP effects, and “Piano Position” which includes EQ presets for when your keyboard is on a table or against a wall etc, and a spot to choose effects presets for your mic
- Mixer Menu: allows you to adjust levels between split and layered voices as well as some reverb and chorus fine tuning
- Keyboard Menu: allows you to transpose, shift octaves, custom tune, set the split point, and not only adjust your touch response but also the hammer and key off response (so you can fine tune how long it takes a note to sound and fade after a key is pressed and released)
- Pedal Menu: lets you configure what parts (so upper 1, upper 2 and(or) a split tone) your pedals will be applied to, as well as what type of pedal you have connected to the auxiliary pedal port (so a switch type sustain pedal or an expression pedal; and when you choose expression you can choose either polarity which is nice touch). Once you’ve set the pedal type, you can also assign what you want to the pedal to do which IS cool, but there are some things missing here . . . I’ll talk more about pedals when I get to the connectivity section of the review. And you can also adjust the pitch bend range and some other options for the modulation wheel
- Knob Menu: this menu allows you to customize what you want your 2 live control knobs to do; there are a TON of options in here, but the coolest one to ME is that you can control DSP parameters for your chosen DSP effects – this is a HUGE advantage the PX-S6000 has over the PX-S7000 which only has buttons instead of knobs, and the buttons have very limited functionality in comparison
- Control Menu: this allows you to customize what the live control button does; my main use for this will be to toggle my organ rotary speaker speed back and forth between slow and fast
- F Button Setting Menu: this is for working with Function Button Sets; I’ll be going over that later in the review
- Duet Menu: this is for splitting the keybed into 2 halves with adjustable octaves in each
- Arpeggiator Menu: for working with arpeggiator settings; I’ll be skipping this in this review
- Registration Menu: the PX-S6000 has 96 registration memory slots available to store your favorite setups; I’ll take an in-depth look at these later in the review
- Song Menu: you specify within this menu whether you’re working with onboard MIDI recordings or audio recordings on a flash drive
- Metronome Menu: this has all the usual metronome settings like tempo and time signature, but also gives you access to the 20 built in rhythms that you can play along with. Note that to start and stop the metronome (or a drumbeat) you hold FUNCTION and press the PLAY button
- Media Menu: IF you have a flash drive connected, this menu allows you to record & replay audio recordings, as well as move data back and forth, format a new drive etc. Do note that you can’t have this connected at the same time as the wireless BlueTooth adapter, since there is only one port
- Wireless Menu: for working with BlueTooth settings using the included WUBT10 BlueTooth adapter
- MIDI Menu: for customizing your MIDI settings
- System Menu: this has some typical options like speaker, battery and headphone options, but there are some unique and kinda useful ones in here, in particular to fine tune the capacitive touch controls: you can adjust the screen contrast, the touch sensitivity of the buttons and touch ring, and a cool one called “Close-Up” – if I turn this on, then anything you modify (by scrolling to it or selecting it) will be temporarily increased in size to make it even easier to see
So that’s basically it for the user interface and how it works, and how you navigate – if you’re at all nervous about the capacitive touch controls as opposed to a more traditional physical button style interface? In my opinion, you don’t need to be; I’ve found this interface to be super easy, quick and intuitive to use. Now there are 2 more REALLY important things that I haven’t gone into detail on yet that DO involve the user interface; the registration memory system and the “Function Button Sets” – but these are super important, and are kind of related so I wanted to go over them separately, so let’s check that out.
Registration Memory & Function Button Sets
These 2 features are separate from each other, but you CAN choose to use them in conjunction with each other to do some pretty cool stuff, so I wanted to talk about them together. First I’ll go over how registration memory works, then I’ll jump into all the cool stuff you can do with the F button sets and how you can use these 2 features together to really customize your user interface.
Registration Memory
The PX-S6000 has 96 registration memory slots that are split into 24 banks of 4 slots each, AND you can create custom names for your banks. The basic idea is you first select your bank, and then you can use the F1 to F4 buttons to choose between the 4 slots in that bank. So to do that, you move the focus to the Function Button Sets, then select “F Button Set 02 = Regist Setting”. When you do that, you’ll notice the F1 to F4 buttons now have new shortcuts assigned to them. If I press F1, it will show me my current bank; from here I can either start using the touch ring to navigate through banks, or I can press ENTER and that opens up a list I can navigate through. If I scroll through all of these you’ll see a couple of my custom ones I’ve set up (and named) as well as all of the empty banks named “Newbank” all the way up to #24; all of these unused banks will have all 4 slots set to just load the default piano and settings. To choose a bank, you just highlight the one you want (I’ll choose my “Organs” bank) and then press EXIT (you don’t need to press ENTER to confirm your choice).
Then, to be able to load your registration slots, you need to navigate to “Function Button Set 03 – Registrations”; now the F1 to F4 buttons will be used to load your slots. This is one of the only things about this user interface that I think Casio could improve SIGNIFICANTLY (you listening Casio? ;) – and that is to remove the need for you to go to one F button set to CHOOSE a bank, and then ANOTHER F button set to actually load your registrations. All it would take is ONE more button on the front panel that is used to open your registrations. So with my “Organs” bank selected, I’ll press F1 and that will load all my settings for an organ voice that I’ve set up; you’ll notice the on screen “F1” now has square brackets around it. So I could easily switch to other presets I’ve saved within this bank using the other shortcut keys – if I press F2, it will load the second slot from the Organs bank (I don’t have anything in there yet, so it just loads the default Grand Piano and settings). But remember, if I want to load a preset from a DIFFERENT bank, I have to go back to “F Button Set 02 – Regist Setting” to be able to switch banks, then go BACK to the 3rd F button menu to load my slots from that bank (FYI – when I get to the F Button Sets, I have a BIT of a workaround to make this process quicker and easier).
So let’s say I want to save a new preset; I’ll pretend I’m fine saving it within my current Organs set; I’ll quickly pick a different organ, let’s say “065 Jazz Organ”; then I’ll press F2 to STORE it, and I’ll press F4 to store it in slot #4 in the current bank. Then if I press EXIT, and go to F button set #3, now I can press F1 to load my original preset, and F4 to load the one I just saved. If I want to rename my bank, I go back to F button set #2 and press F4 and I can edit the name if I like.
One more thing to mention, is there is also a FREEZE function that could come in handy; let’s say you want to switch to a new registration, but you have some settings you’re currently using that you DON’T want to lose; you can press F3 to toggle FREEZE to on (you’ll see the square brackets appear) and now those settings will NOT change when you load a new registration slot (until you turn that setting back off). You can check the manual from Casio’s website if you want to see what settings get “frozen” and what settings don’t.
Organizing Registration Memory
There are LOTS of ways to organize your registration memory banks and slots, and different strategies may work better for each players needs. How you organize them will depend on how many different presets you need (one per song, or lots of shared presets etc). So if you have lots of common (shareable) presets, you could have a registration bank called “Pianos” with your 4 favorite piano setups, and another called “Organs” with 4 organ setups etc. And for songs that require unique presets, you could create shared registration banks with presets for 4 songs (maybe name those banks using song title acronyms like “BL-RTG-ATSM” etc). And for a song that needs multiple presets you may need to use an entire registration bank just for the one song and name the bank after the song.
Something important to note here that could really help if you have a large repertoire is you can EASILY save registration banks to a flash drive using a custom name, and then reload them back into the piano memory to any registration slot you like. So you could have all your registration banks stored on a flash drive and just load in the banks you need for an upcoming show.
Function Button Sets
Ok now on to some really cool functionality, Function Button Sets. We’ve already introduced how to select and navigate between F button sets when we talked about registration memory, but there’s a LOT more to cover. First off, how many are there? We’ve got 30 F button sets available to us; 14 are built in to the piano (and cannot be changed), then we have 16 empty F button sets that you can customize for YOUR needs, which is super cool. This basically means you can create 16 sets of 4 shortcuts each to customize your user interface. If you use the touch ring to move down to the F button sets, you can press ENTER to see a list. Or for these, it might even be more helpful to scroll through them one at a time WITHOUT drilling down into the list view, because then you can see what the 4 shortcuts are within each set. If you look at those closely, you’ll notice that the sets are named (and you CAN assign custom names to your own sets), but you’ll also notice that you can assign ALL sorts of things to these shortcuts:
- you can assign a shortcut for an action (such as toggling layers or splits on or off, or STORE to save a new registration)
- you can create a shortcut to open a menu within the Function menu (like opening the Metronome menu – if I press F2 on the first F button set it takes me to the metronome menu that’s within the main Function menu tree
- you can create a shortcut to choose a specific voice
- you can create a shortcut to load a registration slot from the current registration bank
So from the names and the shortcuts, you can see that the built in F button sets are tailored for certain things: dealing with registrations, useful shortcuts for song playback, loading some common voices, dealing with effects and so on. So the world is (well ALMOST) your oyster here – you can create shortcut sets for things that meet YOUR needs.
F Button Set: Example 1
Let’s say you mostly use 2 tones with your band that you like to use back and forth, and you sometimes need to transpose the keyboard depending on who is singing; and, because your bass player is ALWAYS late 😉 you may need to cover bass in your left hand. To create a new F button set, you just navigate to an empty one, which will start at #15, and be named “User”. To add one of our tones to the F1 button, first hold FUNCTION and press F1, then press ENTER to edit the F1 shortcut – you’ll see we have a massive 7 page list of options we can choose from here; I’ll scroll down to TONE CATEGORY and press ENTER. Then I’ll drill down to “Various Pianos” and highlight “Dance Piano”; now this is a bit strange, there’s no ENTER to confirm my selection, but if I highlight it and press EXIT until I’m back at the “F BUTTON EDIT” screen beside F1 it just says “TONE CATEGORY” – but don’t worry, if I press EXIT here and confirm by using the touch ring to tap YES, it does work and that voice gets saved into F1. So I can repeat this process to add another tone to F2, I’ll do that with an organ voice. Now, let’s make it easy to transpose the keyboard – If I hold FUNCTION and press F3, this time I will look for the “Transpose” option and save that to F3. Then, for when the bass player is late, I can hold FUNCTION and press F4 and navigate to the SPLIT option and press EXIT again and save my changes. Now, I’ve got quick access to my 2 voices, the transpose option & the ability to split the keyboard.
So to assign a custom name to my F button set, I press FUNCTION to go to the Function menu and drill down into the “F Button Setting” menu. From here I can choose to edit the name of ANY custom F button set (once I enter a name I’ll get prompted to choose which set I’m renaming). And from within this menu, you can also jump straight to editing the current F button set’s buttons, and you can clear the contents of an F button set.
F Button Set: Example 2 (Quicker Access To Registrations)
So the first thing that came to mind for ME with custom F button sets was to use these to load registration memory slots quickly at a gig; I was hoping to be able to assign F1 to open “Registration Bank 1: Slot 3”, and F2 to open “Registration Bank 5: Slot 2” etc. Unfortunately, this isn’t possible; if I hold FUNCTION and press F1 to start editing a shortcut, I CAN choose Registration 1, 2, 3 or 4, BUT . . . only from the CURRENTLY selected bank.
But I did come up with an F button set that’s at least a partial workaround that I named “Reg Quick”. And that is, assign F1 to “Bank” (which opens the bank selection menu) and then F2 to registration slot 1, F3 to registration slot 2, and then F4 to registration slot 3. So at a gig, I would load this F button set, and I can press F1 to choose the registration bank I want, and then F2-F4 to choose one of the first THREE registration slots (so this does limit me to only 3 slots per bank instead of 4, so 72 slots instead of 96).
Tones (Voices)
So there are 350 tones on the PX-S6000 & 400 on the PX-S7000, but as is the case with all keyboards nowadays, that number always includes some . . . less impressive general MIDI and drum tones; but even if I don’t include those, we’ve still got 214 main tones to choose from on the PX-S6000 and 264 on the PX-S7000. All of the usual categories like pianos, electric pianos, organs, strings, pads, synth etc are well represented. The sound engine is Casio’s “Multidimensional Morphing AiR” engine, and there’s tons of polyphony available at 256. One other noteworthy thing to mention is that Casio has added an extra piano & electric piano category on the PX-S7000, and an extra electric piano category on the PX-S6000 that are dedicated to recreating tones from well known songs, with names that “hint” at what the song is.
But all that aside, the REAL highlight here is the new Grand piano sample, Casio’s “Hamburg Grand” which is apparently sampled from a Steinway; this is the new main piano voice on all 3 of the new Privia models. And, there are also bright and mellow versions of the Hamburg Grand included. These 3 tones are actually in their own tone category, because they are definitely a noticeable step up on the other available piano tones. And I should also mention here, that in addition to the Hamburg Grand, the PX-S7000 ALSO offers 2 more upgraded piano samples, a “New York Grand” and a “Berlin Grand” (also with mellow and bright versions of each).
When I was in store testing keyboards, I remembered that I always really liked the “Stage Piano” sample on the PX-S3100 (which is also available on the PX-S6000) so I compared that back and forth with the newer Hamburg Grand and . . . there is NO comparing these; the new samples (even to my old and not very experienced ears) sound SIGNIFICANTLY fuller, more detailed, more nuanced and have more distinguishable highs and lows.
And for those of you that like “tinkering” with your sounds, you have a LOT of options. For piano sounds, there’s the “Acoustic Simulator” which allows you to fine tune things like:
- string resonance
- damper resonance
- damper noise
- key on noise
- key off noise
- PX-S7000’s Acoustic Simulator Adds:
- aliquot resonance
- open string resonance
And something else worth noting regarding the main piano sounds; not only can you choose from 6 levels of touch sensitivity to match your playing style (pretty much every piano allows you to do this), but you can also customize both the hammer & keyoff response, which allows you to fine tune the amount of time it takes to generate a sound from a keypress and how long it takes a sound to fade after a keypress.
And while you can customize your reverb & chorus on both the PX-S6000 & PX-S7000, the PX-S6000 also has 100 customizable DSP effects you can apply to tinker with your sounds, and even control those as you play with the 2 live control knobs. As I mentioned earlier, the DSP effects on the PX-S7000 are NOT customizable. So with all of those sound shaping tools, those that like fine tuning sounds have a LOT of options.
So with all that out of the way, let’s take a listen to some of the sounds on the Casio PX-S6000.
Splits & Layers
The PX-S6000 allows you to split the keyboard into left and right (which Casio calls “lower” and “upper”) voices, and you can also layer a 2nd voice in the upper zone.
Splits
Splitting the keyboard into lower and upper is easy: go to F button set #1, and press F3; you’ll see the screen change with “F3” now having square brackets to indicate you’re in split mode, you’ll see an “SP” at the top of the screen, and the voice selection will switch from “U1” for upper 1 to “L” for lower, and a bass guitar will be selected by default. To switch to a different voice, the navigation is the same as normal – make sure the touch ring focus is on the voice selection, and choose your voice. To set the split point, press FUNCTION and drill down into the “Keyboard” menu. Find the “Split Point” and either use the touch ring to adjust it, or just play a note on the keyboard. To adjust relative volumes of each part, press FUNCTION and go to the “Mixer” menu and choose “Volume” – here you can adjust relative volumes of all 3 voices.
Layers
Layering works exactly the same way as splitting; from F button set #1, press F4 and you can choose your voice, adjust relative volumes etc. – you’ll see an “LY” at the top of the screen.
With both splits and layers, do note that when you’re done with them and want to choose another voice, they will still be active unless you manually turn them back off first, or choose a new registration memory slot (as opposed to just manually switching the main voice or pressing a voice category button etc).
Effects
So there are a ton of effects options available on the PX-S6000 to tinker with your sounds, and there are 2 live control knobs available to shape your sound as you play; as I mentioned earlier, the PX-S7000 does NOT allow you to customize your DSP effects, and has no live control knobs. So just an FYI, everything I talk about in this effects section is specific to the PX-S6000, except (POSSIBLY) the chorus, reverb & surround options MIGHT be the same on the PX-S7000 but I can’t say for sure.
Chorus, Reverb & Surround
Chorus
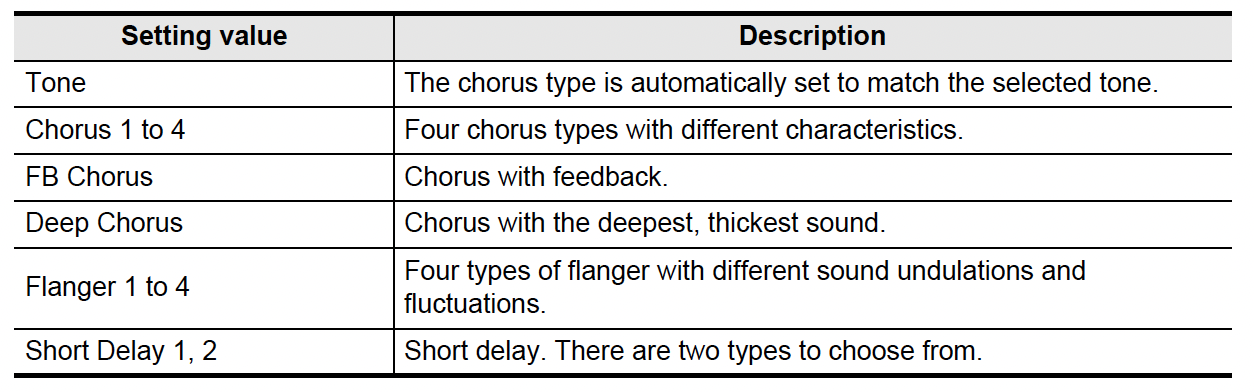
Every tone on the PX-S6000 has a preset chorus effect assigned; there are different chorus options you can choose from, which include some flangers and delays. To choose a chorus option, multiple F buttons sets have shortcuts to “Effect”; try using F button set 10, and press F3 to open a menu and press ENTER on “Chorus Type” to choose (it will default to “Tone” which is the pre-assigned one, or you can scroll to the one you want. Then you can also set the brilliance level (which is the brightness of the sound).
So that’s just setting the TYPE of chorus & brilliance level, but how do we actually turn the chorus ON? You do that from the mixer menu – press FUNCTION then in the “Mixer” menu, you can choose “Chorus” and how much you want to apply to each of the 3 tones. If I start cranking the Upper1 level here, you’ll hear the chorus get applied – my piano will start sounding like a honky tonk piano.
Reverb & Surround
Casio calls reverb “Hall Simulator/Reverb”, but . . . it’s basically reverb. And there is also a “surround” option, but this only works with the built in speakers; the surround effect is NOT sent out through the headphones or the line out ports. I’ll demo the surround option in the speaker demo later in this review. The reverb is enabled by default, but you can choose to disable it, and turn surround on or off with or without the reverb effect. To choose that option, you use the “Sound Mode” menu (which is also in multiple F buttons sets; press F1 from F button set #10 to open the menu) and you can choose your option.
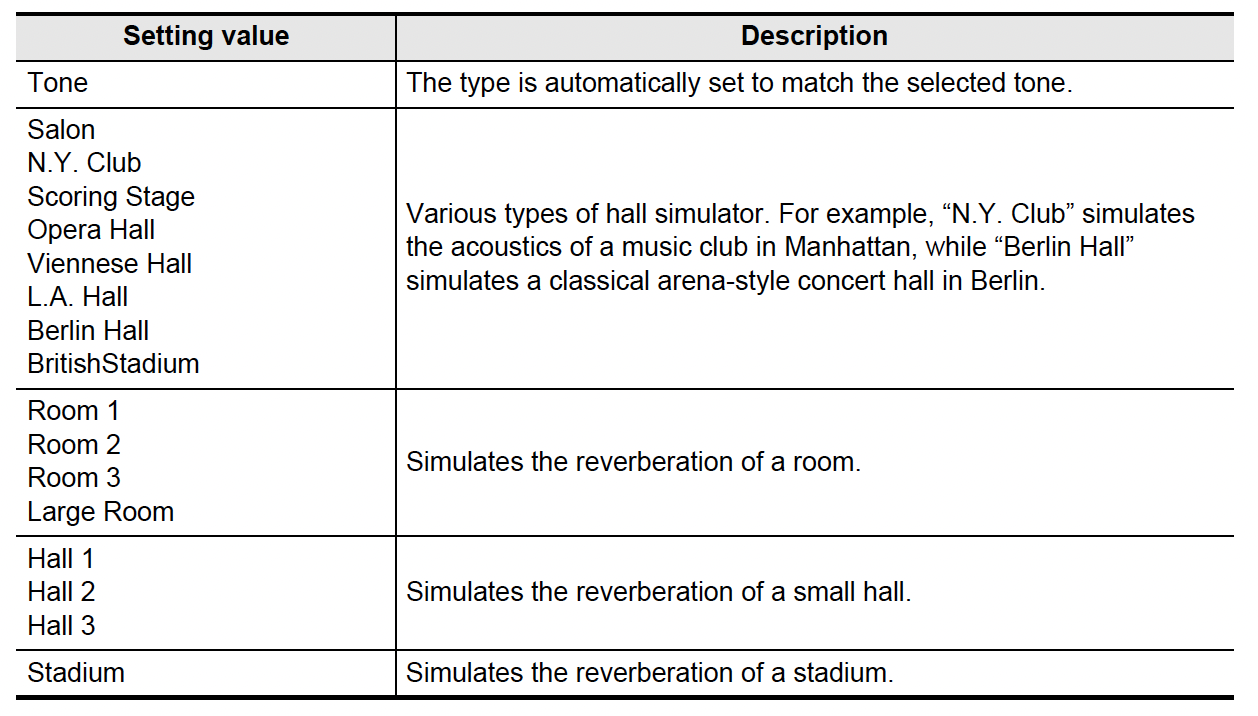
Kind of goofy, but to actually CONFIGURE your reverb, you LONG press F1 instead – now you see a menu with the “Sound Mode” choices we just saw, but now you have additional options for choosing different reverb TYPES and surround options. But how do we adjust the LEVEL of the reverb? For that (just like the chorus), we’re back at the “MIxer” menu, and we can choose “Reverb” and adjust how much reverb we want on each of the 3 tones. The “Hall/Rev. Return” is the OVERALL reverb level – if you adjust that, it will maintain the RELATIVE levels between the 3 parts as you adjust the OVERALL reverb level; for example, if I set Upper1 reverb to be 0 and crank the return level, you won’t hear any reverb.
DSP Effects
There are 100 customizable DSP presets available for you to play with. The majority of the MAIN tones have a default DSP effect applied (although you can customize that DSP’s settings, or switch it to another DSP and save that change in a registration slot); you can see which tones do and do not have default DSP effects applied in the Data List PDF from Casio’s website. These are called “Tone DSPs”, because Casio has used one of the existing 100 DSP presets, but then customized the settings for that DSP to work well with the chosen voice (so when you MANUALLY choose the same DSP, it may not sound the same as it did on a “Tone DSP” until you adjust all of the DSP settings to match what Casio did at the factory. Something interesting to note is the main Hamburg Grand piano samples do NOT have any DSP effects applied by default.
So as an example, I’m going to use tone #62 RockOD Organ. From F button set #10 “Effects”, I’ll see that a DSP is enabled because the F4 button has brackets around it. To toggle DSP on and off, just press F4; to work with the effect, LONG press F4. When I do that, I’ll see that it is a customized “Tone DSP” that’s a rotary drive effect. I can press ENTER on the type and navigate through all the 100 DSP effects available . . . I’ll just move it back to the default one for this example. Now these M1-M3 things are slots where more than one insertion effect may or may not be in use; you can’t add or remove THESE, they’re part of the preset itself (so if you’re customizing your DSPs you have to start with an existing preset and whatever insertion effects it contains). This particular preset only has one insertion effect; the drive rotary.
So to customize this, you can press ENTER on the insertion effect itself; I see this Drive Rotary offers different types I can choose from, and then I can customize all sorts of things like the gain, the rotary speed at slow and at fast, how fast it rises and falls, and whether it rotates when at slow or stops entirely . . . pretty cool! So now you might be wondering – how do I flip the rotary speed or adjust anything else on the fly (as opposed to deep diving into this menu)? That brings me to the live control options 🙂
DSP Effect – LIMITATON
One thing to mention that MIGHT matter to you (or it might NOT) is that only ONE of up to three tones (Upper1, Upper2 and Lower) can have a DSP effect active, AND you can only customize the DSP effect for Upper1. I was trying to get a guitar with a distortion DSP in the Lower voice, and an organ with a rotary DSP in Upper1, but I could only have one of those DSP’s active (so the distortion for the guitar OR the rotary for the organ).
And implementing a DSP in the Lower voice is really clumsy; before splitting the keyboard, you have to make sure DSP is NOT active in Upper1 (if it is, the DSP in the Lower won’t work, and there will be no way to turn it on). The F4 (DSP) button on F button set 10 “Effects” only works with Upper1’s DSP effect. So as a result, you cannot customize a DSP in the lower voice, and if you turn Upper1’s DSP back on, the DSP on the lower voice will be disabled (and it WON’T come back on even if you turn Upper1’s DSP back off again; you’ll have to turn off Upper1’s DSP, disable splits, turn splits back on and re-add the Lower tone).
Live Controls
The PX-S6000 has a live control button and 2 live control knobs (the PX-S7000 has 3 buttons and no knobs, and the functionality is much more limited). Go to F button set #12 “Control” to configure how you want your live controls to behave.
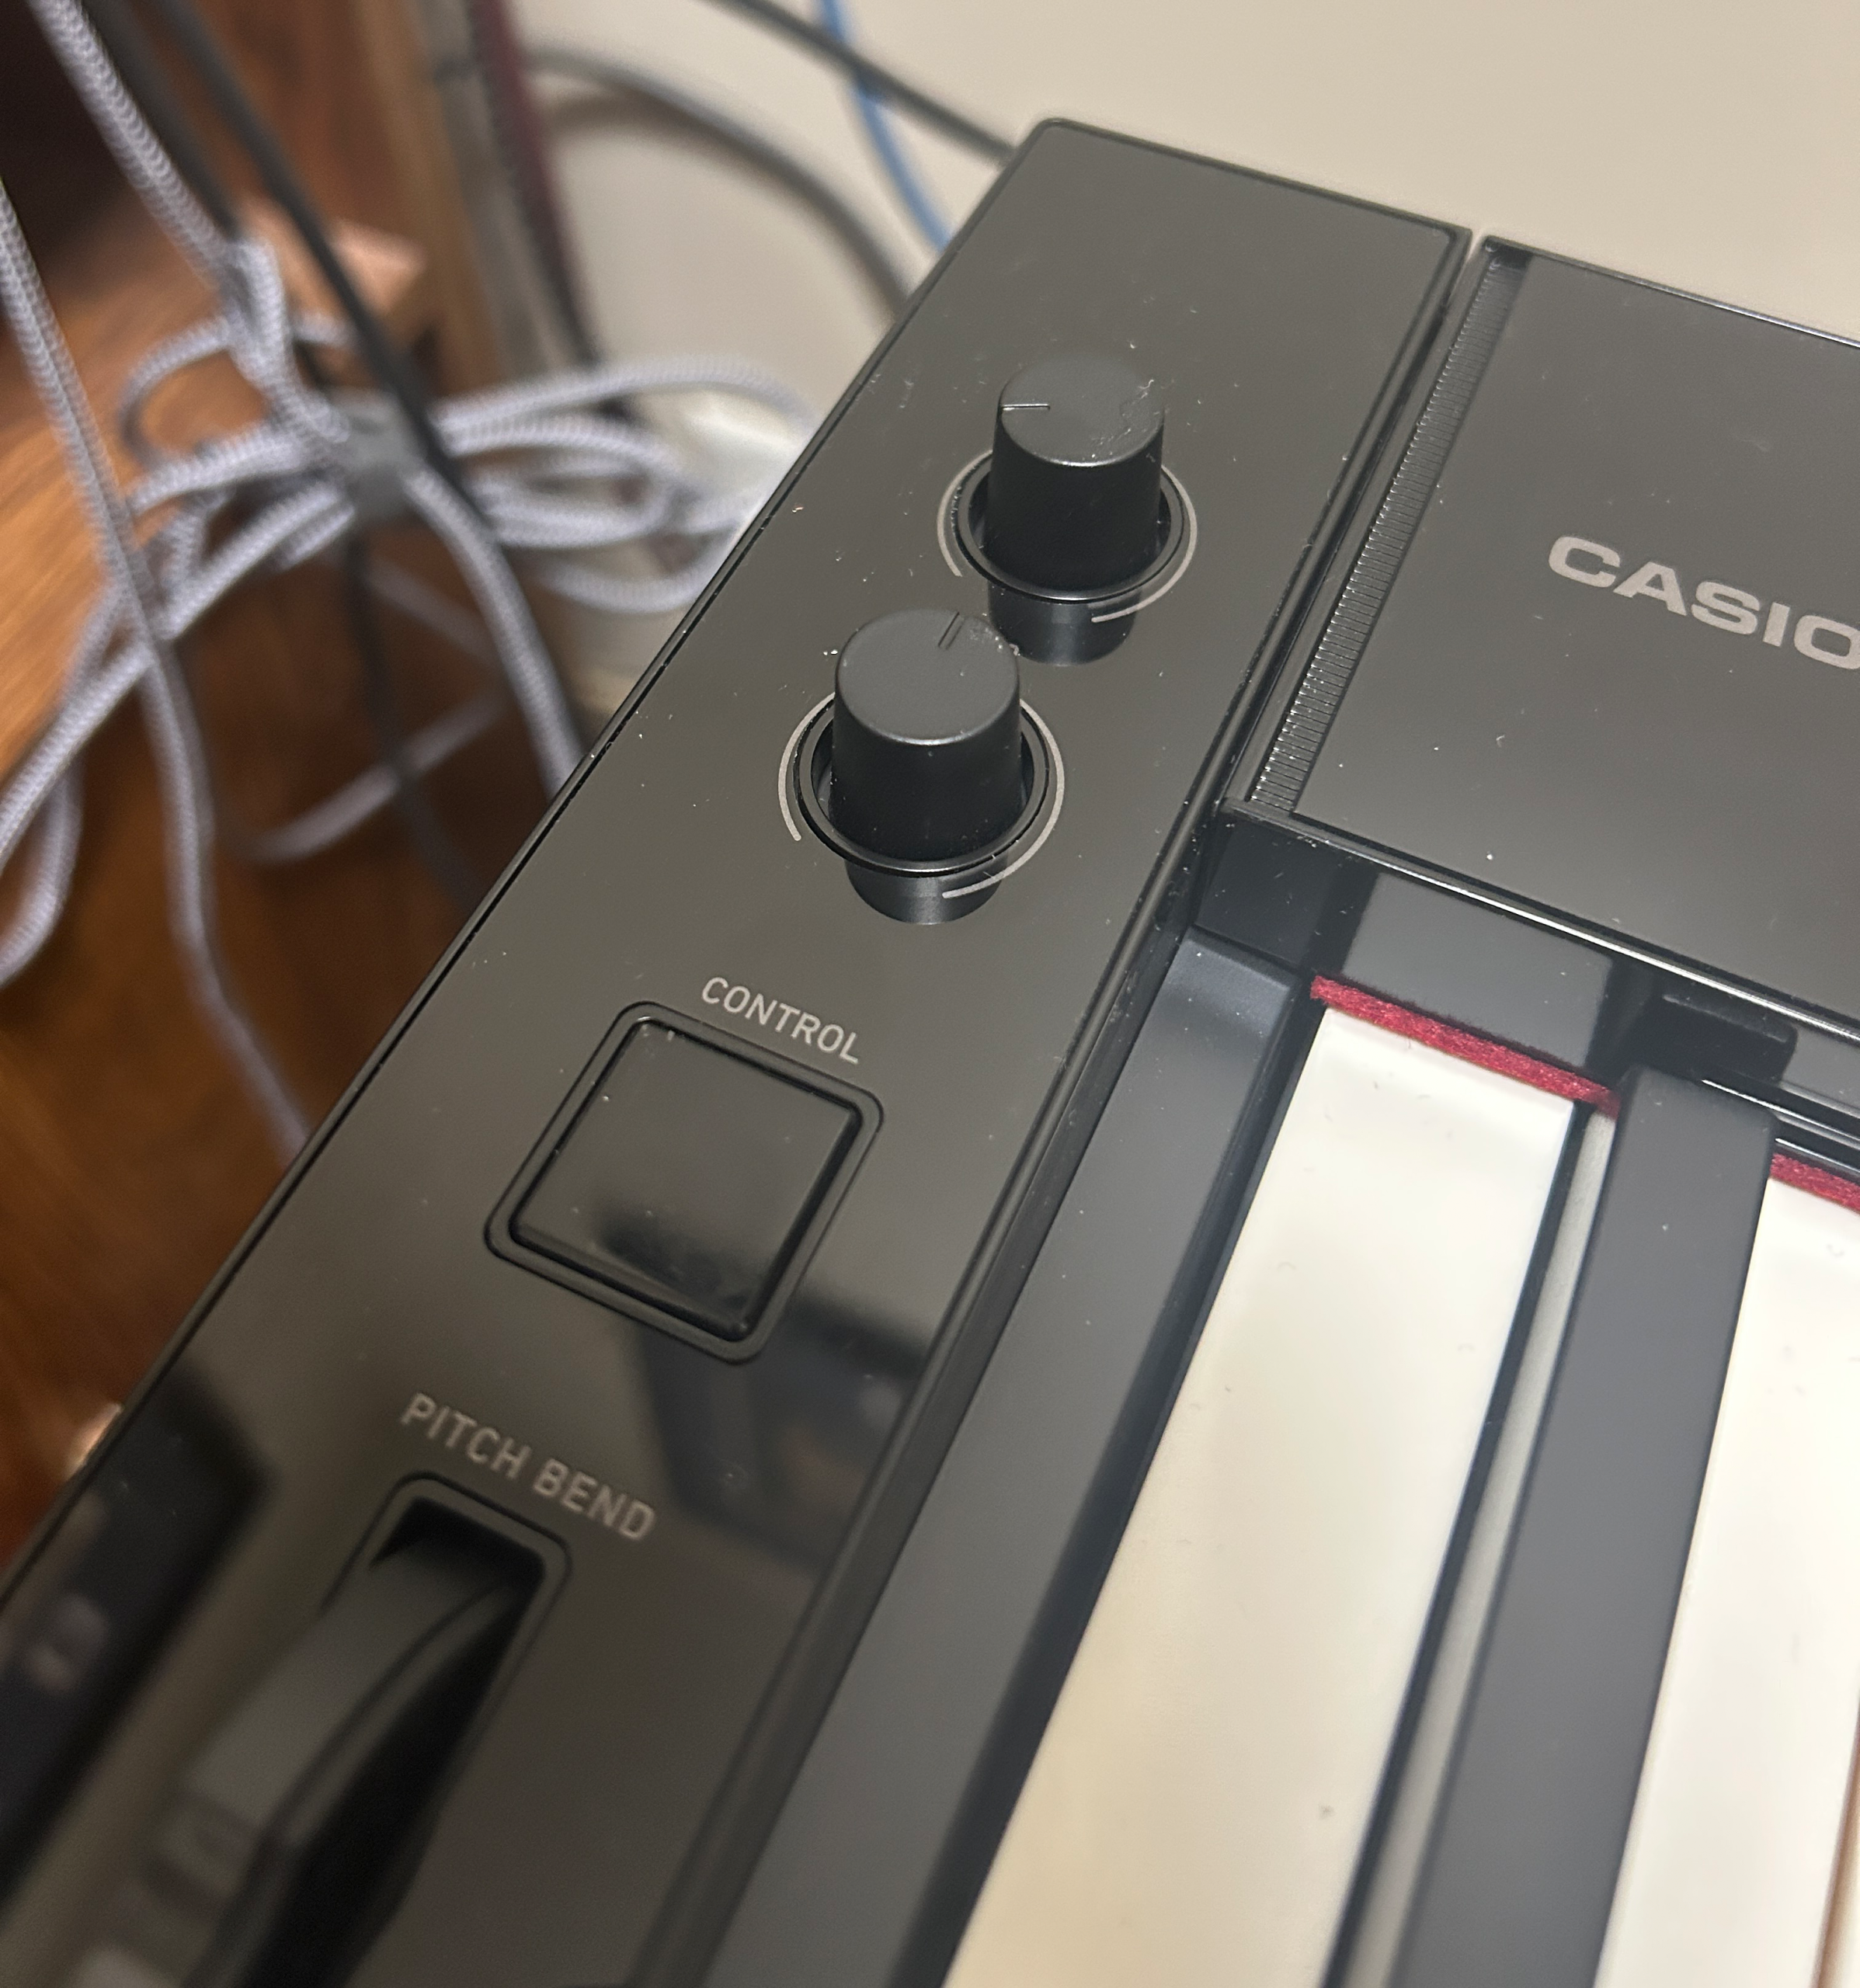
Control Button
I’ll press F4 to configure the “Control Button” first; it defaults to applying modulation while being held down; your other choices are toggling portamento on or off, toggling rotary speaker speed between slow and fast, and toggling the arpeggiator note length between full and half; I’ll switch mine to the rotary option. Now, it will flip the rotary speaker speed back and forth between fast and slow (which will of course only work if I have a rotary DSP effect active on my current tone). So that works great, but I’d LOVE to see Casio add something here that’s missing – when you press the button it DOES say “Rotary” on screen briefly; but there is no indication as to whether the rotary is currently on fast or slow. Yes, you should be able to tell, but that’s easy to say at home with your headphones on or in your music studio – if you’re on a stage with other musicians, crowd noise and maybe you can hear yourself well through your monitors, maybe you can’t? A visible indicator for this is . . . kind of mandatory for me if I was to consider using an organ voice on stage. However when I get to the control knobs, there is a SLIGHTLY better option . . .
Control Knobs
The 2 live control knobs have a TON of options available for you. To configure those, press F3 from F button set #12 “Control”. Knob 1 defaults to cutoff frequency, and knob 2 defaults to resonance. If I press ENTER on K1, I can see the massive list of options I have here; you can adjust reverb, chorus, portamento time, attack and release, vibrato, relative volumes between layered tones, panning and tons of other stuff (check the manual on Casio’s website for a complete list of your options – it’s a big list).
But some notable options here are your DSP parameters; you can adjust DSP parameter 1 or 2 with either knob (so the specific function will depend on your currently selected DSP). I’ll set K1 to be DSP Parameter 1 and K2 to be DSP Parameter 2. As far as a list of what parameter 1 and parameter 2 ARE? I’ve been looking online but haven’t found one yet (maybe someone hint hint needs to make one). So for now, I’ve been manually figuring this out by looking at a DSP effect’s settings while moving the knobs to see what changes. As an example, with the RockOD Organ, if I long press F4 on F button set #10 “Effects” and then press ENTER on the “DriveRotary” insertion effect, I can turn knob 2 and see that it is controlling the OD Gain level; and for knob 1 I need to look at the next page, and I’ll see that it’s controlling the rotary speaker speed from slow to fast (when you cross the half way mark). So THAT would be my workaround for being able to tell if my rotary is on slow or fast, since the knob’s position will tell me that.
Rhythms
It’s not heavily advertised in Casio’s marketing, and I don’t see it demonstrated in many YouTube reviews either, so I was actually surprised (and in a VERY good way!) that the PX-S6000 includes 20 built in drumbeats in common genres that you can play along with. There isn’t any built in accompaniment, but I’m TOTALLY fine with that – just having basic drums you can play along with is an AWESOME feature for players like me that would rather play and practice to a drumbeat than to a metronome (I even do that when I practice SCALES :D).
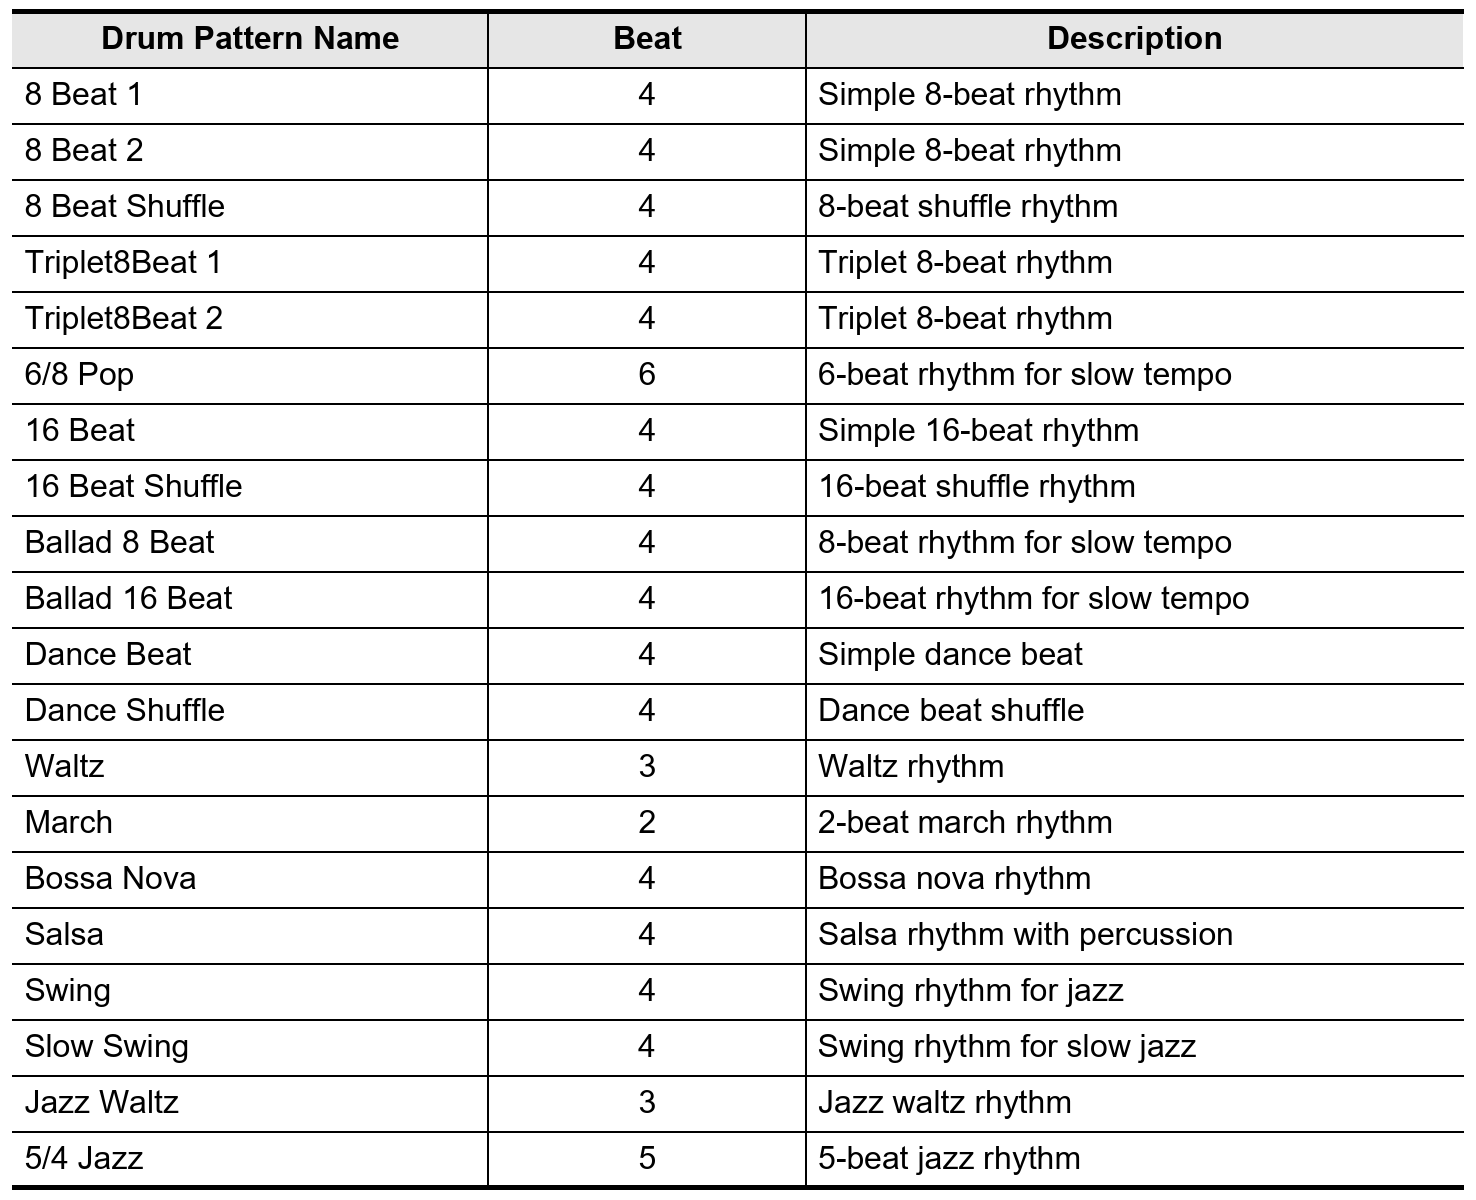
You access these from the “Metronome” menu, which is on multiple F button sets (or just within the Function menu as well); I can go to F button set 01 to find it and press F2. On the metronome menu, if the “Guide Type” is set to “Metronome”, then you’ll only see metronome patterns in the “Pattern” option; but if you switch “Guide Type” to “Drum” you’ll see the different drumbeats. To start and stop the drumbeats (or the metronome) you HOLD FUNCTION and press the PLAY button; I actually have a registration bank saved that I use for piano practice that uses the bright Hamburg Grand and has a shuffle rhythm selected that I like practicing scales with.
Connectivity
Ok for connectivity, we’ve got some good AND . . . not BAD, but . . . could be better things to talk about.
“Good” Connectivity

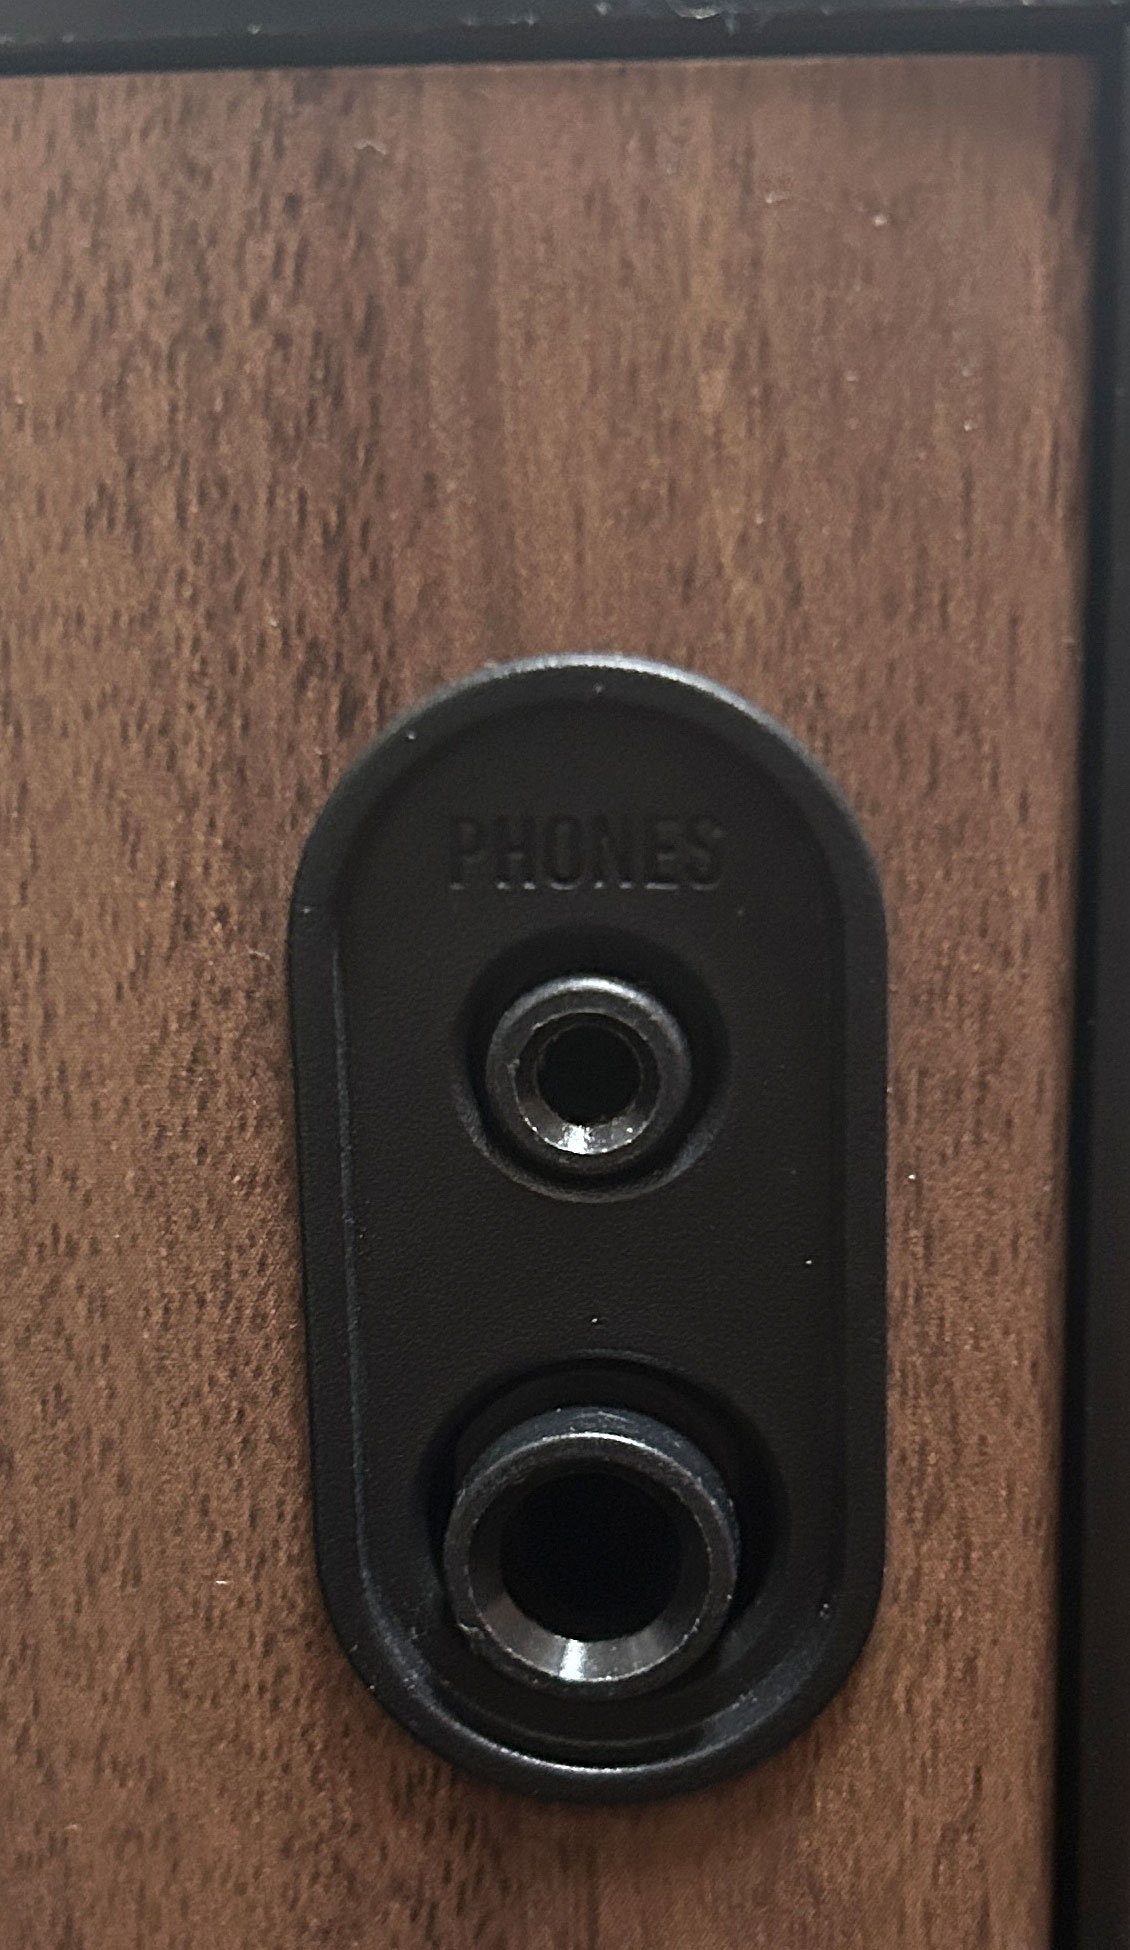
- TWO headphone ports, conveniently located on the FRONT of the piano, and both standard headphone connection sizes are there; we’ve got a 1/8” AND a ¼” so you won’t need to have adapters handy, so nice touch there from Casio
- We’ve got ¼” L&R line out ports for proper connections to external audio equipment, which is a must for gigging musicians
- We’ve got a ¼” mic input with a gain knob, and there are onboard effects we can use with a mic
- USB type A port: you can connect a flash drive to this port to save & replay audio recordings, and move data back and forth to the keyboard’s onboard memory (a super useful application of this is you can save registration banks with a custom name to a flash drive, and move them back to the keyboard when you need them)
- If you connect the INCLUDED WU-BT10 Bluetooth adapter to the USB type A port, you can stream in external audio from a device (which is super handy), and you can also take advantage of wireless MIDI if that’s your thing (remember though that since there is only ONE USB type A port, you cannot have the Bluetooth adapter AND a flash drive connected at the same time)

“Not BAD, But . . . Could Be Better” Connectivity
- The USB to host port is type B which is fine, but it would be nice to have a seen a more modern type C port. Note that this port only transmits MIDI, not audio; it would be nice to see Casio catch up with the competition and start including built in audio interfaces in their USB to host ports (it does add a LOT of functionality)
- Pedal Ports (I have some complaints here):
- 1/4″ pedal port that defaults to a switch style sustain pedal (so no half pedaling; and FYI there is a basic plastic brick switch pedal included). You can configure this pedal to be either a switch pedal and assign it to various things (it does default to sustain, and no you cannot assign it to flip rotary speaker speed . . . sigh), OR you can assign it to be an expression pedal and assign it to some different options (most likely expression to control volume). And a nice touch here is you can choose either polarity if your expression pedal doesn’t have a switch
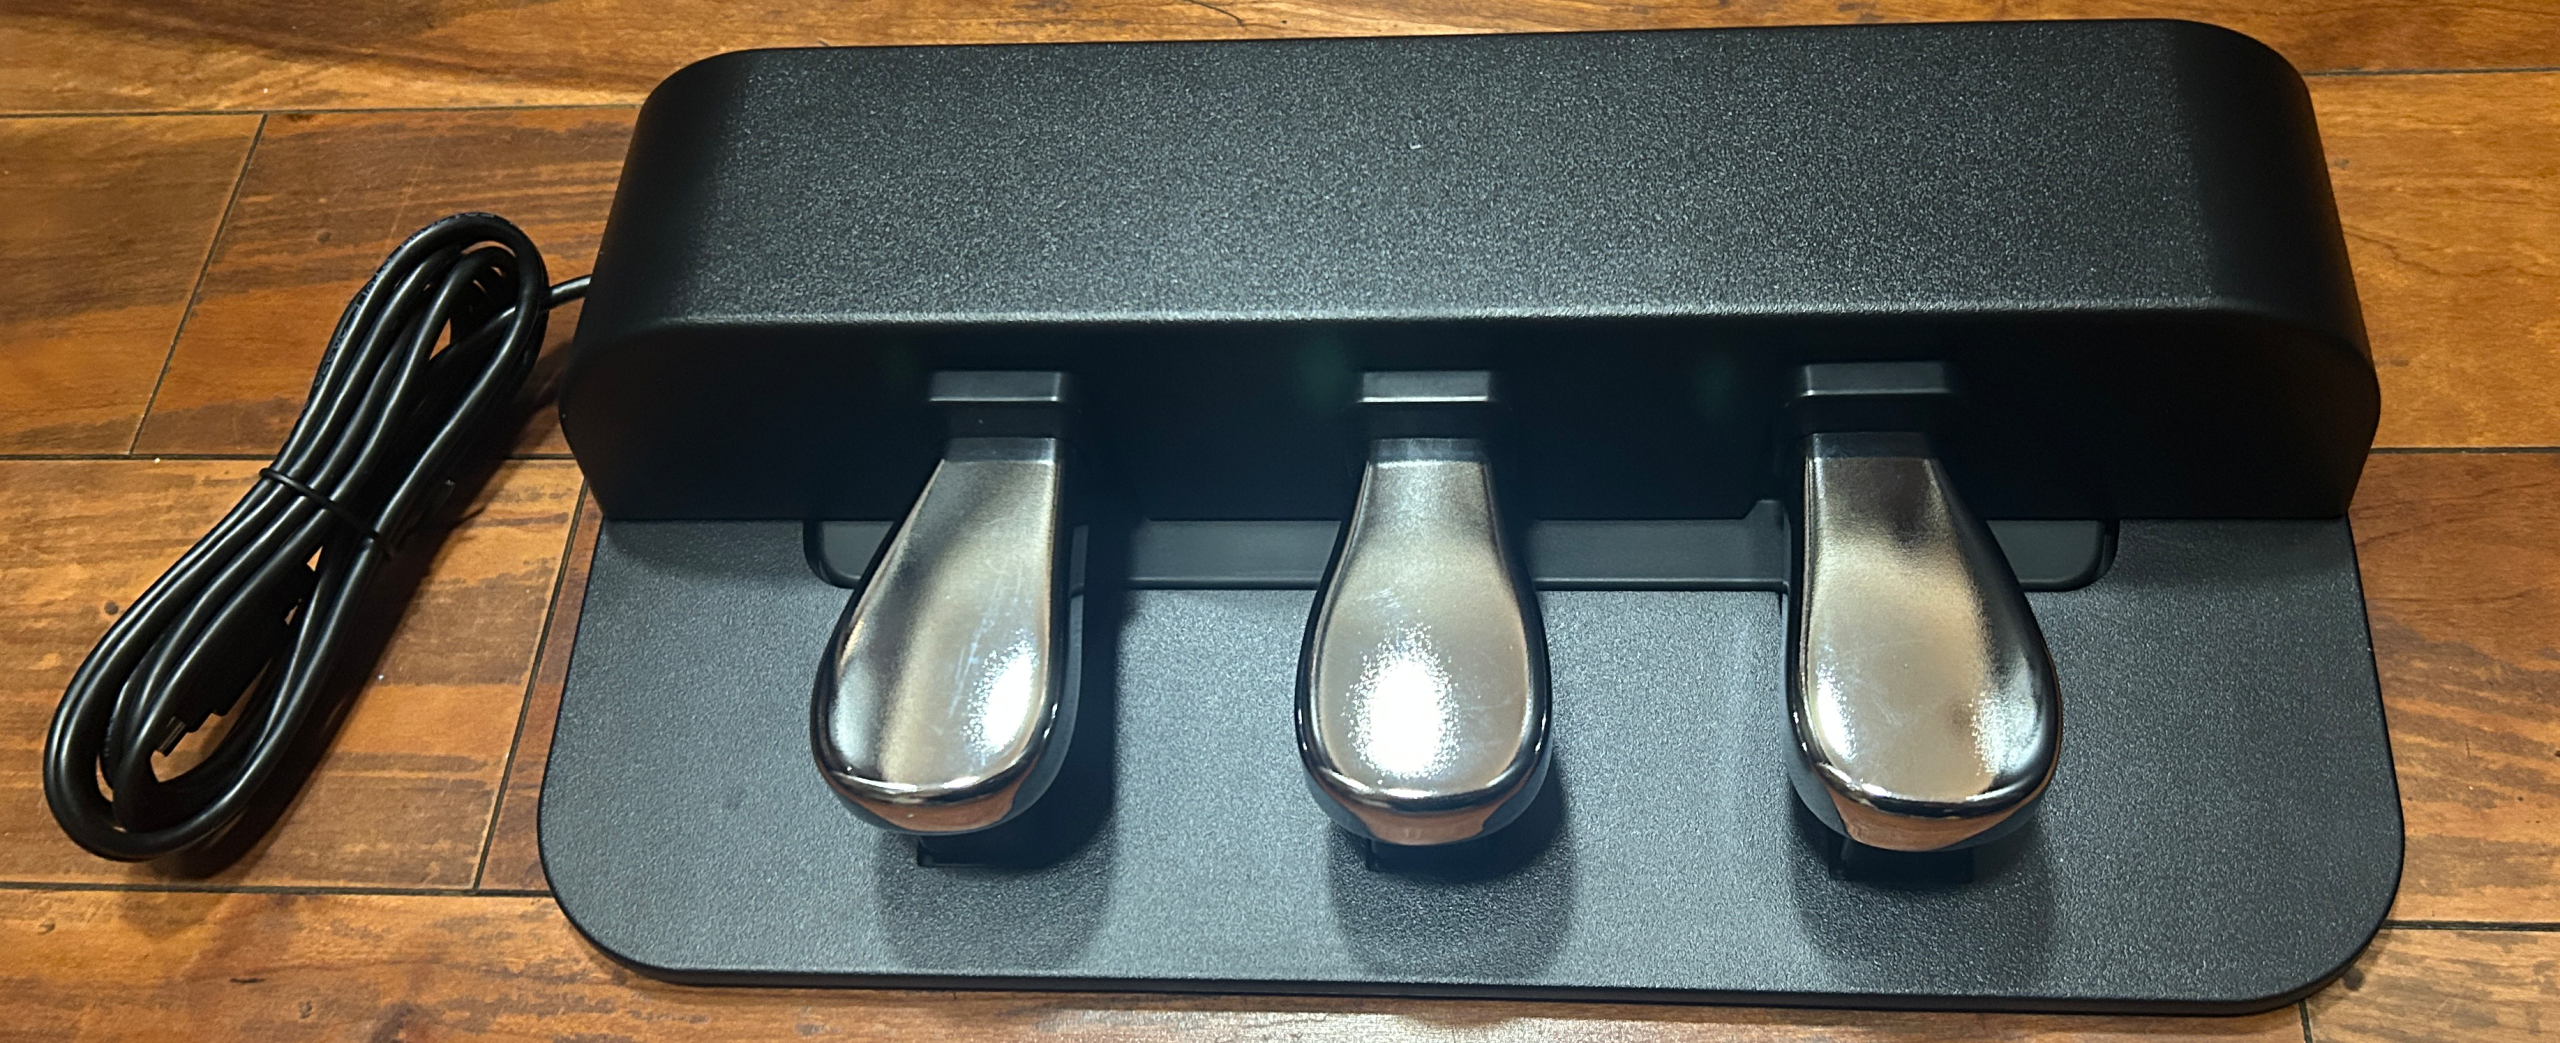
- a proprietary port for Casio’s portable SP-34 triple pedal unit (I did buy this pedal, and it is awesome; the sustain supports half pedaling, and it’s light and has great rubber grips on the bottom), but unfortunately, you CANNOT customize what the individual pedals do; you’ll be limited to the normal sustain, soft and sostenudo functions. Since I don’t use soft or sostenudo, for ME the SP-34 is basically a really nice but kind of big and . . . expensive sustain pedal . . .
So what are my complaints about the pedal ports? I think there’s a pedal port MISSING. In my opinion, in addition to the existing 1/4″ assignable pedal port, there should ALSO be an ADDITIONAL 1/4″ sustain pedal port. Because we only have ONE 1/4″ pedal port, if I want to use an expression pedal for volume AND a sustain pedal, I’m being FORCED to buy and use the SP-34 triple pedal, even though I’m never going to touch the soft or sostenudo pedals; it’s a shame you can’t at least customize the soft and sostenudo pedals to perform ANY other functions. The SP-34 IS a really nice pedal unit, but if all you need is sustain . . . it is a bit pricy and it is bigger to haul around than a normal pedal.
At first, I thought that Casio should have included 5 pin MIDI in and out ports for connecting to other keyboards, as well as a USB audio interface. But as I thought more about the use case (at least for me), the PX-S6000 has SUCH a good key action AND VST quality piano sounds, so I would NEVER bother connecting this to trigger piano sounds on anything else. And while it would be nice if Casio started including audio interfaces in their keyboards, and I do ALWAYS talk about how useful that feature is in my reviews, I asked myself “When was the last time I used a USB audio interface for my own needs?” . . . and the answer was “I can’t remember“, so . . . not that big a deal for me.
So overall, the connectivity on the PX-S6000 is fine and has everything I need – as long as I buy and carry around the SP-34 triple pedal.
Other Features
Mic Input
I’ll probably do a deep dive video in more detail into the mic input, but here are the basics. There is no phantom power supplied, so you have to use a dynamic mic (not a condenser), and make sure your mic cable is a TS (one stripe) connector at the keyboard connection – if it is 2 stripes it’s a TRS connection and you will have almost zero volume.
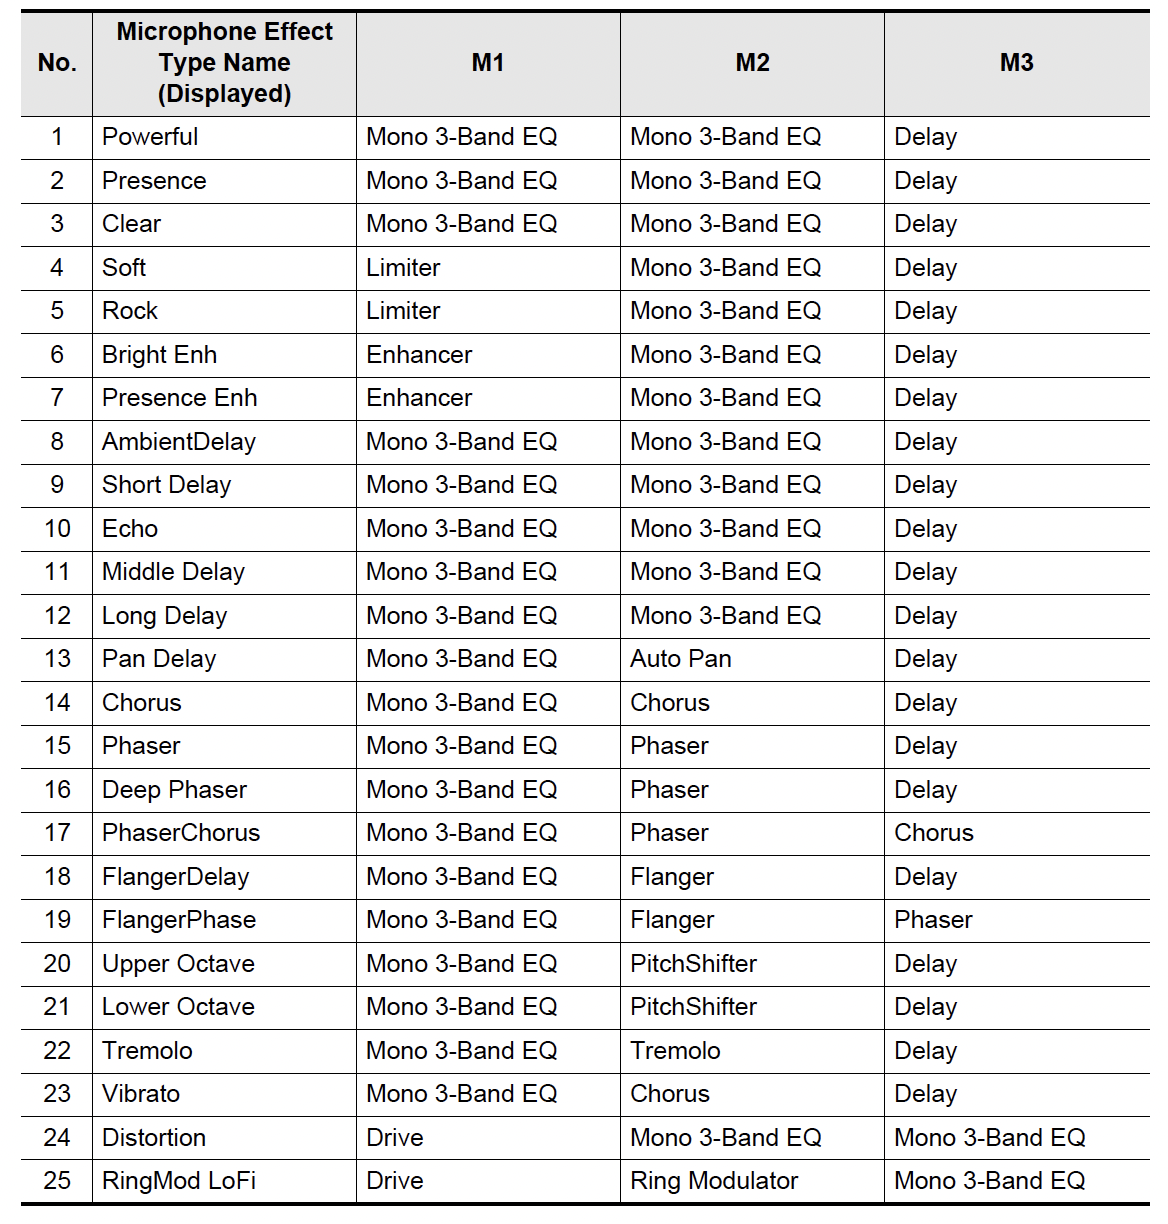
To access the effects, either drill down through the Function menu, or find a “Mic FX” shortcut in one of the F button sets; you can use F button set #5 “Song Play”, but there’s a better option: F button set #11 “Vocal. You can press F2 to toggle mic effects on and off, and LONG press it to access the effects list. The effects aren’t individually accessible; Casio has created presets with multiple affects combined, and given them names – hard core effects aficionados may not like this, but being an effects novice, I’m all over that approach. And you can actually drill down into each of the individual effects and edit their settings or even disable one or more of them if you want. But if you look at the effects list (it’s in the PDF manual on Casio’s website) you’ll probably be wondering . . . there are some choices in this list with chorus, but . . . where’s the reverb, panning or relative mic volume?
Reverb, panning and relative mic volume are independent of the mix effects; you access THOSE settings from the main “Mixer” menu (which from F button set #11 “Vocal” you can access by pressing F4). From here, you can drill down into relative settings for everything on the keyboard (upper 1 & 2, and lower tones, wireless audio in, background song, mic etc) and adjust relative volume, reverb, panning etc. So it’s important to note that turning the mic effects off does NOT turn reverb off; so if you’re using the mic at a performance and want to talk to the audience between breaks, you might want to have F button set #11 available (or create a custom F button set with shortcuts for both the mic effects AND the mixer).
I haven’t had a chance to deep dive into the mic effects yet, but my initial “go-to” choices would be reverb at around 50 or so, and the bright and presence sound great with my not so great voice (I noticed the 1st effect in those is an “enhancer”; I have no idea what that IS, but my voice can DEFINITELY use some “enhancing”). Here’s a super quick demo of me with my dynamic mic connected to the PX-S6000’s mic input.
Speakers
As far as the speakers go on the PX-S6000? Have to hand it to Casio, they went all out on these . . . they are REALLY good, and I’m NOT usually a fan of backward facing speakers. There are FOUR independently driven 8 watt speakers for a total of 32 watts, which is double the speaker setup you get on the PX-S5000, 1100 or 3100. They’re equipped with bass reflex technology & “side enhancing diffusers” (which are supposed to “widen” the sound).
There are also some cool settings available, such as “piano position” (with available settings like Standard, Wall, Centre or Table) that allow you to tinker with how the speakers sound based on where your piano IS, as well as some surround sound options.
Here is a quick demo on the speakers (just as picked up by the built in mic on my iPhone); I’m not sure if any of these options will come through in the video or not, but I will include the piano position and surround features.
Recording
As I mentioned earlier, you can can record and play back simple one track MIDI recordings into the keyboard’s memory, or you can record and play back audio tracks in either .WAV or .mp3 formats (which WILL include the mic input if you are using it) to a flash drive. One kind of annoying issue for people like me that like to record audio as opposed to MIDI is that you can’t have the BlueTooth adapter connected at the same time since you need a flash drive; so as a result, you aren’t able to play along with a backing track from a device and record all of that together. This is another difference I noticed with the PX-S7000; on that model you CAN record audio to the keyboard’s memory so you WOULD be able to include external audio. Not the end of the world for PX-S6000 users, but a bit annoying nonetheless.
I will do a deep dive video on my channel into both recording methods, but for now something helpful that I can share: on most keyboards, you’d press RECORD and then choose MIDI or audio; on the PX-S6000, you have to set your chosen recording type in a function menu FIRST, and THEN you can proceed with your recording or playback; kind of strange, but it is how it works. Press FUNCTION to open the “Function” menu and drill down into the “Song” menu. From here you choose the song type (onboard MIDI or flash drive audio), and you can also choose whether to enabled “cancel centre” for audio playback (this is MEANT to hide the vocals in an audio track so you can sing, but in my experience, this never really works).
Once you’ve chosen your song type, THEN the play and record controls on the front panel will work with the recording type you’ve chosen. Every audio recording you make will be recorded as a new file on the flash drive named “Take01/02” etc.; you can delete or rename those files using the “Media” menu. I’ll talk more about all of this in my deep dive video down the road on my channel.
Build Quality & Music Rest
I don’t always talk about build quality in my reviews, but it deserves to be mentioned here; this is not only a BEAUTIFUL piano with the shiny black top and wood grain accents, but this piano feels EXTREMELY well built; it is super sturdy and solid; the plastic casing is rock hard, and the physical controls and connection ports are good quality.
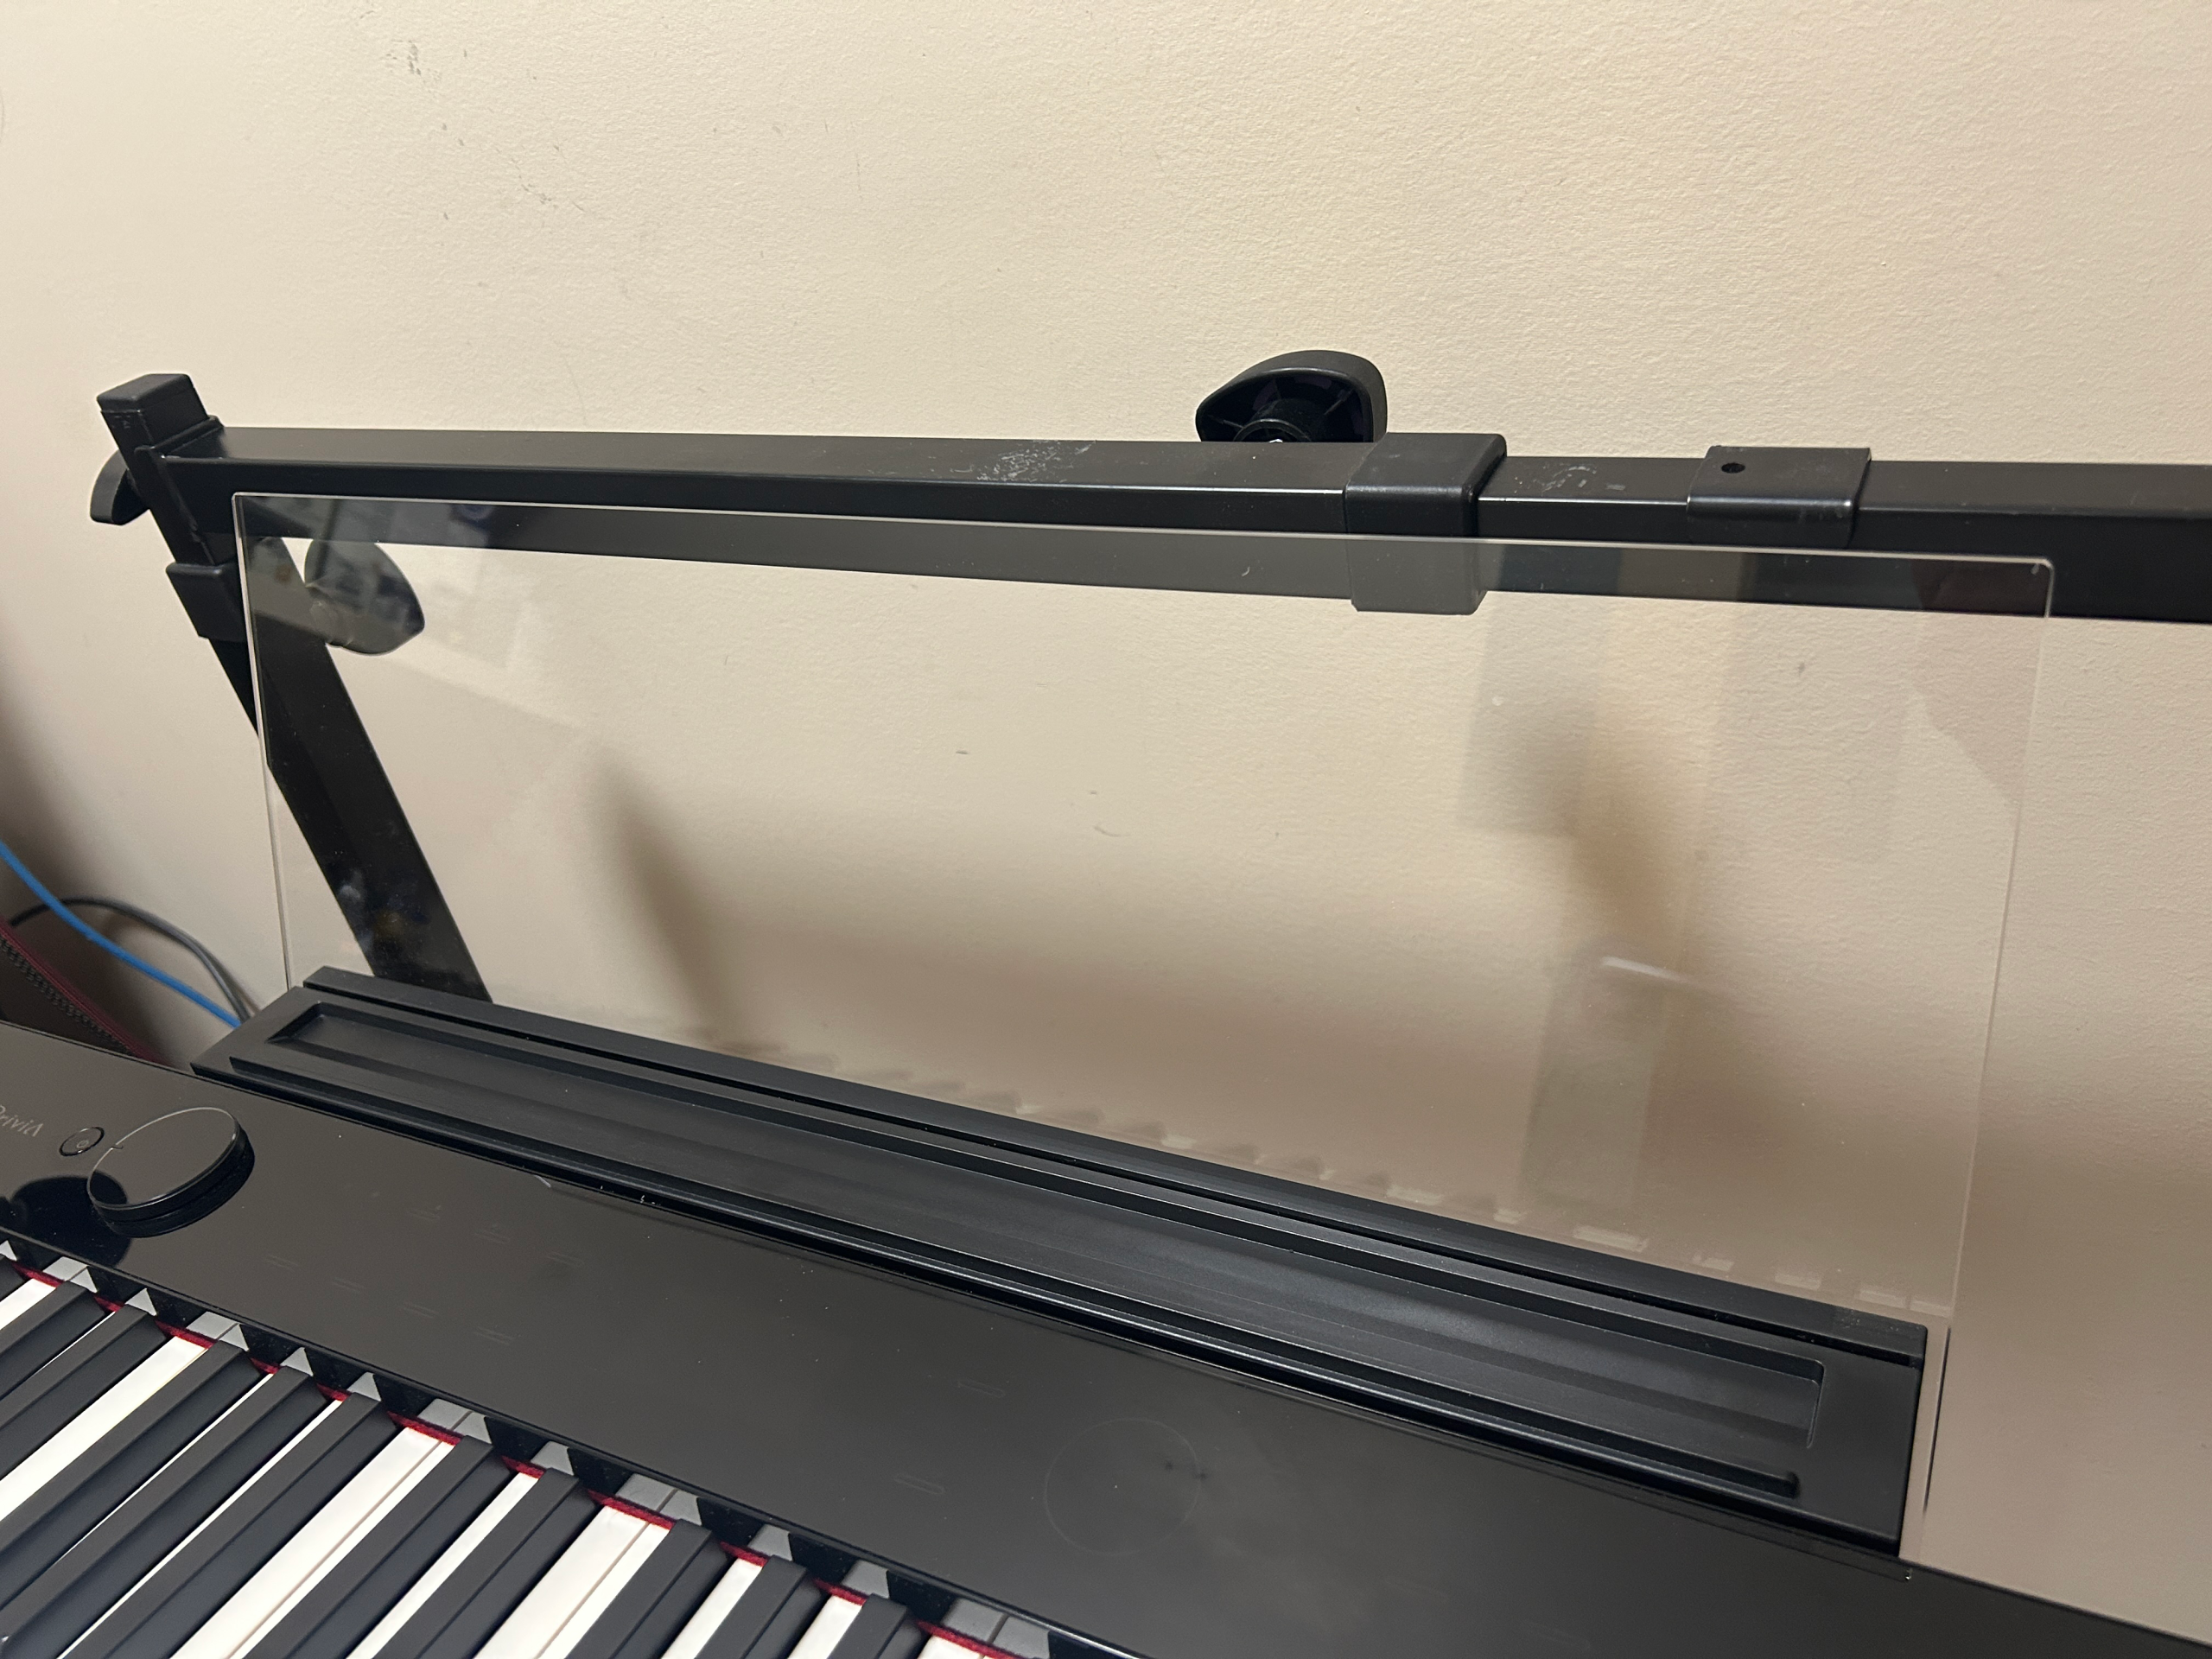
And even the music rest is premium – it’s a thick, heavy plastic, it’s super wide (I can comfortably fit TWO iPads side by side on this, it sits VERY solidly in the piano, AND has a REALLY nice and wide recessed area to help keep your music or devices from sliding out. And the back is transparent which looks kinda cool. I also have to mention when I unboxed this, I have NEVER seen a digital piano packaged this well so great job there by Casio; there was more than the usual amount of protective packing, and there was even a soft almost fabric like wrap around the keyboard itself in addition to the usual plastic bag.
Portability
If you follow my channel, you know that I’m big on portability, and often complain about heavier keyboards (like the Yamaha DGX-670 at a whopping 50 lbs). Well at 32.5 lbs, the PX-S6000 IS about 7 lbs heavier than most portable digital pianos I’ve owned that are typically around 25 lbs (examples: Casio PX-S3100, Yamaha P-225); BUT for a portable piano with a PREMIUM key action? It’s still WAY lighter and FAR more compact than premium pianos from the competition:
| Length | Depth | Height | Weight | |
| Casio PX-S6000 | 52.5″ | 9.5″ | 4″ | 32.5 lbs |
| Kawai ES920 | 52.5″ | 14.7″ | 5.7″ | 37.5 lbs |
| Yamaha P-525 | 52.5″ | 14.8″ | 5.7″ | 48.5 lbs |
| Roland FP-90X | 52.5″ | 15.4″ | 5.4″ | 52 lbs |
At first I thought the extra weight was mostly due to the upgraded key action, but then I noticed that the PX-S5000 (which also has this upgraded action) only weighs 25.5 lbs, which is only 1/2 a lb heavier than the PX-S1100. So then it occurred to me that the extra weight on the PX-S6000 is likely due to twice the number of 8 watt speakers (there are 4 on the PX-S6000 vs 2 on the PX-S5000), there are more electronics onboard to deal with the screen and newer user interface, and I also think the PX-S6000’s case itself is a LOT more solid and heavier duty than the PX-S1100/5000’s style case.
App Compatibility

Casio Music Space
The PX-S6000 is compatible with Casio’s Music Space app (formerly Chordana Play). I’ve been pretty critical of this app in the past, and I haven’t used this app much at all since I sold my PX-S1100 – I found it to be EXTREMELY unreliable, laggy and just . . . generally flaky at the time, and some of the new “features” (like pretending you’re playing in a stadium with a screaming crowd) I thought were just . . . well . . . silly.
But since it’s been awhile, I thought I would take a quick look at it again. While it does still have the “silly” stuff, it does also still have some useful features like a falling note interface, the ability to play along with built in songs etc; but most importantly it has a graphical user interface for working with your keyboard’s settings, and selecting sounds. But to me, the graphical interface isn’t needed for the PX-S6000 – the onboard user interface is so good, you might as well just spend your time using and getting familiar with that. As far as the various song play along and practicing features, those aren’t features I would EVER use, but I might do a deep dive video further into the app down the road.
Users who could REALLY benefit from Casio Music Space and should definitely use it are owners of the PX-S5000 which has a VERY minimal user interface, so the app would be a big help.
Any Negatives?
I like quite a bit about the PX-S6000; the key action, sounds, built in rhythms, the number of DSP effects, the live control knobs and customizable user interface, and the Bluetooth audio in is super handy and the build quality is awesome. I do have a few complaints, but only a couple are at all significant; and depending on YOUR use case, they may not matter to you at all.
Complaint #1: Limitations On DSP Effects
Only being able to have ONE DSP effect active at a time, AND ONLY on ONE tone (Upper1, Upper2 or Lower) at a time MIGHT be an issue for you, if you’re hoping to have lots of complex setups and presets; if I wanted to use the PX-S6000 with my current pop rock band, this would be a HUGE restriction for me. I have setups for dozens of songs I play with my current band that have up to FOUR voices active at a single time, split across multiple zones on the keyboard, and EACH of these voices can have MULTIPLE DSP effects applied at the same time, so this alone kind of makes the PX-S6000 . . . unusable for my needs with MY band (unless I’m willing to significantly simplify what I’m playing). But in all fairness, this isn’t a huge knock on the PX-S6000, it just means it’s not the right keyboard for me to be using with my current band . . . “square peg; round hole”. If I was playing mostly piano and organ in one of the blues bands I used to play for? This wouldn’t be an issue at all.
Complaint #2: Missing Pedal Port
My second complaint is that missing pedal port; I use an expression pedal ALOT when I play, so since there is only ONE 1/4″ pedal port available, I was forced to buy (and carry around) the SP-34 triple pedal for sustain, even though I’ll NEVER use the soft and sostenudo pedals. Given that I’m unlikely to use the PX-S6000 on gigs, I may even return the SP-34 pedal unit, and just use a basic sustain pedal at home for piano practice. At home, if I need an expression pedal for playing a song, I can just unplug my sustain pedal and plug in the expression pedal.
The only other complaints I have are minor:
- you can’t customize the pedals on the SP-34 to do anything OTHER than soft or sostenudo; if you could it would help justify having to buy it
- there is no visible indication of whether your rotary effect is set to slow or fast (but the knob does provide a workaround for that)
- switching registration banks quickly is VERY cumbersome, making fast changes challenging at a gig
So unless you need lots of complex setups and presets with a wide variety of sounds, the DSP limitation isn’t likely to be a big issue, in which case the only “issue” is you have to carry around a slightly large (but really nice) sustain pedal? In all honesty, there isn’t really a lot to complain about with the Casio PX-S6000.
The Competition
Before I get into comparing the Casio PX-S6000 to the competition I want to address a couple of things: what kind of piano IS the PX-S6000 (home, stage or a bit of both?), and I also want to make you aware of how much relative prices among manufacturers can vary depending where you are.
What Kind Of Piano IS The Casio PX-S6000?
While I would say the PX-S7000 is definitely a premium HOME piano, I would have to say that the PX-S6000 is a bit of both; a premium home piano AND a stage piano (or as another reviewer called it, a “Stage Piano LITE” which is the perfect way to describe it). I’ve owned and used a few stage pianos and keyboards; they will have a LOT of quick access physical controls right on the front panel, so that you can see and adjust all of your settings quickly and easily without having to deep dive into a menu system.
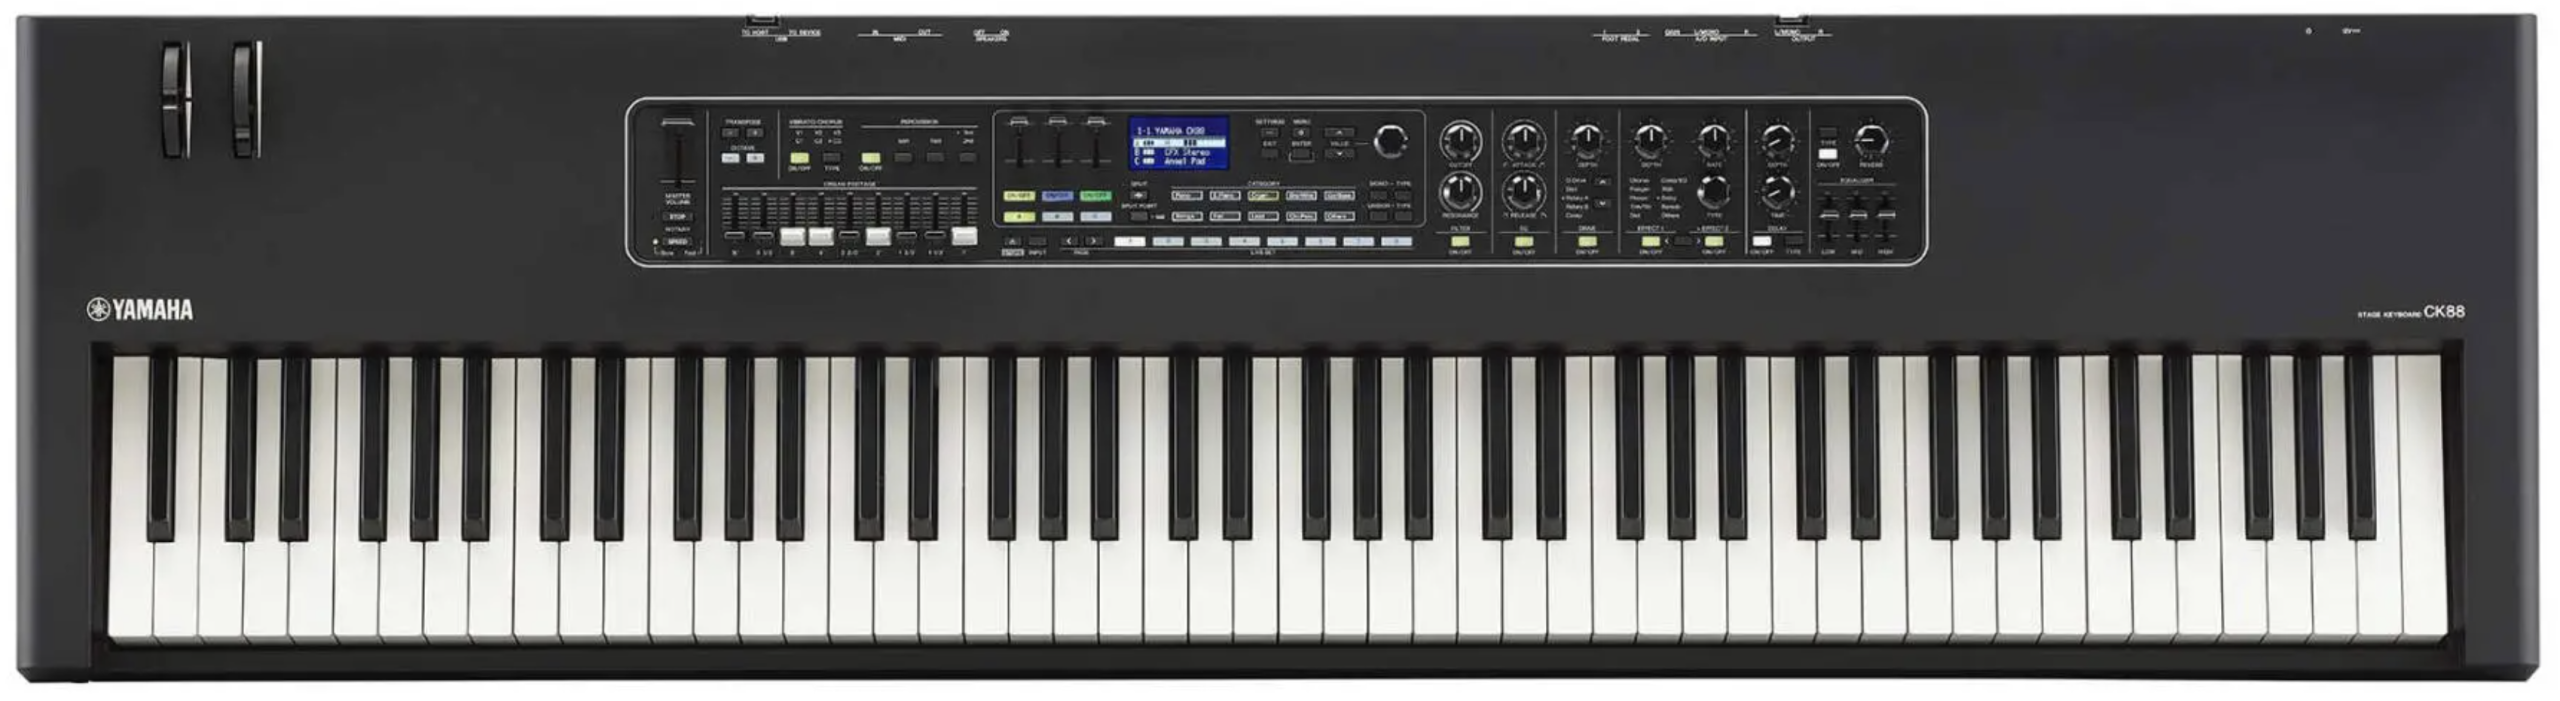
As an example, looking at the Yamaha CK-88 stage piano’s front panel, you can see how many buttons, controls & sliders etc it has as opposed to the PX-S6000, which DOES have a minimalist front panel in comparison. But that alone doesn’t make the PX-S6000 unusable on stage; it really depends on what’s important to the player. Speaking from personal experience, I owned a CK-88 (and quite liked it) for about a year, and used it on stage multiple times; and when I think of how often I adjusted effects or any other settings offered by all those front panel controls while I was playing? The answer is easy; almost ZERO; I’m the kind of player who likes to set up my presets for a song (or style of song) in a registration with all the sound settings and effects already configured (and the PX-S6000 has 96 registration slots available).
Unlike the PX-S7000, the PX-S6000 allows me to fine tune my effects to my liking choosing from 100 configurable DSP effects. And while the setup of these DOES require some menu diving, the user interface is super intuitive, fast and easy to use, and once you’ve set up your sounds you can save them in a registration slot so recalling them on stage will be fast and easy. The one big thing to keep in mind is the PX-S6000’s limit of only one DSP active at a time, but . . . that’s part of what makes it a “Stage Piano Lite”. And for smaller gigs, the PX-S6000’s 32 watts of speaker power and the fact it can run on batteries are 2 other stage worthy features.
Price Variations Between Countries
So before I get into how the PX-S6000 compares to premium pianos from other manufacturers, I do want to comment on how much relative price differences among manufacturers can vary between different countries, because it CAN be pretty significant. As an example, Roland has typically sold for far less (relative to the competition) in the US as opposed to Canada; check out how in the US, the PX-S6000 is closer in price to the FP-90X, but it in Canada it is MUCH closer in price to the FP-60X. So make sure you keep all this in mind when you’re shopping for the right piano for you.
| Price in USA | Price in Canada | |
| Roland FP-60X | $1100 USD ($1500 CDN) | $1900 CDN |
| Casio PX-S6000 | $2000 USD ($2800 CDN) | $2400 CDN |
| Roland FP-90X | $2300 USD ($3200 CDN) | $3500 CDN |
Roland FP-90X ($2300 USD)
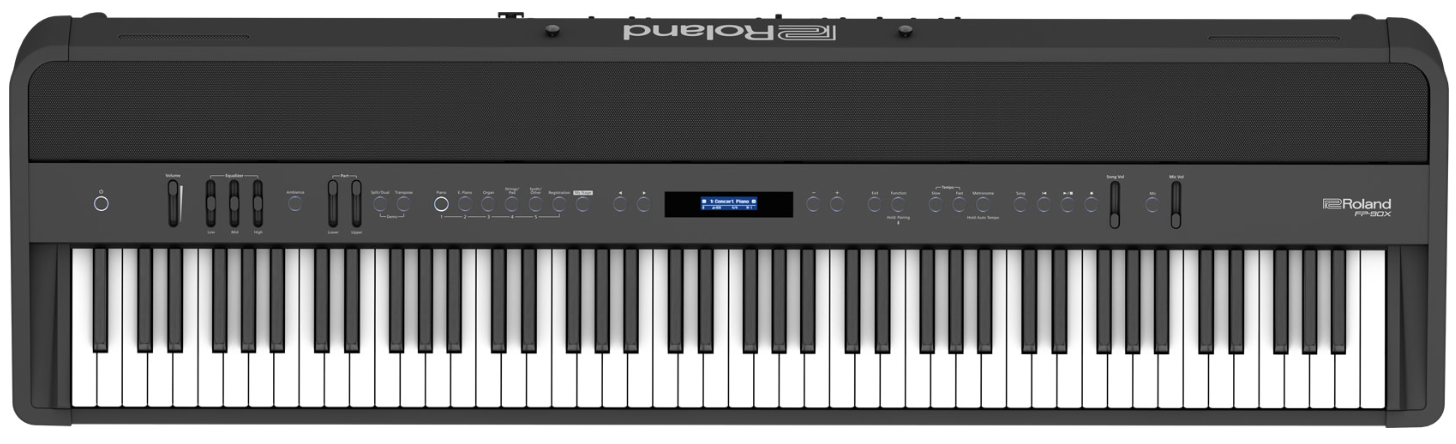
So Roland’s top of the line portable digital piano is the FP-90X, and the next in line is the FP-60X. Now I have to be clear that I haven’t reviewed either of these pianos, and have only played the FP-60X in store so I won’t be able to offer a lot here, but I can weigh in on some general specs. The FP-90X’s main piano sounds are NOT from samples, they are 100% modeled; this means they are generated mathematically on the fly as you play. The PX-S6000 (and most other digital pianos) use sample based sound engines, and some of which (including the PX-S6000) can modify those samples as you play using more basic modeling technology. Which Roland’s modeling technology actually SOUNDS better to your ear or not is totally personal opinion. The key action on the FP-90X is Roland’s PHA50 hybrid wood and plastic action that has a triple sensor, escapement and a VERY long pivot point, so this is definitely a very premium key action. I haven’t even played one of these, but listening to some very knowledgeable reviewers online (who typically prefer Roland keybeds), I’ve heard pretty consistently that Casio’s Smart Hybrid action (which uses software instead of a 3rd sensor to detect the position of the key) is comparable and has surprised them. The FP-90X does have a nice looking user interface with a screen and lots of direct access controls, as well as some powerful speakers at over 50 watts, but all of this does come with a major portability price . . . the FP-90X is a colossal 52 pounds (I know I would NEVER consider carrying that to a gig). And the PX-S6000 has those built in drumbeats which I love for practice – you need to connect an app to get those with the Roland.
So in my opinion, unless you are a professional jazz or classical gigging pianist that really needs the long pivot point, the Casio PX-S6000 can save you a bunch of money, and offer a much more portable solution.
Roland FP-60X ($1100 USD)
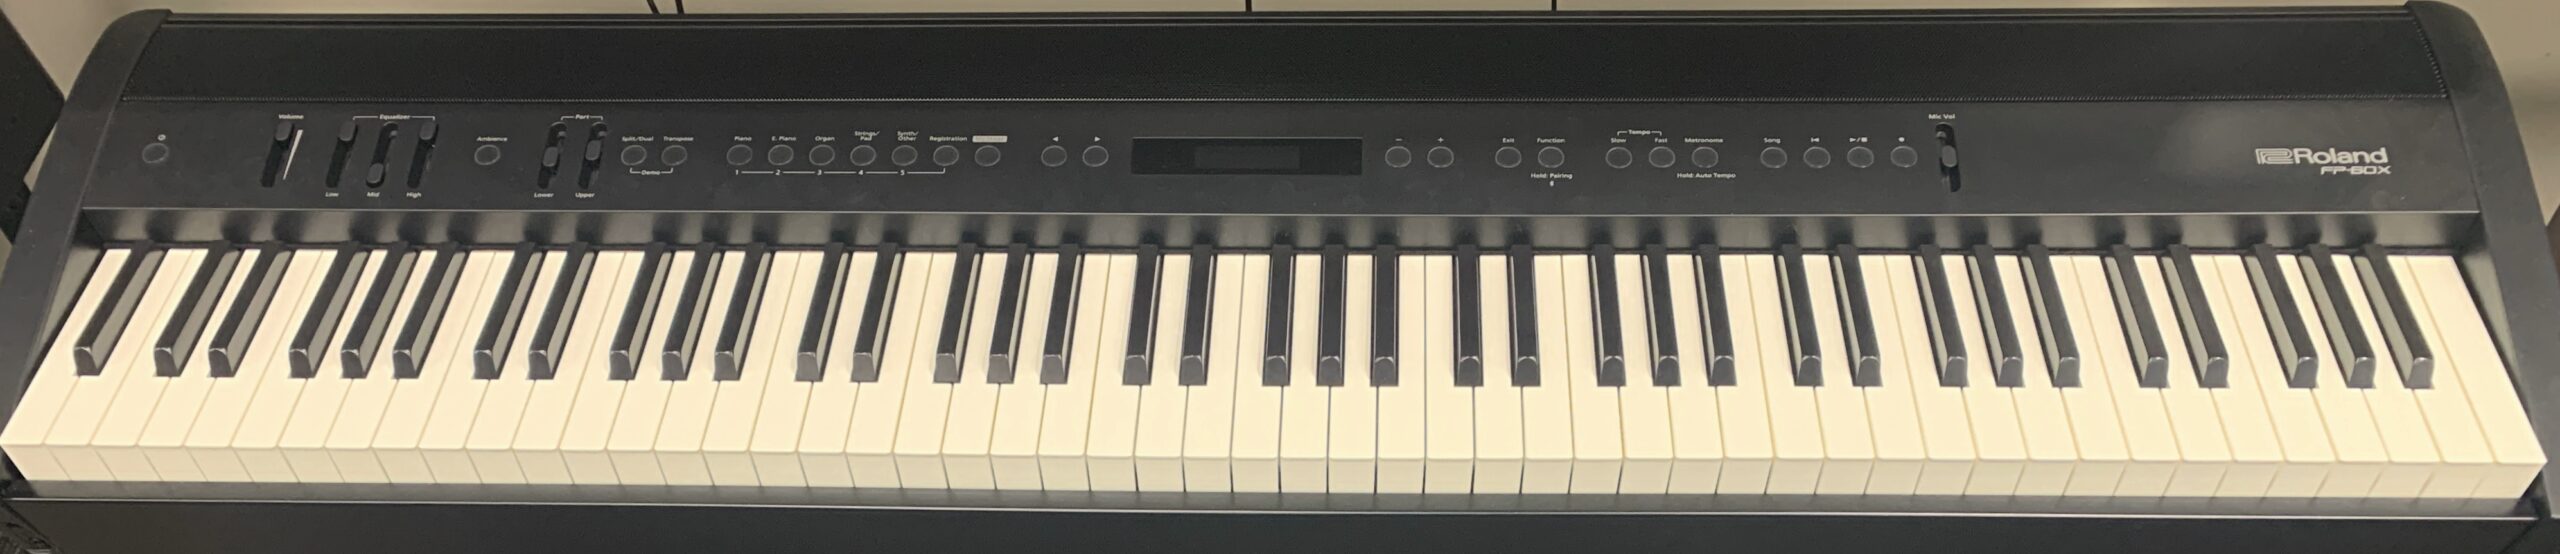
The Roland FP-60X (regardless of what country you’re in) is likely to be less expensive than the PX-S6000. It also uses a sample based sound engine with some additional modeling, and the FP-60X uses the same PHA4 triple sensor action with escapement found in the FP-10 and FP-30X (which MANY people really like – I don’t – I’ve always found the PHA4 to be sluggish). The FP-60X has a nice user interface that’s similar looking to the FP-90X with EQ and relative volume sliders right on the front panel. But, while it’s not as heavy as the FP-90X, it’s still almost 20% heavier than the Casio at 42.5 lbs, it’s much bulkier, and no it won’t run on batteries. And once again, the Casio has the built in drumbeats I like to use for practice – the FP-60X needs an app for that.
So as far as comparing these directly, it will depend on your personal preferences for key actions & sounds; personally though I think Casio’s Smart Hybrid key action is a MASSIVE step up on Roland’s PHA4 – I totally think the PX-S6000 is worth more than the FP-60X.
Yamaha P-525 ($1800 USD)
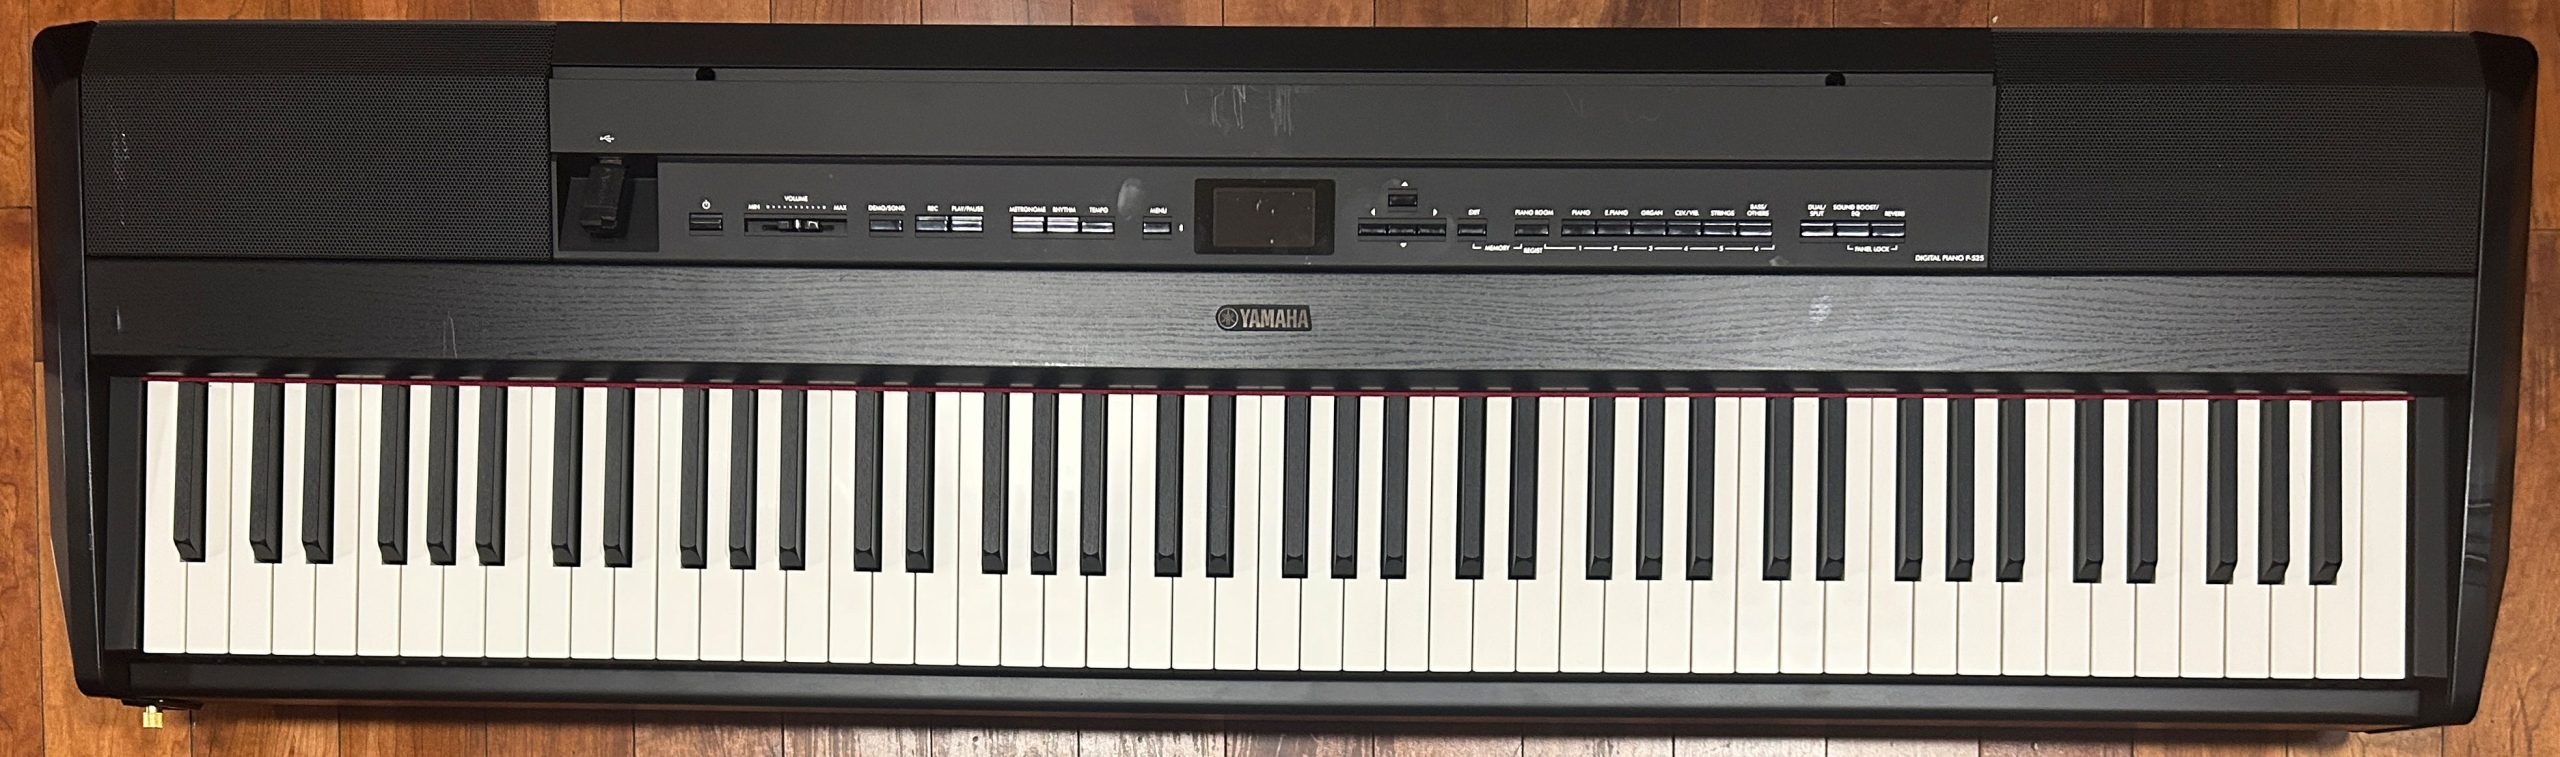
I recently reviewed the Yamaha P-525 (which is slightly less expensive than the PX-S6000 in the US . . . but about the SAME in Canada . . . ), and highly recommended it (and I still do – this is a fabulous piano). The P-525 also has a REALLY nice key action; it’s Yamaha’s “Grand Touch S” action which is a SOLID wood triple sensor key action with escapement. This action is a joy to play, but it is a bit heavier feeling than the PX-S6000 keybed, so depending on your personal preference, you may prefer one over the other – I prefer lighter actions, so I prefer the Casio’s. As far as sounds go, I’ve always been a MASSIVE fan of Yamaha’s piano sounds; while I AM super impressed with the Hamburg Grand on the PX-S6000, I would really need to compare these side by side in studio to offer a preference. The user interface on the Yamaha is really good, but it does not have a mic input (if that matters to you; it doesn’t really matter much to me).
For me, this comparison comes down (as it often does) to portability – like the FP-90X, the Yamaha weighs about 50 lbs which is far too heavy for me to consider as a portable instrument; and while I love both key actions, I do prefer Casio’s so the PX-S6000 wins this battle for me.
Kawai ES920 ($1700 USD)
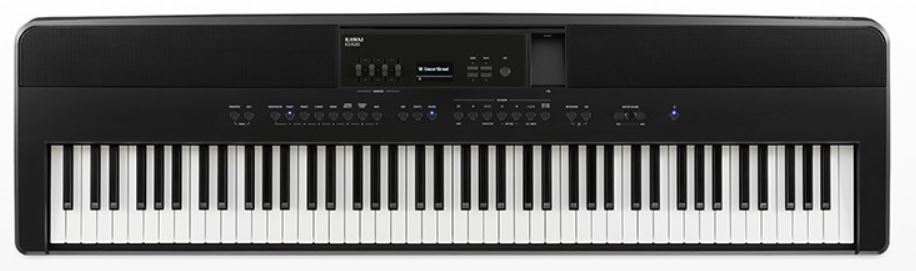
Another competitor for the PX-S6000 would be the Kawai ES920, which is their top of the line portable digital piano. Kawai’s are not very accessible where I live (stores don’t tend to carry them – I’ve never even SEEN an ES920) so sorry, but I’m going to leave this one for you to research on your own.
Casio PX-S5000 ($1300 USD)
So what about saving some money and going with the Casio PX-S5000? You still get the Smart Hybrid key action, and the Hamburg Grand main piano sound . . . that totally depends on your needs. If you mostly just care about piano and maybe an occasional other bread and butter voice? The PX-S5000 might be the perfect solution for you. Or if you don’t mind carrying multiple keyboards and a 2 tier stand to gigs, then a PX-S5000 for piano & electric piano, and another keyboard (like a Yamaha CK-61) for organ, synth and everything else would be a great combination (a viewer on my channel pointed out you can get a PX-S5000 AND a Yamaha CK-61 for only a couple hundred more than a PX-S6000). To be honest, I WAS considering that myself, but when I saw a PX-S6000 on sale for a sizeable discount, it was an easy decision to get that instead, and as I get older, I’m really not too interested in carrying multiple keyboards around. And I’ve never been a big fan of the SUPER minimalist user interface on the PX-S1100 & PX-S5000 that requires key combinations to select sounds.
Other Stage Keyboards? Yamaha CK-88 ($1500 USD)
So since the Casio PX-S6000 is a “Stage Keyboard LITE”, how does it compare to actual “Stage Keyboards”? I’ve seen a number of reviews comparing the PX-S6000 to “full-on” stage keyboards from Roland like the RD-88 or RD-08; I’m not familiar with those keyboards, but I am VERY familiar with the Yamaha CK series, so I’ll compare it to the Yamaha CK-88, and with a couple of different use cases in mind.
The Yamaha CK-88 IS a fully-featured stage piano; when compared to the PX-S6000, it has more live control knobs & buttons, it has more versatility for layering and splitting with 3 VERY customizable zones, it allows for multiple DSP effects to be used simultaneously, instead of just sampled organ tones, it has an actual organ engine with physical controls (drawbars, rotary speaker etc), it has nameable registration SLOTS (so songs would be easier to find quickly) and it has 5 pin MIDI in and out ports – so for my current band needs (where I need lots of complex presets and setups)? The CK-88 would work VERY well (and to be honest, since I play almost zero piano in my current band, the CK-61 with a more organ and synth friendly keybed would work even BETTER).
So is there a stage use case where the PX-S6000 might work better than the CK-88? Absolutely – the use case where a “Stage Piano LITE” is enough for your needs! If you play mostly piano & electric piano, and maybe a LITTLE bit of organ, but your requirements for setups, presets, splits and layers are NOT super complex, then you might be fine with just a couple of live control knobs, and MUCH better off with the PX-S6000’s keybed; the key action on the PX-S6000 is a MASSIVE step up on the CK-88. And for on stage monitors or as your main speakers for playing smaller gigs, you might be able to get away with the built in 32 watts of speaker power on the PX-S6000; the CK-88’s speakers are only usable for personal practice.
And if you play a lot of piano but do ALSO play a lot of organ, you’re probably going to want a second dedicated keyboard for organ ANYWAYS (with either the CK-88 or the PX-S6000). You could get away with a MIDI controller connected to the CK-88 to trigger the CK’s organ sounds, while you would need a standalone organ of some sort (Yamaha Reface, Hammond M-Solo) with the PX-S6000 (but either way, it’s still 2 keyboards and a 2 tier stand and mixer that you’d have to start carrying around).
So to share an honest story: I ALMOST returned the PX-S6000 so that I could get a CK-88 instead (since it would be usable with my current band), but . . . the Yamaha PSR-SX720 I’ve been using with my band has been working really well, so I just couldn’t justify giving up the PX-S6000’s key action, which is my absolute FAVORITE fully weighted piano action EVER, so I decided to stick with the PX-S6000.
Casio Privia PX-S6000 – The VERDICT
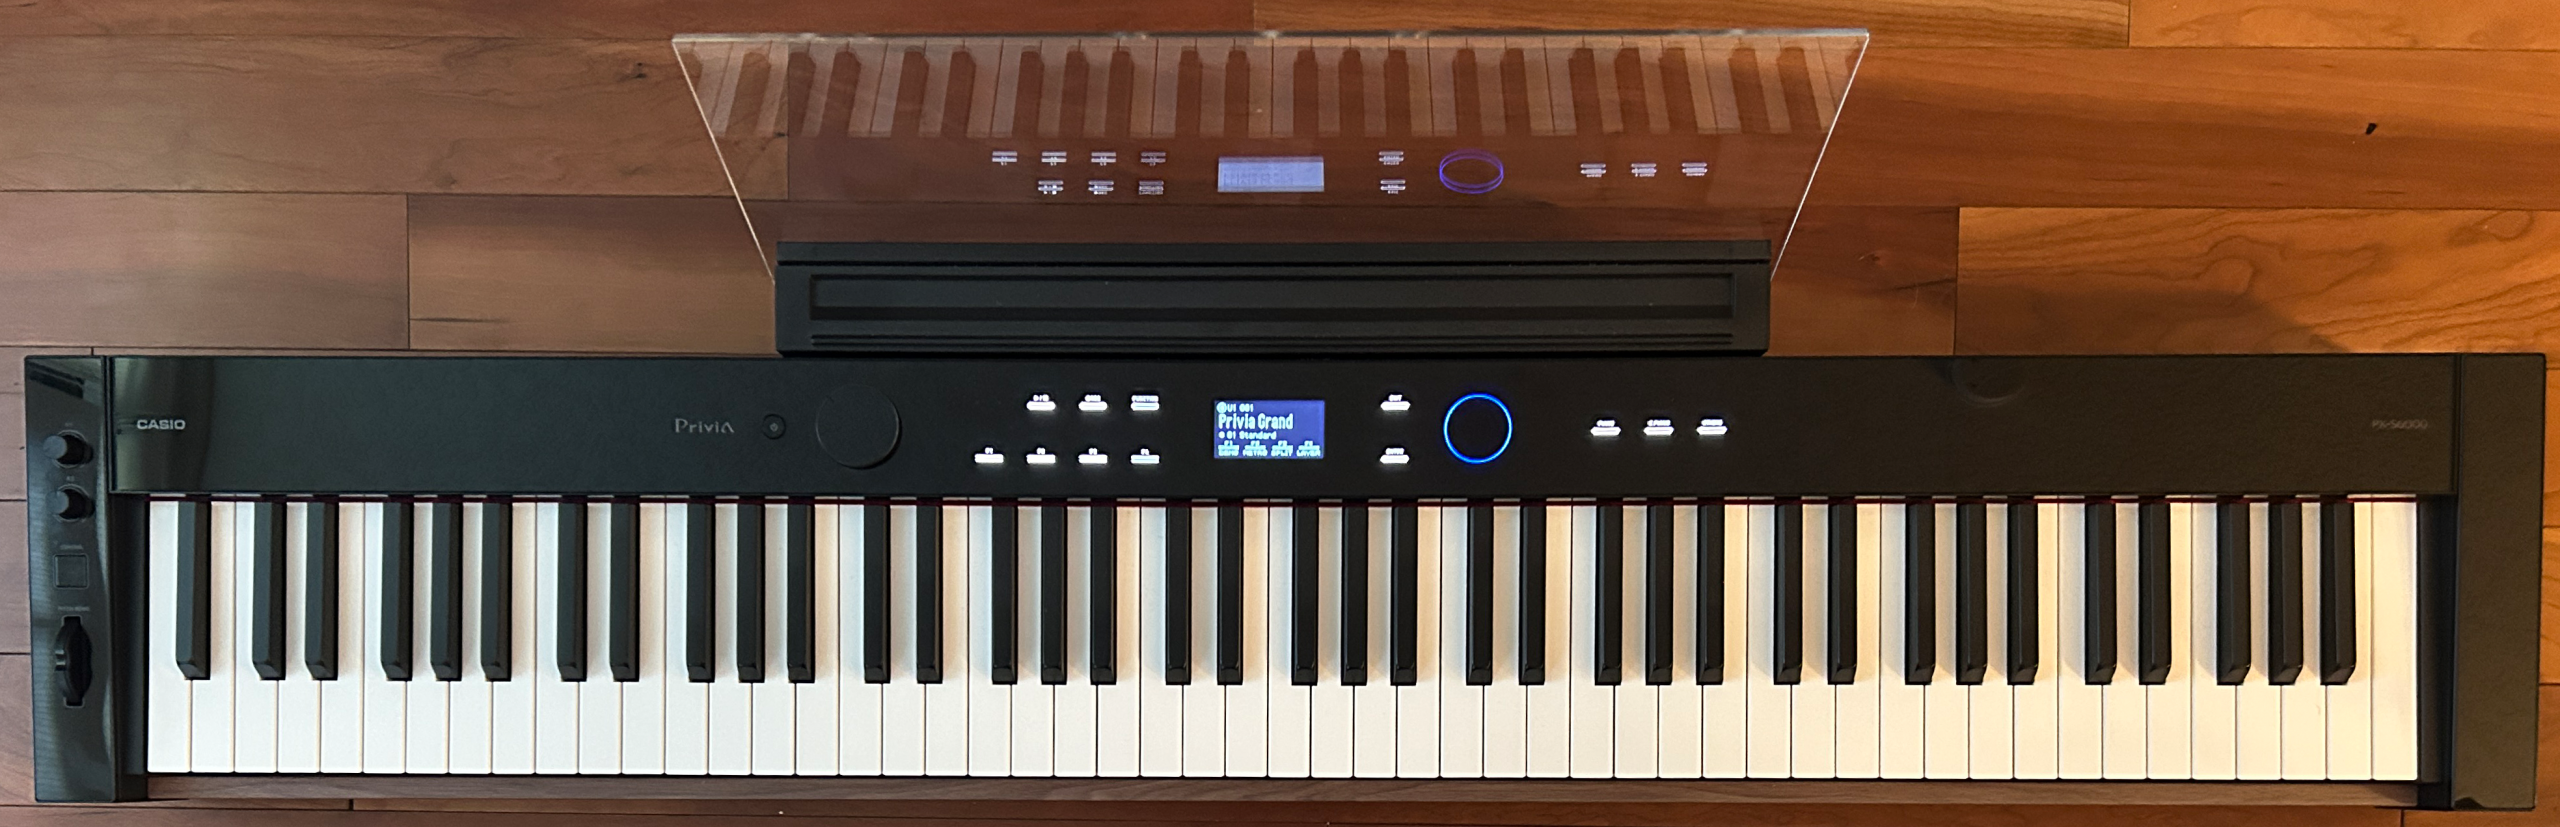
So . . . the verdict is pretty easy on the Casio Privia PX-S6000:
This is a FABULOUS Piano!
I can HIGHLY Recommend The PX-S6000!
If you’re looking for a portable & stage ready digital piano that checks all of the boxes for a PREMIUM level product? The Casio PX-S6000 is a great choice; it offers comparable features to the top of the line competition, and offers quite a bit that the premium competition does NOT:
- an awesome to play fully weighted and graded, wood & resin composite PREMIUM key action
- a fantastic, highly detailed main piano sample, and tons of other great quality voices
- user friendly, fast and intuitive user interface that you can actually customize
- 1/4″ left and right outputs for proper connections to external audio equipment
- 100 EDITABLE DSP effect presets and live control knobs
- 96 registration memory slots
- onboard drumbeats in various styles that are super handy for practice
- BlueTooth audio in for streaming in external audio
- a mic input with gain and effects presets
- 32 watts of speaker power
- super solid build quality & a great music rest
- for portability it’s super slim, narrow & thin, so less bulky AND lighter at 32 lbs when compared to the competition at up to FIFTY pounds or more; and it can run on batteries
Thanks so much, and happy keyboard playing! (and keyboard shopping 😉 )
So that’s pretty much it for this review and tutorial, I hope you found the content useful if so please feel free to smash the like button and subscribe to my channel, that does really help me out. I’ve left links below to my MUCH shorter initial reaction review on the PX-S6000, as well as links to other relevant videos of mine, and links to check out current pricing on products I’ve mentioned in this video. And as always, I’ve also left links for you to check out online piano training that worked really well for me that I can highly recommend. So thanks again for stopping by, and happy piano shopping! Have an awesome day!
Check out current pricing in your area:
Piano Training I Recommend
I’ve taken a number of online piano courses and tried various piano learning apps; the ones I’m listing here are my favorites and I can highly recommend any of these if you are looking for some online training to get started on learning piano, or to take your current skills to the next level.

Bird’s Piano Academy is one of my absolute favorite online piano programs. Arthur Bird has created multiple courses on getting started learning piano quickly as well as great intro courses on Blues, Jazz and more. And his courses are chord based, so you don’t have to read sheet music which is AWESOME and definitely the fastest way to learn to play modern music. You can go with a subscription that includes ALL his courses, or you can buy individual courses a la carte with LIFETIME access – HIGHLY RECOMMENDED!
If you’re looking for the least expensive way to get started on piano, Pianoforall is a great option. It’s a unique course created by Robin Hall that uses downloadable eBooks with embedded videos and audio instead of a website.
This course is an amazing option for learning piano from beginner up to being able to perform; it teaches multiple genres of music and focuses on how to be a “one person band” on the piano. This course is taught by pro pianist Steve Lungrin – Steve has been teaching and performing his whole adult life and is a fantastic instructor and performer.
I took this course from 2020 to 2021 and it elevated my playing from a very basic level to being able to play songs in multiple genres.
I was super excited when Simply Piano added the “Chords Path” to their super popular piano training app (iOS or Android); this path allows a new student to get started learning piano using a chords based approach (which I HIGHLY recommend over a traditional approach). Learning to play using chords is by far the easiest and fastest way to learn to play modern songs (MINIMAL sightreading ability is needed). I did the entire chords path, and can highly recommend that you check it out (you will get a trial period so why not?)
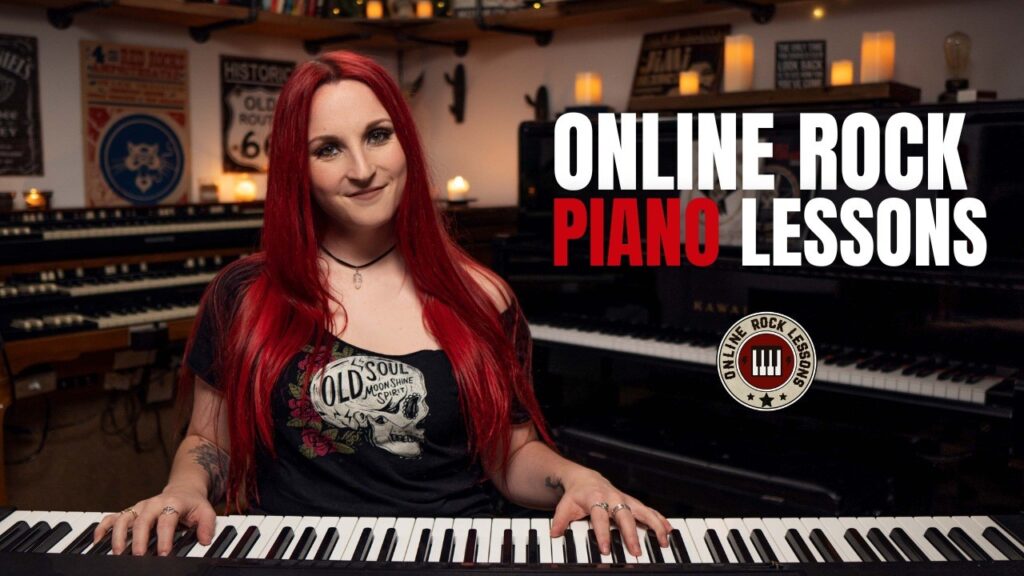
This is a fantastic option if you are mostly interested in rock music. This course was created and is taught by Marine Lacoste, who is not only a fantastic instructor & pianist, but she is also a very accomplished hammond organ player – she performs regularly with her own band, as well as playing keys regularly for multiple recording artists on tour. I started this course in 2023 when I joined a band, and it is helping me greatly in taking my playing to a new level. And Marine is constantly adding new content, and is very active on the platform.
If you sign up for Online Rock Lessons yearly subscription, use code PIANOTONE at checkout to let Marine know I referred you, and she will give you some free bonuses!

This is a fantastic (but pretty unique) online program for taking your piano and organ playing skills to the next level, developed by pro piano, keyboard & Hammond organ player Mike Little. Mike shares tips & tricks accumulated from over 30 years of pro touring, gigging, studio & production experiences. This course isn’t for a COMPLETE beginner, but you don’t have to be a super accomplished player either, to get TONS of value from this program!

Ultimate Piano isn’t an actual course to learn how to play, but it IS a really helpful TOOL for piano students. You connect your keyboard to your computer, go to Ultimate Piano’s website (so NOTHING to install!) and you have a ton of helpful training and exercises at your disposal, as well as built in piano sounds. With the help of on screen light up keys, you can learn and practice scales, chords and even ear training and you can play along with MIDI or audio files, and even YouTube videos to practice songs!