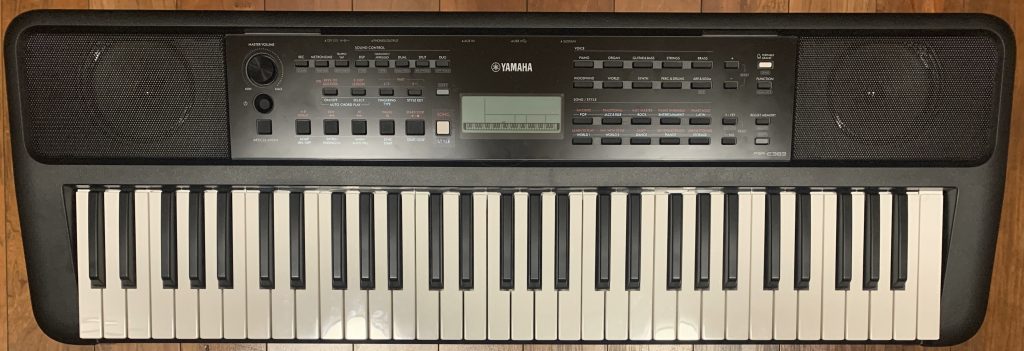
This is my review on the Yamaha PSR-E383 portable arranger keyboard; this keyboard really is the best overall bang for your buck beginner keyboard on the market – it has tons of great sounds for the price (most notably a fantastic piano sound); it has tons of accompaniment patterns that you can play along with as an arranger keyboard, or you can just use the drums as a much more fun and engaging way to keep you in time than a metronome; it is insanely portable at only about 10 pounds, and all of this will currently only cost you about $200USD. Do note that this review also applies to the Yamaha PSR-EW320, which is the 76 key version of the PSR-E383.
PSR-E383 vs. PSR-E373: How Big Is The Upgrade?
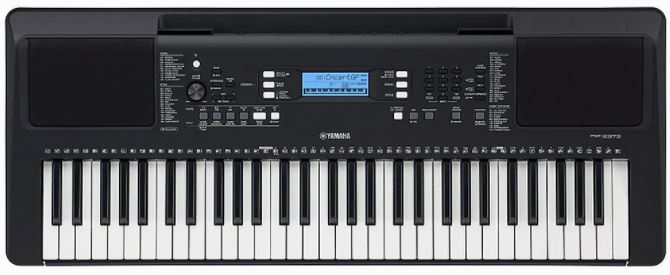
So the Yamaha PSR-E383 replaced the PSR-E373 in mid 2024, but the E373 WAS around for a while, and was one of the best selling entry level keyboards EVER, so it IS very well known among enthusiasts. So, since many of you probably already know alot about the prior model, I thought I would start off the review just with a quick summary of what’s different or new:

- The Price Is The Same: (at least where I live)!!! I know that’s not different, but . . . that’s AWESOME that Yamaha didn’t increase the price on the new model; they both still sell for about $200USD
- Size & Dimensions: the Yamaha PSR-E383 is 1/2 a pound lighter, 1/3″ thinner, and a whopping 2 inches narrower than the PSR-E373! This is awesome because the E373 was a bit on the bulky side compared to the competition
- User Interface: the user interface has had a pretty significant makeover; I’ll go over the user interface in detail later on in the review
- Sounds: There’s no significant upgrades here; there are a few more sounds (650 vs. 622), but when there’s so many in the first place, that’s not a huge change. The main sound samples including the main piano sound seem to be unchanged, and there is no upgrade in polyphony which remains a bit low at 48
- Rhythms & Accompaniment: There are 260 styles now vs. 205 on the prior model so there is an increase there, but I was a bit disappointed that Yamaha is STILL only offering 2 chord fingering options, Multi Finger & Smart Chord, so they are really lagging behind the competition here by not offering more options like full keyboard chord detection
- Built In Chord Progressions: This is probably the most significant new feature: there are 50 built in chord progressions that you can play along with using any of the built in styles as backing!
Yamaha PSR-E383 Review – The Details
Key Action
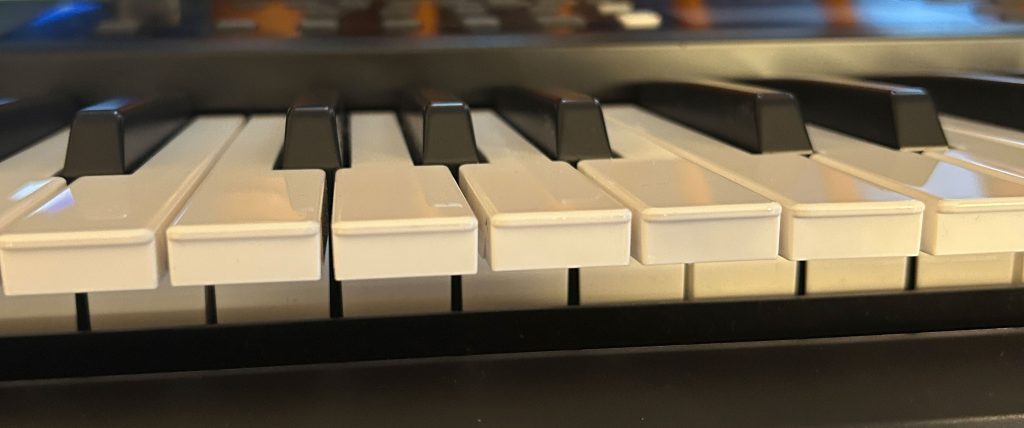
The Yamaha PSR-E383 has 61 full size organ style, NON weighted synth action keys with 4 layers of touch sensitivity. The keys are pretty light to play (so they will feel NOTHING like the keys on a real or weighted digital piano); but they are fast, responsive and fun to play, and once you’re used to them, it’s pretty easy to control your dynamics. I’m used to playing fully weighted (or lately more often semi-weighted) keybeds, so I’ve found that setting the touch curve on the PSR-E383 to HARD works well for my playing style.
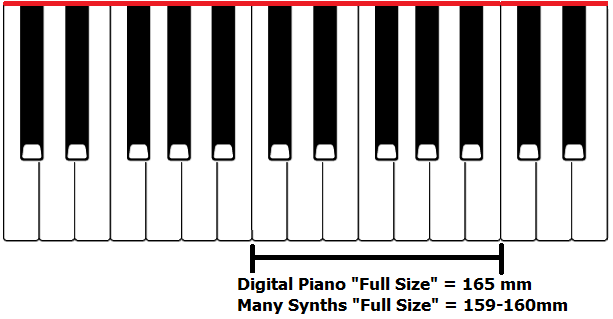
Since these are “diving board” synth action keys, they are thinner than a “box shaped” piano style key. And, even though they ARE marketed as “full size”, like most non weighted synth action keybeds from almost all manufacturers, they are slightly narrower with an octave width of 159mm as opposed to 164-165mm (like most fully weighted hammer action pianos). So . . . is the width difference a HUGE issue? I used to think it was a bigger deal than I do now, so to be honest . . . I wouldn’t worry about it; just something to be aware of.
So while the action is light and not really anything like a piano, it does feel well built, there isn’t a ton of side to side movement. and it is responsive. While there are people out there who will say “you HAVE to have fully weighted keys”, in my opinion non weighted synth action keys are still fine for a beginner, as long as they are touch sensitive (which these ARE); that means that if you press the keys harder you get a louder piano sound, if you play softly you get a softer sound. The less expensive PSR-E283 does NOT have touch sensitive keys, so I would NEVER recommend that model. And as you learn to play and gain experience, you can decide for yourself if having fully weighted keys matters to you or not, and take that into account if you decide to buy a more expensive keyboard. And if and when that time comes, with the PSR-E383 you won’t have broken the bank on your first keyboard; and regardless of whether your next purchase has fully weighted keys or NOT? Having a 10 pound keyboard with good sounds that can run on batteries is ALWAYS a nice thing to have lying around.
Menu & User Interface

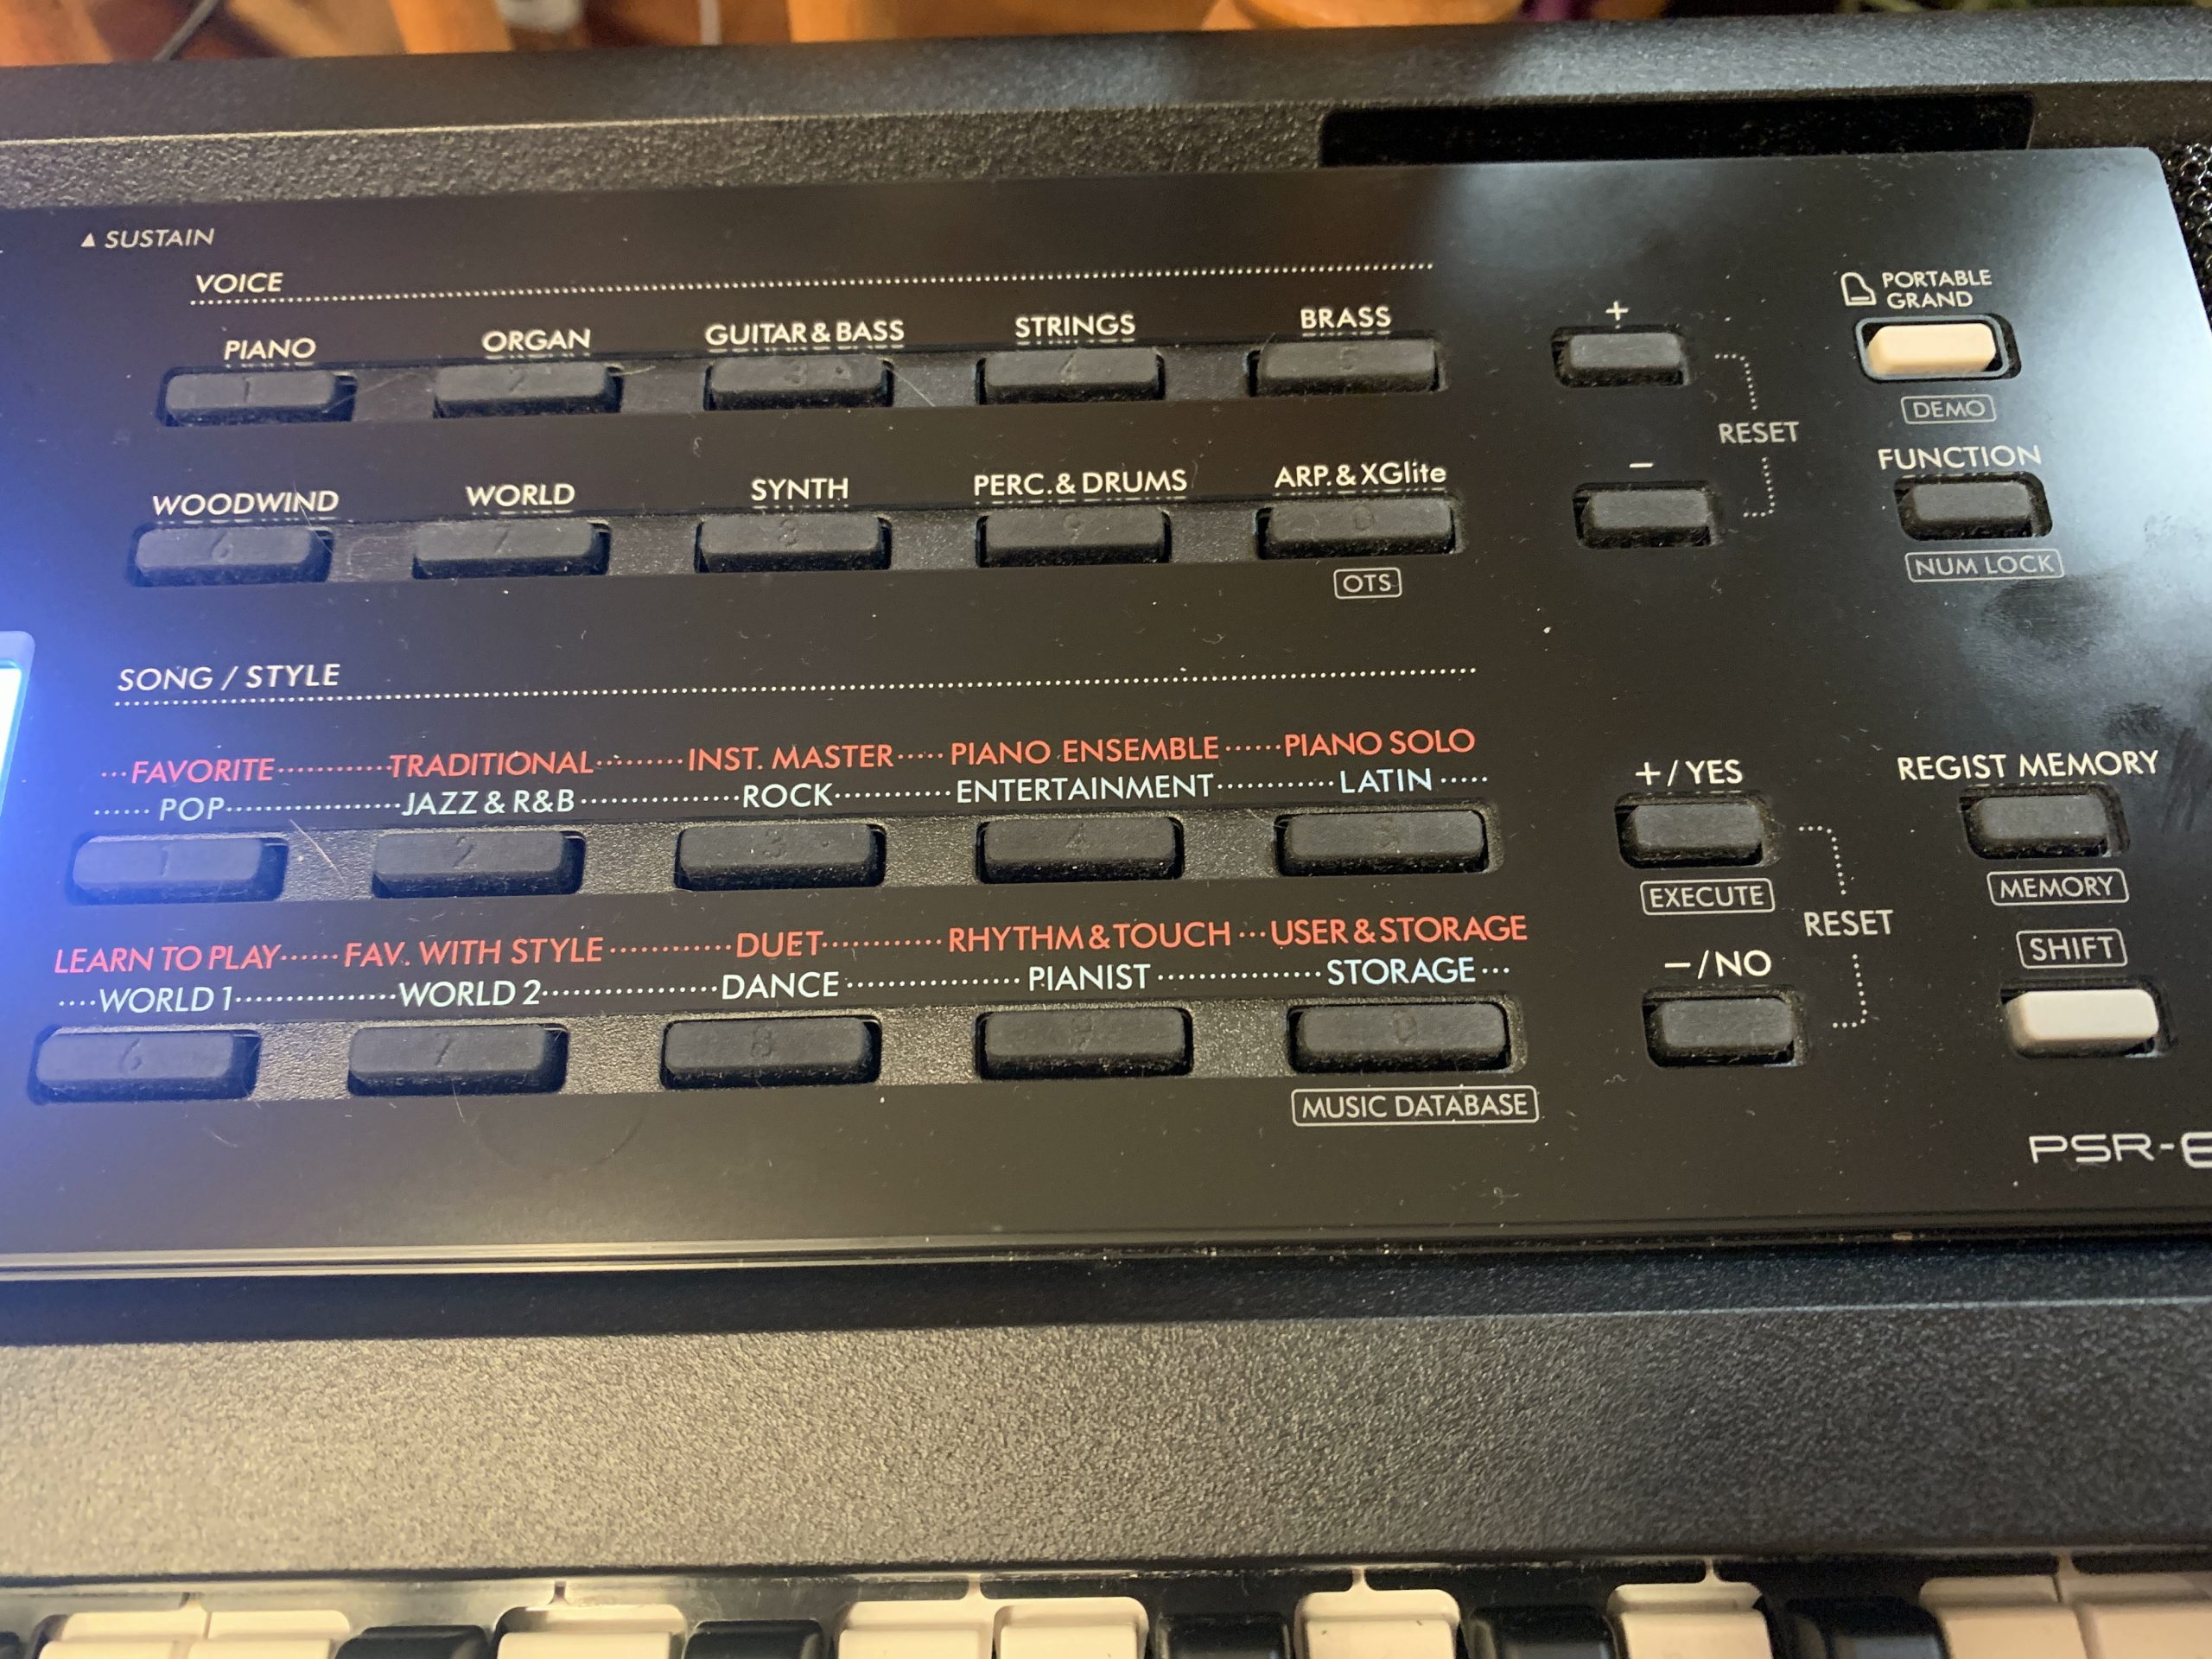
OK so for the user interface, the general layout is as follows: The left half of the interface deals with controlling your overall sound settings (so splitting, layering & effects), working in STYLE mode with your rhythms & accompaniment, and some of the extra features like auto chord play, and working in SONG mode, which is used both for recording our own songs, as well as playing back with built in songs, AND using the built in “Keys To Success” piano lessons. In the centre we have the display screen, and on the right side we have the voice selection, the song and style selection, and then to the right of THAT we have buttons for navigating through options & choices, confirming selections, and then buttons for accessing the Function menu & registration memory.
So the first thing to mention is MOST of the buttons on the PSR-E383 can do more than one thing. Buttons that have grey text in a rectangle BELOW the button allow you to access that functionality by holding one of the SHIFT buttons when you press them. If you DON’T hold the SHIFT button, then the white text above the button is what you’ll be accessing. So for example, if I press the SPLIT button that will turn splits on or off (you’ll see that reflected on the screen) and if I hold SHIFT and press this button I get to choose the split voice. Then you’ll also notice a lot of the buttons have both red and blue text labels; the blue text will apply if you are in STYLE mode, and the red text will apply if you are in SONG mode. As I mentioned earlier, STYLE mode is used with rhythms and accompaniment as well as Auto Chord Play, and SONG mode is used with recording, playing back built in songs and using the “Keys To Success” lesson system. And you switch back and forth between those modes using this white button (and the current mode will also be indicated on screen).
So just to go over some general navigation; for choosing voices or styles, you can use the category buttons to jump to a category, and then the +/- buttons to the right of the category buttons to navigate one voice or style at a time. Now if you look closely at the category buttons in both the voices & styles section, you’ll see numbers have been carved into them – that’s because if you activate NUMLOCK, then you can use these buttons as a number pad to go DIRECTLY to a voice or a style (if you happen to have that number memorized). So to activate NUMLOCK – if you take a look at the FUNCTION button, it has grey text in a rectangle below it that says NUMLOCK; so that means I can hold SHIFT and press FUNCTION – now you’ll see NUMLOCK on screen. So now I can use the voice keys as a number pad to go straight to a voice; I’ll just type 042 – you can see that takes me to voice #42 which is a Jazz Organ. And I can do the same thing with the styles – I’ll type in 111 and that takes me to style #111. Personally, I would never bother with this, I’m quite happy to just use the category and +/- buttons to navigate (so I don’t have to memorize numbers); so I’ll hold SHIFT and press FUNCTION again to turn numlock back off.
Now while there are some direct access buttons over on the top left of the keyboard to jump directly to certain settings in the function menu, you will still need to browse through the function menu to access other settings. To be honest, when you first get your PSR-E383, it would be a good idea for you to browse through all of the settings available in the function menu just to familiarize yourself with what’s in there. So to open the function menu, just press the FUNCTION button. So in here, you’ll use the TOP set of +/- buttons to navigate BETWEEN all the settings in the function menu, and you’ll use the LOWER set of +/- buttons to EDIT the current setting. For example if I use the top buttons to move to the split point, then I can use the bottom +/- buttons to edit that setting (you’ll see the split point moving on screen). And just as an FYI, some of the most common settings you’re likely to be using in here relate to the main, layered and split voice settings. For example, the settings starting with “M.” relate to your main voice, so we’ve got volume, octave, reverb level & chorus level, then we get to the ones starting with “D.” so that’s your dual or layered voice, then the ones that start with “S.” are for your split voice. And also, note that when there IS a direct access button you can use, for example if I hold down SHIFT and press TEMPO to get to the split point setting, all that is doing is taking me DIRECTLY to that particular item WITHIN the function menu. And to get OUT of the function menu when you’re done, just press SHIFT.
And the last user interface thing to mention has to do with registration memory; I will be going over how to actually use this later in the review, but just an FYI; you use the LOWER set of number pad buttons when working with registration memory.
The Voices
There are a staggering 650 voices on the Yamaha PSR-E383, including some very high quality and unique ones (especially at this price point). There are 258 “panel” voices, which are really the “main” ones (the best quality). 12 of those voices are “Super Articulation Lite” which allow you to trigger a different version of the sample using the “Articulation” button on the left of the panel (or the pedal if you set that up in the function menu). The remaining voices are either drums or “XG Lite” voices, which are voices brought forward from prior models using older samples – they are by no means “bad” and are nice to have, but are not quite the same quality as the main panel ones.
With that being said, there are some spectacular voices in the main panel voices library. The first one, and arguably still one of the main highlights of this keyboard is the main piano voice. This (I’m pretty sure) is the exact same main piano voice from the PSR-E373, but it was a MASSIVE upgrade from the PSR-E363, and even without seeing an upgrade on this new model? It is still a fantastic piano sample at this price point. The voice is sampled from a Yamaha grand piano, and is a very high quality sample that was the main piano voice on Yamaha’s retired Tyros keyboards (which sold for thousands of dollars). In my opinion this piano voice can actually rival alot of piano voices on much higher priced keyboards, and even some budget digital pianos; it definitely holds up VERY well against any of the competition.
As with the PSR-E373, there are also the “featured” voices called “Live”, “Sweet” or “Cool”. These are higher quality samples (mostly keyboard instrument samples like electric pianos) that have some well thought out DSP effects pre-applied to them. Here is a quick video on a few of the voices (there are way too many to demo all of them), and I will also demonstrate the split & layering functionality, and some Super Articulation Lite voices.

The Effects
The Yamaha PSR-E383 has a HUGE amount of effects that can be applied to your voices to customize them to your liking. There are 41 DSP (Digital Signal Processing) effects, 15 types of reverb (with adjustable levels), 7 types of chorus, 5 types of master EQ configurations, 26 types of harmony and 152 types of arpeggios to choose from.
So with all of these effects at your disposal, you have a ton of options and combinations to fine tune your voices to your liking. This is just a VERY quick example of a couple of effects you can use:
Rhythms & Accompaniment
The PSR-E383 has 260 rhythms from a wide variety of genres with optional sync start, intros, endings, fills as well as optional accompaniment, which includes backing bass and a rhythm section. A nice feature here is you can adjust the rhythm & accompaniment volume if you want it adjusted relative to the main voice you are using with setting #17 in the function menu, “StyleVol”. If you don’t want the accompaniment, you can just play along to the drum track, and still take advantage of the variations (2 types per style; you get a fill when you switch between them) as well as optional intros & endings. So even if you aren’t interested in the arranger features, having a wide selection of drum styles to play along with is never a bad thing (and to be honest, I NEVER use a metronome; when I’m practicing, even if it’s just scales or finger exercises, I am ALWAYS using a drumbeat – it’s just far more engaging than a metronome). And for voice selection for your right hand, you can also use Yamaha’s OTS (“One Touch Setting”) feature: if I hold SHIFT and press the XGLite voice button (with OTS marked below) then the voice will switch to one that Yamaha recommends with your current style.
For chord fingering options. I was really hoping (and kind of expecting to be honest) that Yamaha would finally catch up to the competition and start including more chord fingering options, but . . . no luck! We are still stuck with only 2 chord fingering options; Multi-Finger and Smart Chord. That being said, Yamaha’s version of multi-finger is actually a combination of TWO modes: a typical multi-finger approach WITH a wizard mode you often see on other keyboards . . . but as a separate mode. Being a piano player at heart, I especially would have liked to have seen some full keyboard chord detection modes. Competition from Casiotone offers 5 chord detection modes, and Roland offers 4, so Yamaha is still lagging behind in this area. You can choose your chord fingering mode by pressing the FINGERING TYPE button (while in STYLE mode). Check out the video below for a demo:
Song Mode / Lessons
There are 125 songs built into the PSR-E383, and this feature is also tied into Yamaha’s “Keys To Success” lessons system. Now I don’t use the songs feature at all, and to be honest onboard lessons on keyboards I think are well beyond being a thing of the past; I would HIGHLY recommend that you look into online training instead, but this feature is here if you want to use it. To access the songs you switch from STYLE mode to SONG mode; and when you do that, instead of seeing styles on screen, you’ll see the song name. And you can scroll through those using the +/- buttons along with the song category buttons to find the one you want. When you press play, you’ll see the notes for the song being played on screen in real time, and you can play along. And if you want to use the lessons features to gradually learn one of these songs you can do so (I’m not going to be demo’ing any of that here; you should really instead check out my recommended online piano training instead 🙂
Music Database
The Yamaha PSR-E383 also has a “Music Database” which is basically a bank of 200 presets for famous songs. So when you choose one, the keyboard will be set to the appropriate tempo, style and recommended voices will also be set for you. To get to the music database (and this is labelled right on the keyboard), you hold down SHIFT and press the STORAGE key (you’ll see MUSIC DATABASE labelled under that key on the front panel). The songs are listed in the “Data List” manual on Yamaha’s website (so not in the main manual), many with “coded” names due to licensing, but they are pretty easy to figure out.

Auto Chord Play
OK so this is (in my opinion) by FAR the biggest improvement made in the PSR-E383 over its predecessor. There are 50 chord progressions built into the keyboard that you can play along with using any of the built in styles. This frees up the entire 61 keys of the keyboard and allows you to just play along with BOTH hands without having to worry about triggering chord changes yourself; the keyboard just plays the chosen chord progression for you, using whatever style you have chosen. This is an AMAZING feature! Now I have already posted a deep dive into this feature on my YouTube channel if you’d like to check that out:
For this review, I will just quickly outline the basics of how to use the Auto Chord feature – if you need more detail you can check out the deep dive video. Here’s the quick overview:
This is a GREAT way to practice chording, soloing or playing with a band. My only complaint about this feature is that Yamaha didn’t take it just ONE STEP further, and allow you to input your OWN progressions, or even an entire song. I first saw that functionality when reviewing the Roland FP-E50 digital piano, then Roland also added that feature to their new Roland GO:Keys 3&5 keyboards – with both of those keyboards, you can input a chord chart for an ENTIRE SONG and have the keyboard play it back! It’s a shame Yamaha didn’t take this feature to the level Roland did, but . . . this is an entry level keyboard that’s less than HALF the price of the Roland GO:Keys 3, so I guess you can’t have everything! It is still an awesome feature!
Registrations
The Yamaha PSR-E383 has the ability to save up to 10 registrations so you can save your current settings (voice, style, tempo, effects, etc) for quick and easy recall. The PSR-E373 had a limit of 9, so it is up by 1, but for an arranger keyboard that has SO MUCH customization available, 10 registrations is REALLY low – would have been a big add if Yamaha could have increased this to a more realistic number.
You can save and recall registrations quickly and easily just using the keys in the bottom right “Song/Style” section. Press the REGIST MEMORY button then one of the numbered keys to load the registration you want (1-0; they’re not super easy to see the numbers, the numbers are just recessed into the buttons). To save a registration, you set up the settings you want, and then hold SHIFT and press REGIST MEMORY and the keyboard will ask you what number you want to store your registration in. When you load a registration, you’ll see this indicated on screen in a couple of places, an “R##” in the centre area of the screen, and the word “REGIST” will appear in the bottom right corner.

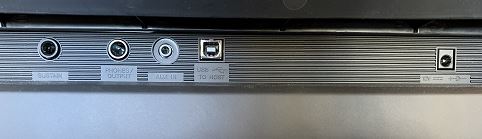
Connectivity
For connectivity, we have the following:
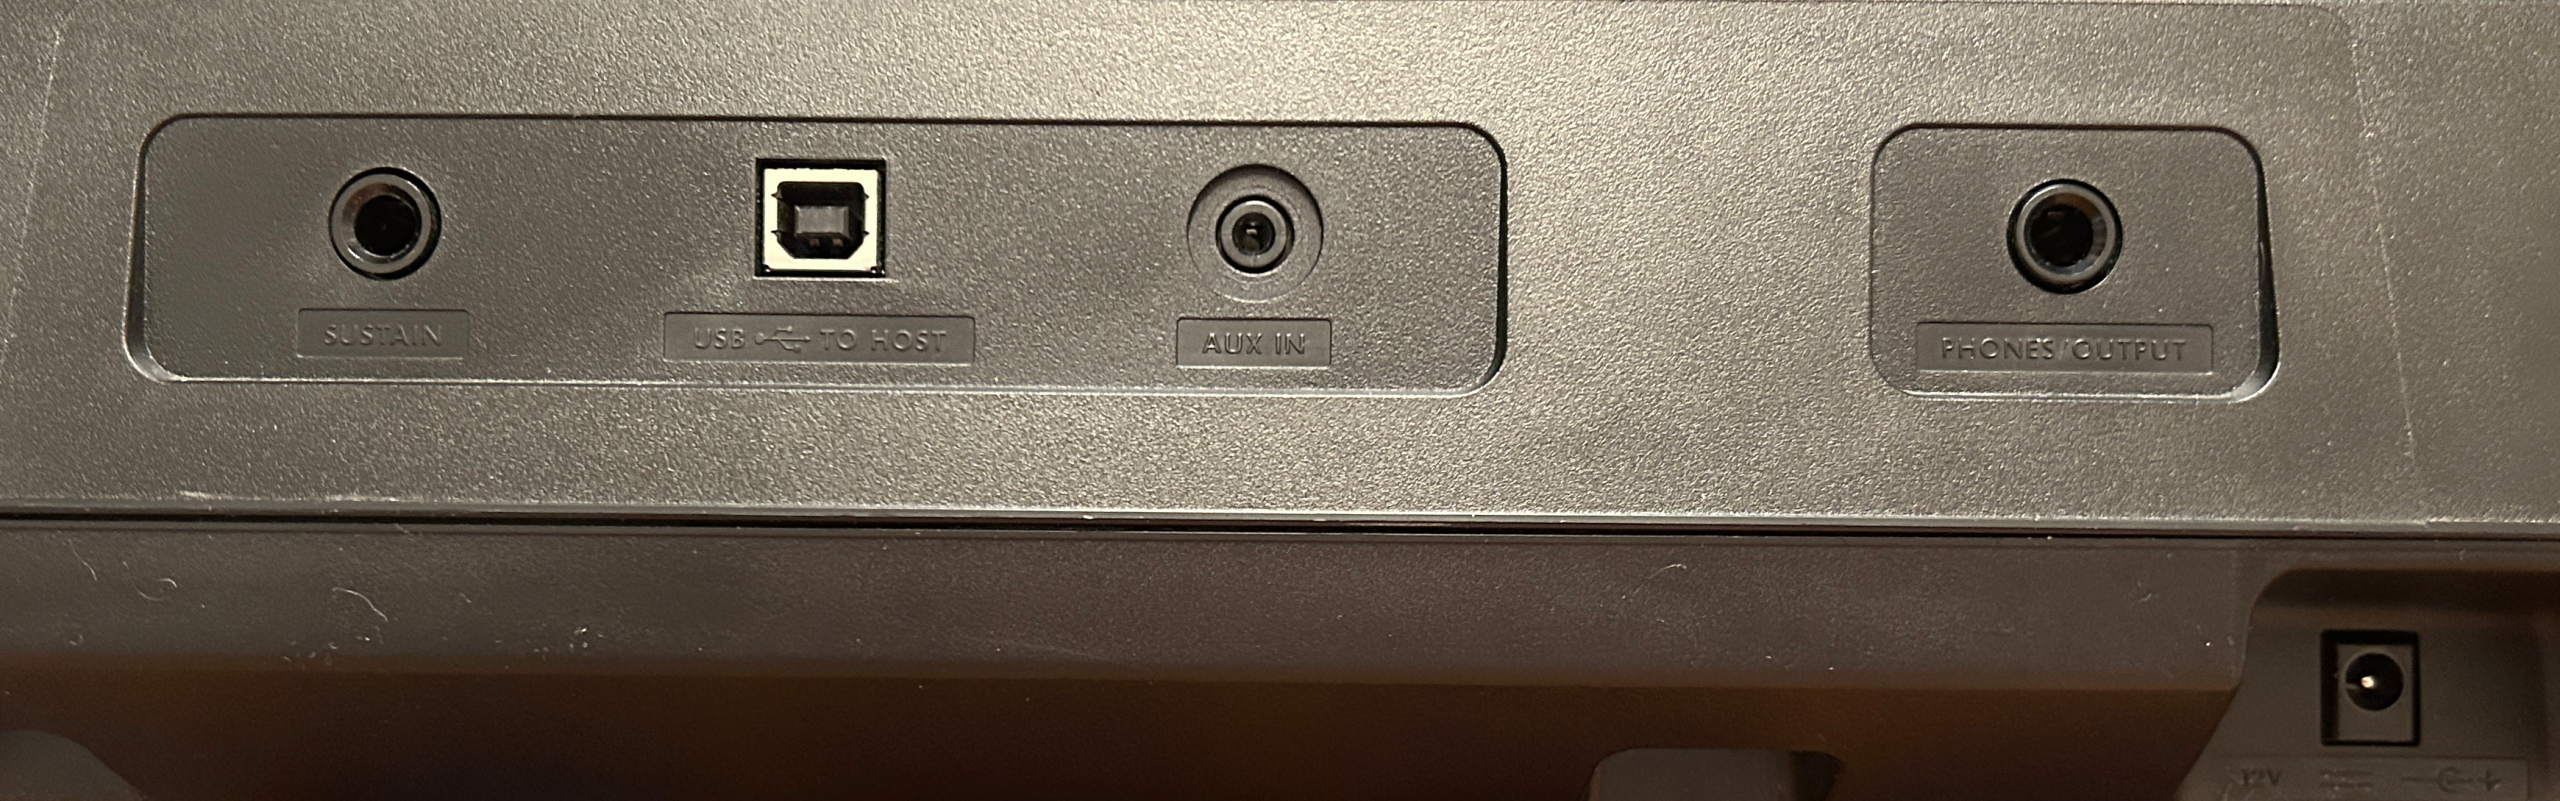
- a 1/4″ port for a sustain pedal (note that there is no sustain pedal included with the PSR-E383)
- a 1/4″ stereo headphone port that also doubles as your only option for an audio out source to connect to external speakers, an audio interface or PA etc. While it’s not ideal to not have proper L&R line out ports for these connections, it’s pretty standard to only have a headphone out in this price range
- There is a handy 1/8″ audio in so you can connect an external sound source like an iPad to play along with YouTube or apps etc.
- Then we have a HUGE feature: the Yamaha PSR-E383 has an audio interface built into the USB to device port; so on most keyboards, this port is used to transmit only MIDI data (which is the data of what you play, not the actual sound of the keyboard) to a pc or iPad so you can then work with that MIDI data in recording software (using the sounds built into the software, not the actual sounds from your keyboard). But with the built in audio interface, you can not only transmit MIDI data, but you can also transmit AUDIO data (which IS the sound of your keyboard) in both directions using this port. The benefits of this are huge:
- This allows you to record audio without the need for an external audio interface device – with most keyboards to record audio, you have to use the line out/headphone ports to connect to an external audio interface device which in turn connects to a pc or tablet running recording software like GarageBand; with the PSR-E383 you can record audio directly to your device
- You can also use this connection as an audio in to stream audio from your device to your piano so you hear that audio through your speakers / headphones, as an alternative to using the audio in port
Speakers
The speakers on the Yamaha PSR-E383 are 5 watts total (2.5 per side) so they are definitely intended just for practice or playing in a small room. Although small, they do project well and are clear, good quality speakers. But if you want to use this keyboard to perform in any scenario (other than performing for your family in the living room), you WILL need external amplification of some sort. While the speakers themselves remain the same as the prior model, there has been a nice improvement: the PSR-E383 now has metallic grilles over the speakers, which is a nice improvement over the dust collecting fabric covers on the prior model.
Here is a quick video of how the speakers sound as being picked up by the built in mic on my iPhone:
Yamaha PSR-E383: The Other Features
Duo Mode: This is a new addition to the PSR-E383 from the prior model that is common on alot of digital pianos, which lets you split the keyboard into 2 halves with the same octave range. It is meant to have you sit by a teacher and play together. It’s great Yamaha added this, but I’m not sure it will see too much use on a 61 key keyboard, and also given that more and more students are learning with online lessons instead of in person; but . . . it’s there if you want to use it.
Portability: One of the benefits of buying a keyboard without fully or semi weighted keys is portability. The PSR-E383 is SUPER portable: it weighs UNDER 10 lbs, under 38” wide, it’s 12.5” deep and a bit over 4” thick AND it can run on batteries. Fully weighted digital pianos weigh 25-30 (or more) pounds, so a 10 lb keyboard with good sounds is always a nice thing to have around.
“Standard” Features: The PSR-E383 has many standard features you see in almost all keyboards nowadays, such as a metronome, and the ability to transpose keys and shift octaves.
The Competition
Yamaha PSR-E383 ($200USD) vs. Casiotone CT-S400 ($300USD)
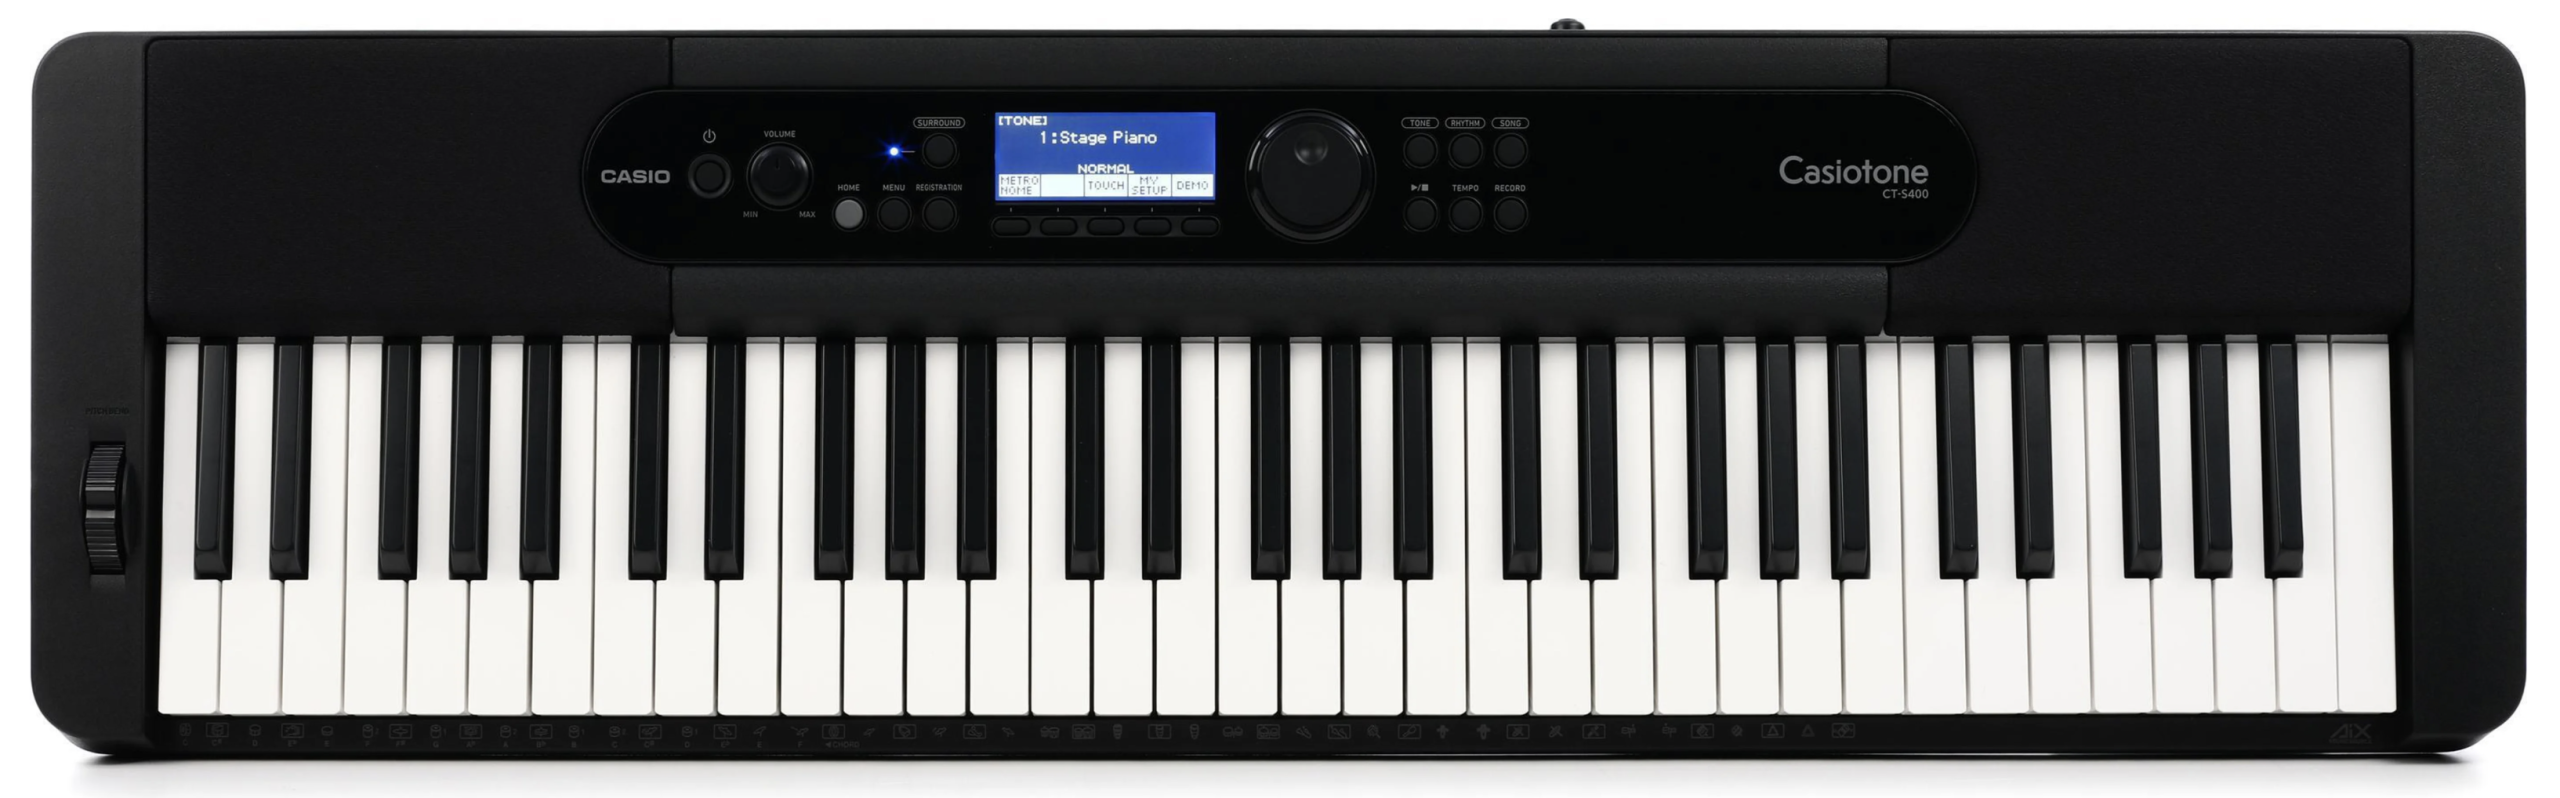
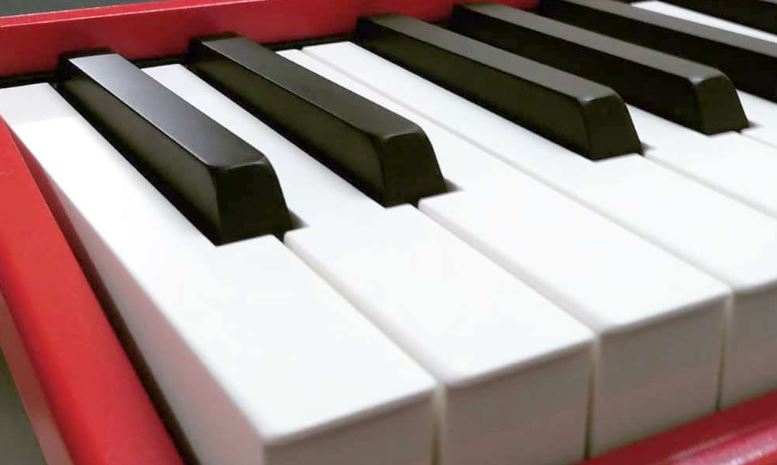
I haven’t reviewed this keyboard yet, but it is more expensive at about $300 USD vs. $200 USD for the PSR-E383, so . . . not really a totally fair comparison. It is also an arranger, and also has touch sensitive keys, and has an action that piano players might prefer because it is heavier and definitely “more pianistic” than the Yamaha’s synth style keys. It’s also super portable with a similar weight and it’s even a bit smaller in dimension. As far as “bread and butter” sounds like piano, electric piano and organ go I personally prefer Yamaha over Casio most of the time, but others will disagree with me. Since I haven’t reviewed this one yet, I can’t comment on the user interface or other features, but the one BIG feature that the Casio has going for it is more chord detection modes for playing with accompaniment (including my preferred full keyboard mode). This one is definitely worth a look.
Yamaha PSR-E383 ($200USD) vs. Casiotone CT-S1 ($260USD)

This is a pretty unique keyboard from Casio that is a popular portable option for pianists, but it too is a BIT more expensive than the PSR-E383 at about $260 USD. Casio took a really interesting approach with this keyboard; it has no display, a very simple interface, no rhythms or accompaniment, and a newer sound chip so it has very high quality sounds, but Casio also included very well thought out effects that are pre-applied to these voices, as well as a lot of articulation samples that are triggered by how you play instead of pushing a button. And there are some very unique voices on this keyboard that don’t exist on any other Casio, even the pricy ones. The action is the same as the CT-S400, a bit heavier and more pianistic feeling.
So feature wise, there is no comparison; the PSR-E383 blows away the CT-S1; BUT, if you’re purely interested in playing piano pieces and don’t care about rhythms, the CT-S1 is definitely worth a look for the key action alone. I reviewed that keyboard here if you want to check it out: Casiotone CT-S1 Review
Yamaha PSR-E383 ($200USD) vs. Yamaha PSR-E283 ($160USD)

This is the cheaper model in the PSR lineup, and I would not recommend this keyboard for one simple reason – it does not have touch sensitive keys, so to me that makes it not worth even considering.
Yamaha PSR-E383 ($200USD) vs. Yamaha Piaggero NP-15 ($270USD)
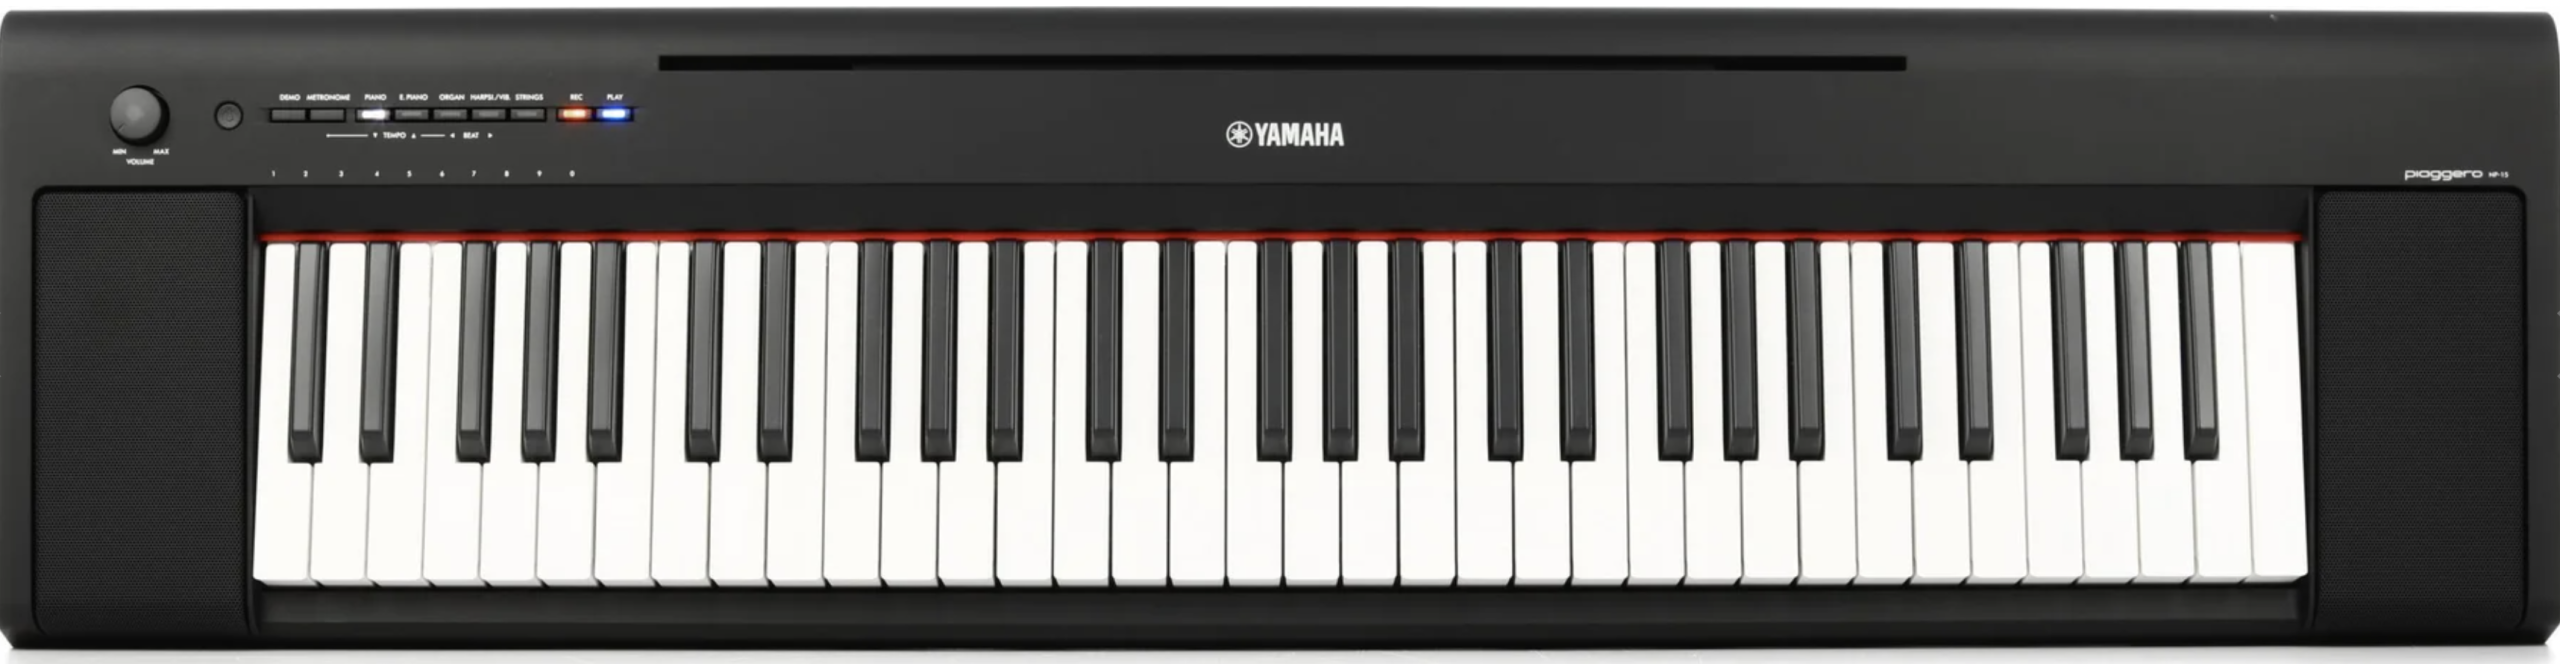
The NP-15 is the 61 key version of Yamaha’s 76 key NP-35, which is Yamaha’s “piano-focused keyboard”. These keyboards (like the Casiotones) also have a heavier action and piano style box shaped keys; the key action on the Piaggero models are actually even MORE “pianistic” than the Casiotones. This keyboard is NOT an arranger, and only has 15 sounds, so it is really trying to focus on “just playing piano” as opposed to having drumbeats etc to play along with – if you only expect to play piano pieces and not bother with extra sounds or arranger features then like the CT-S1, this would be worth considering as an option purely for the “more pianistic” piano action. But once again, the NP-15 is also a bit more expensive at $270 USD, and once again, it pales in comparison to the PSR-E383 in terms of overall features.
Yamaha PSR-E383 ($200USD) vs. Yamaha PSR-E373 ($200USD)
So what about the prior version? Even though the PSR-E383 isn’t a HUGE update on the prior version, it DOES have a better user interface, the new Auto Chord Play feature, and it’s a bit less bulky. So given that Yamaha DIDN’T raise the price on the new version, I would ONLY recommend the PSR-E373 if you can find one on a pretty big discount.
Yamaha PSR-E383: The Verdict
To sum it up, the Yamaha PSR-E383 is (I think) EASILY the best value entry level keyboard on the market today. At only $200USD, you’re getting a keyboard that has some REALLY good quality sounds, tons of effects, some basic arranger features, a responsive touch sensitive key action and some extra features like Auto Chord Play and a built in USB audio interface – and it’s from a reputable, well respected manufacturer like Yamaha.
HIGHLY Recommended!
(As long as you’re ok with the lighter action)
Alot of beginners aren’t going to know yet whether they want to JUST play piano, or maybe as they gain experience they might take an interest in organ, electric piano or even synth playing – if that’s you, then I wouldn’t worry too much about the lighter action (you may end up preferring that over a heavier piano style action). And like I said earlier; when you’re only spending $200USD, you’re not breaking the bank, AND even if you DO end up focusing on piano pieces and investing in a more expensive fully weighted digital piano down the road? Having a keyboard lying around with great sounds that only weighs 10 lbs and can run on batteries is ALWAYS a good thing.
With that being said, if you are SUPER confident that you’re REALLY focused on just piano playing, you might want to take a closer look at keyboards that have a slightly heavier more pianistic style action like the Casiotone CT-S1 or the Yamaha Piaggero NP-15/35.
So with all that in mind, I would definitely recommend the Yamaha PSR-383 if it fits in with your needs and budget. If you would like to check current prices for the Yamaha PSR-E383 or any of the other keyboards I mentioned here, please click my appropriate affiliate link below to check that out. I’ve also included a link to a good generic sustain pedal that has a polarity switch.
Thanks so much, and happy piano playing! (and piano shopping 😉 )
I have included links below so that you can check current pricing
Piano Training I Recommend
I’ve taken a number of online piano courses and tried various piano learning apps; the ones I’m listing here are my favorites and I can highly recommend any of these if you are looking for some online training to get started on learning piano, or to take your current skills to the next level.
Bird’s Piano Academy is one of my absolute favorite online piano programs. Arthur Bird has created multiple courses on getting started learning piano quickly as well as great intro courses on Blues, Jazz and more. And his courses are chord based, so you don’t have to read sheet music which is AWESOME and definitely the fastest way to learn to play modern music. You can go with a subscription that includes ALL his courses, or you can buy individual courses a la carte with LIFETIME access – HIGHLY RECOMMENDED!
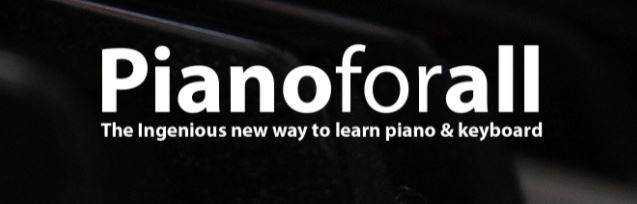
If you’re looking for the least expensive way to get started on piano, Pianoforall is a great option. It’s a unique course created by Robin Hall that uses downloadable eBooks with embedded videos and audio instead of a website.
This course is an amazing option for learning piano from beginner up to being able to perform; it teaches multiple genres of music and focuses on how to be a “one person band” on the piano. This course is taught by pro pianist Steve Lungrin – Steve has been teaching and performing his whole adult life and is a fantastic instructor and performer.
I took this course from 2020 to 2021 and it elevated my playing from a very basic level to being able to play songs in multiple genres.
I was super excited when Simply Piano added the “Chords Path” to their super popular piano training app (iOS or Android); this path allows a new student to get started learning piano using a chords based approach (which I HIGHLY recommend over a traditional approach). Learning to play using chords is by far the easiest and fastest way to learn to play modern songs (MINIMAL sightreading ability is needed). I did the entire chords path, and can highly recommend that you check it out (you will get a trial period so why not?)
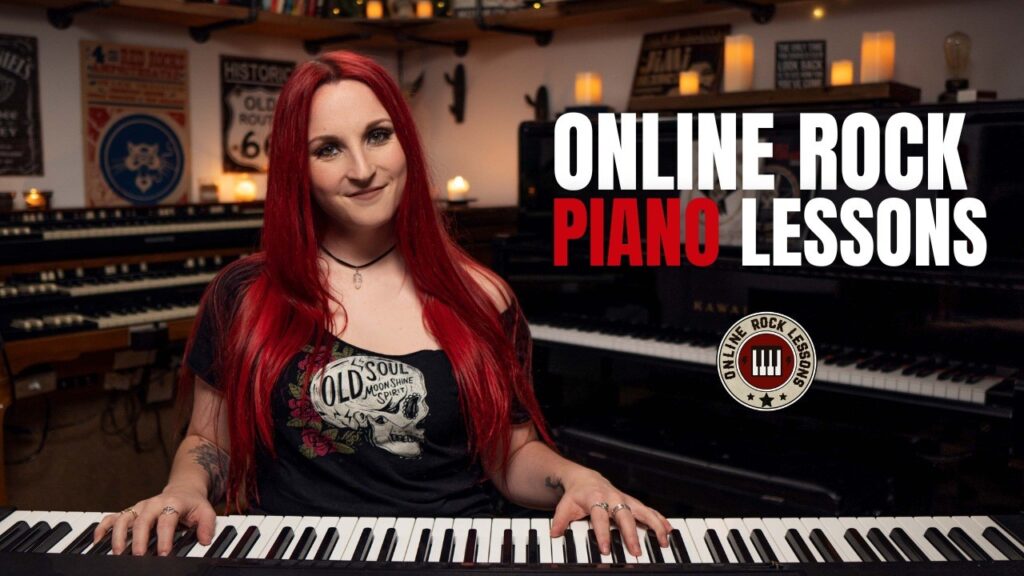
This is a fantastic option if you are mostly interested in rock music. This course was created and is taught by Marine Lacoste, who is not only a fantastic instructor & pianist, but she is also a very accomplished hammond organ player – she performs regularly with her own band, as well as playing keys regularly for multiple recording artists on tour. I started this course in 2023 when I joined a band, and it is helping me greatly in taking my playing to a new level. And Marine is constantly adding new content, and is very active on the platform.
If you sign up for Online Rock Lessons yearly subscription, use code PIANOTONE at checkout to let Marine know I referred you, and she will give you some free bonuses!
This is a fantastic (but pretty unique) online program for taking your piano and organ playing skills to the next level, developed by pro piano, keyboard & Hammond organ player Mike Little. Mike shares tips & tricks accumulated from over 30 years of pro touring, gigging, studio & production experiences. This course isn’t for a COMPLETE beginner, but you don’t have to be a super accomplished player either, to get TONS of value from this program!
Ultimate Piano isn’t an actual course to learn how to play, but it IS a really helpful TOOL for piano students. You connect your keyboard to your computer, go to Ultimate Piano’s website (so NOTHING to install!) and you have a ton of helpful training and exercises at your disposal, as well as built in piano sounds. With the help of on screen light up keys, you can learn and practice scales, chords and even ear training and you can play along with MIDI or audio files, and even YouTube videos to practice songs!