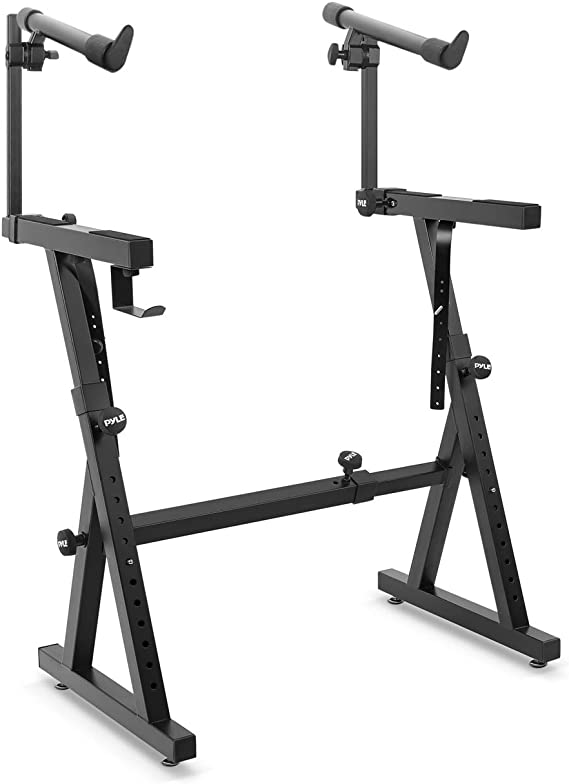
This is my review on my new 2 tier keyboard stand I purchased from Amazon, the Pyle Heavy Duty keyboard Z-stand with 2nd tier. At the time of writing this review, I’ve only had it for a couple of days, but have to say I am quite impressed with it – I hope it holds up!
UPDATE 2023: The Pyle stand was a good stand, but I’m now recommending the Z Stand From Liquid Stands instead! Check out that review here:
Pyle vs. Similar Looking Other Brands?
So the stand I bought is made by a company called Pyle, and it is available as a single tier or double tier, and you can also get it with wheels. (I will include amazon affiliate links to both of those below so you can check out prices on the ones I bought). Now do note, that you may see some other stands under other names (Liquid Stands for example) that look close or even possibly exactly the same. I did some digging online and to be honest I can’t confirm or deny whether these other brands are actually the same thing or not (I found some blog posts saying they are the same, and others saying they’re not), so just be aware my review is on the Pyle branded version.
Why A New Stand (And Why A “Z” Stand)?
I actually have a nice wooden piano table I built myself when I first started playing piano:
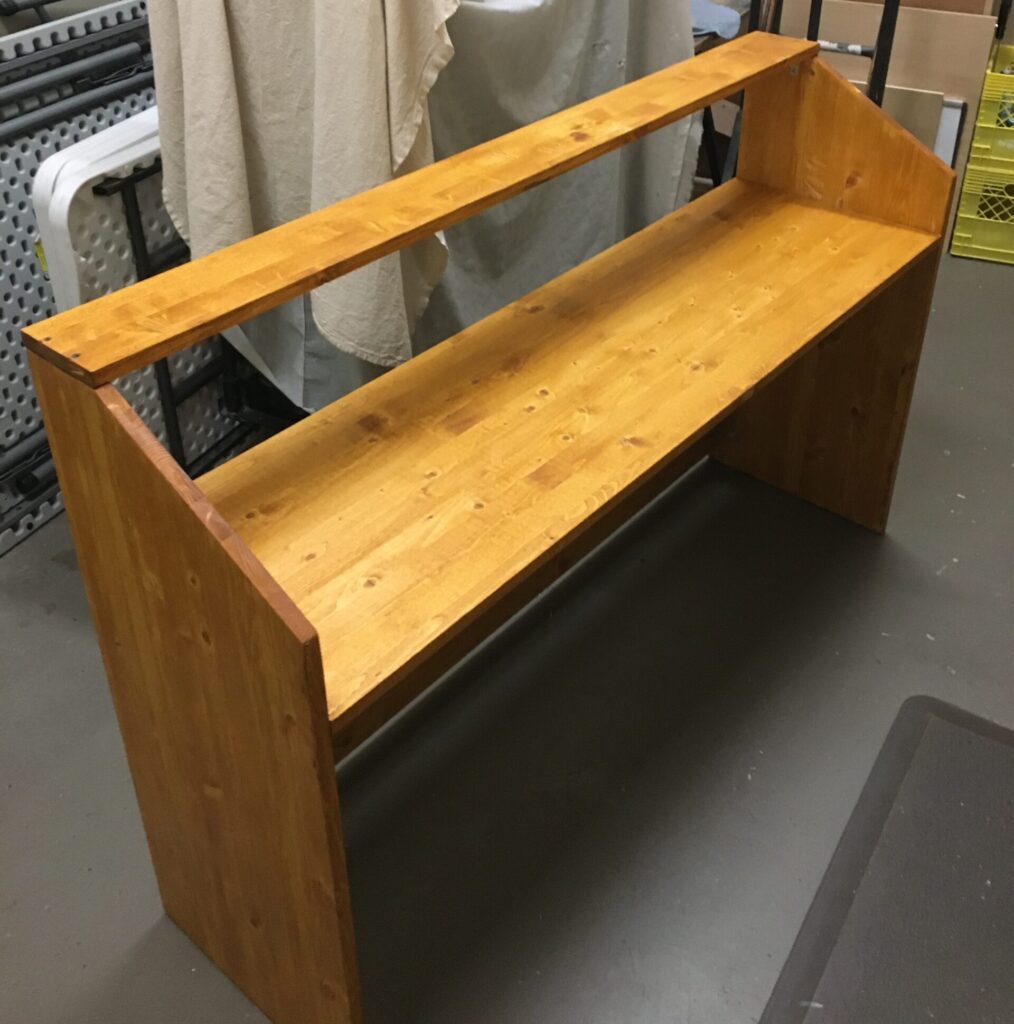
and it is in my living room holding my Casio PX-S3000 piano; I love that table, but it has had the shelf moved up and down SO many times (someone KEEPS buying new keyboards!!), I really don’t want to modify it any more. Here is a link to the post all about my Custom Stand if you want to check it out.
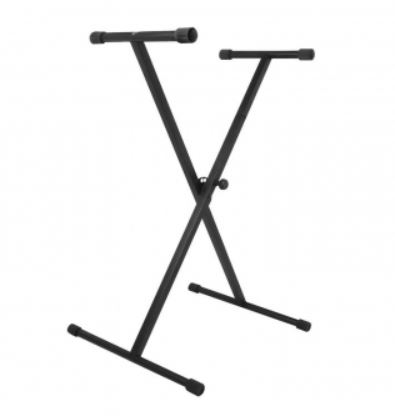
I have (I think) finally settled in to all the keyboards that I will own: In addition to my Casio PX-S3000, I also have a Casiotone CT-S1 and recently added a Yamaha PSR-EW425, so it was time to upgrade my cheap single X stand which is WAY to wobbly for my new Yamaha (and getting a stand with a 2nd tier means my CT-S1 doesn’t get relegated to the closet).
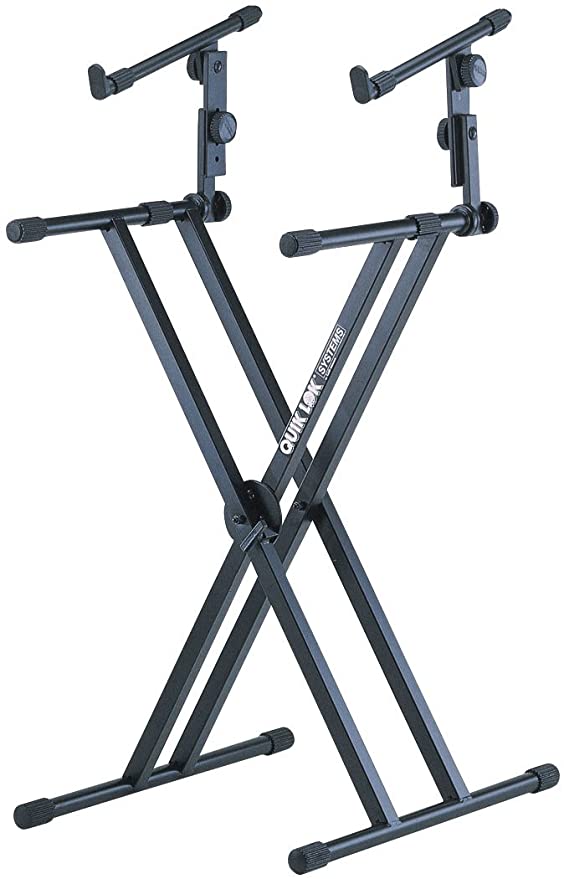
I almost bought a 2 tier double braced X stand from my local music store that they use to display their keyboards, but I’m in a small space, and I really wanted to have as much leg room (and under keyboard storage area) as possible, so I decided to go with a Z stand, and I have to say, this was a great choice. While the double braced X stands do seem OK, I think the Z stand is even more stable and offers the leg room advantage.
The Build
The build took me about 30-45 minutes a lot of that was spent adjusting the width to fit my keyboards, but it puts together quite easily. There was one minor issue with one of the upper tier arms, which I discuss and show how to fix in the build video coming up, but it wasn’t a big deal. The ONLY thing I’m not super thrilled about is that my OnStage mic adapter that I bought to hold a mic on my X stand doesn’t work with this stand if I have the 2nd tier in place; it would work if I took off the 2nd tier, but having the 2nd tier was one of the reasons I bought this.). I included the build process in my full YouTube review which I have a link to at the bottom of this page if you want to check it out.
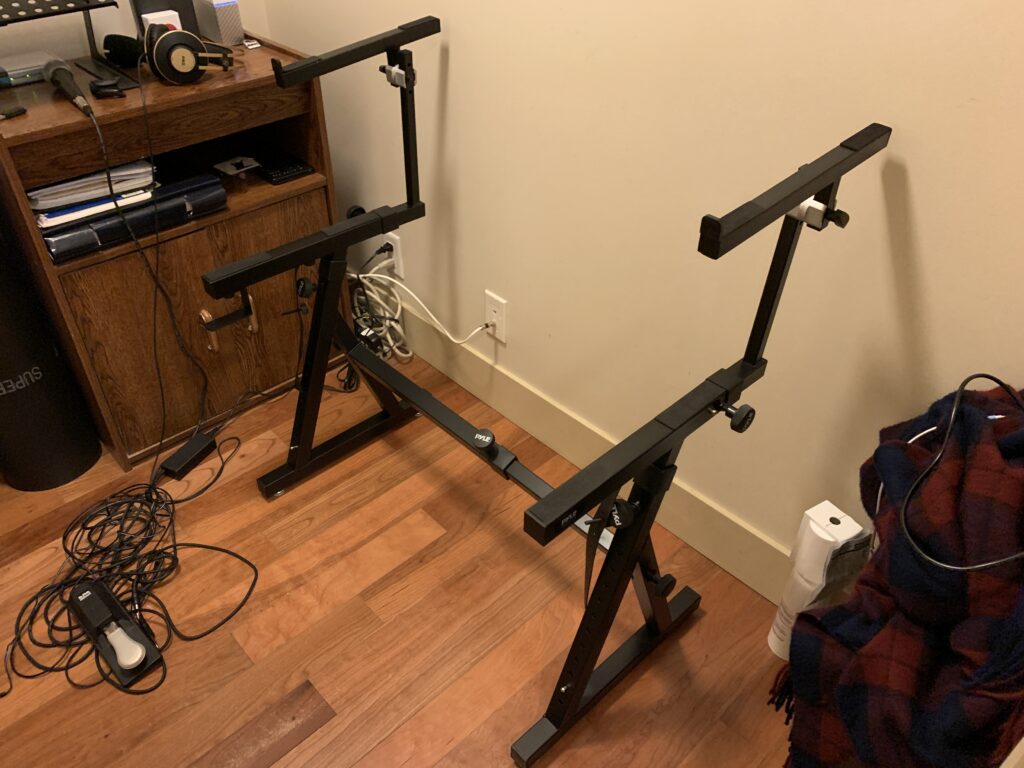

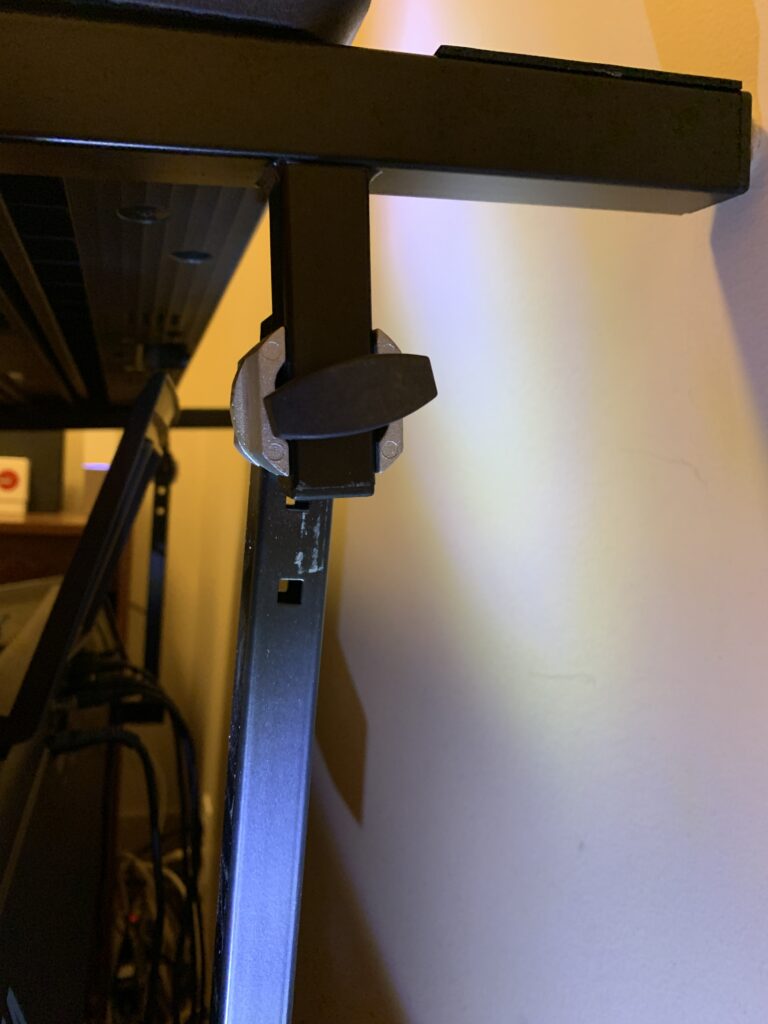
This stand has is SUPER stable, and has a ton of small increment height adjustments which is awesome. And it can stretch out to 37” wide which is super cool, although I had to since that in about 3 or 4 inches so that my Casiotone CT-S1 would fit on the top tier. There is a really handy headphone hook, as well as rubber strips with screws you can use to secure your keyboard to the stand (assuming your keyboard has the correct mounting holes within reach). I didn’t see any such holes on my Yamaha, but I don’t need to bother with that anyways because the stand is super stable, and the arms even have nice rubber pads on them which keep the keyboard from sliding around; I tried pounding on it pretty hard, and it does NOT move at ALL which is great.
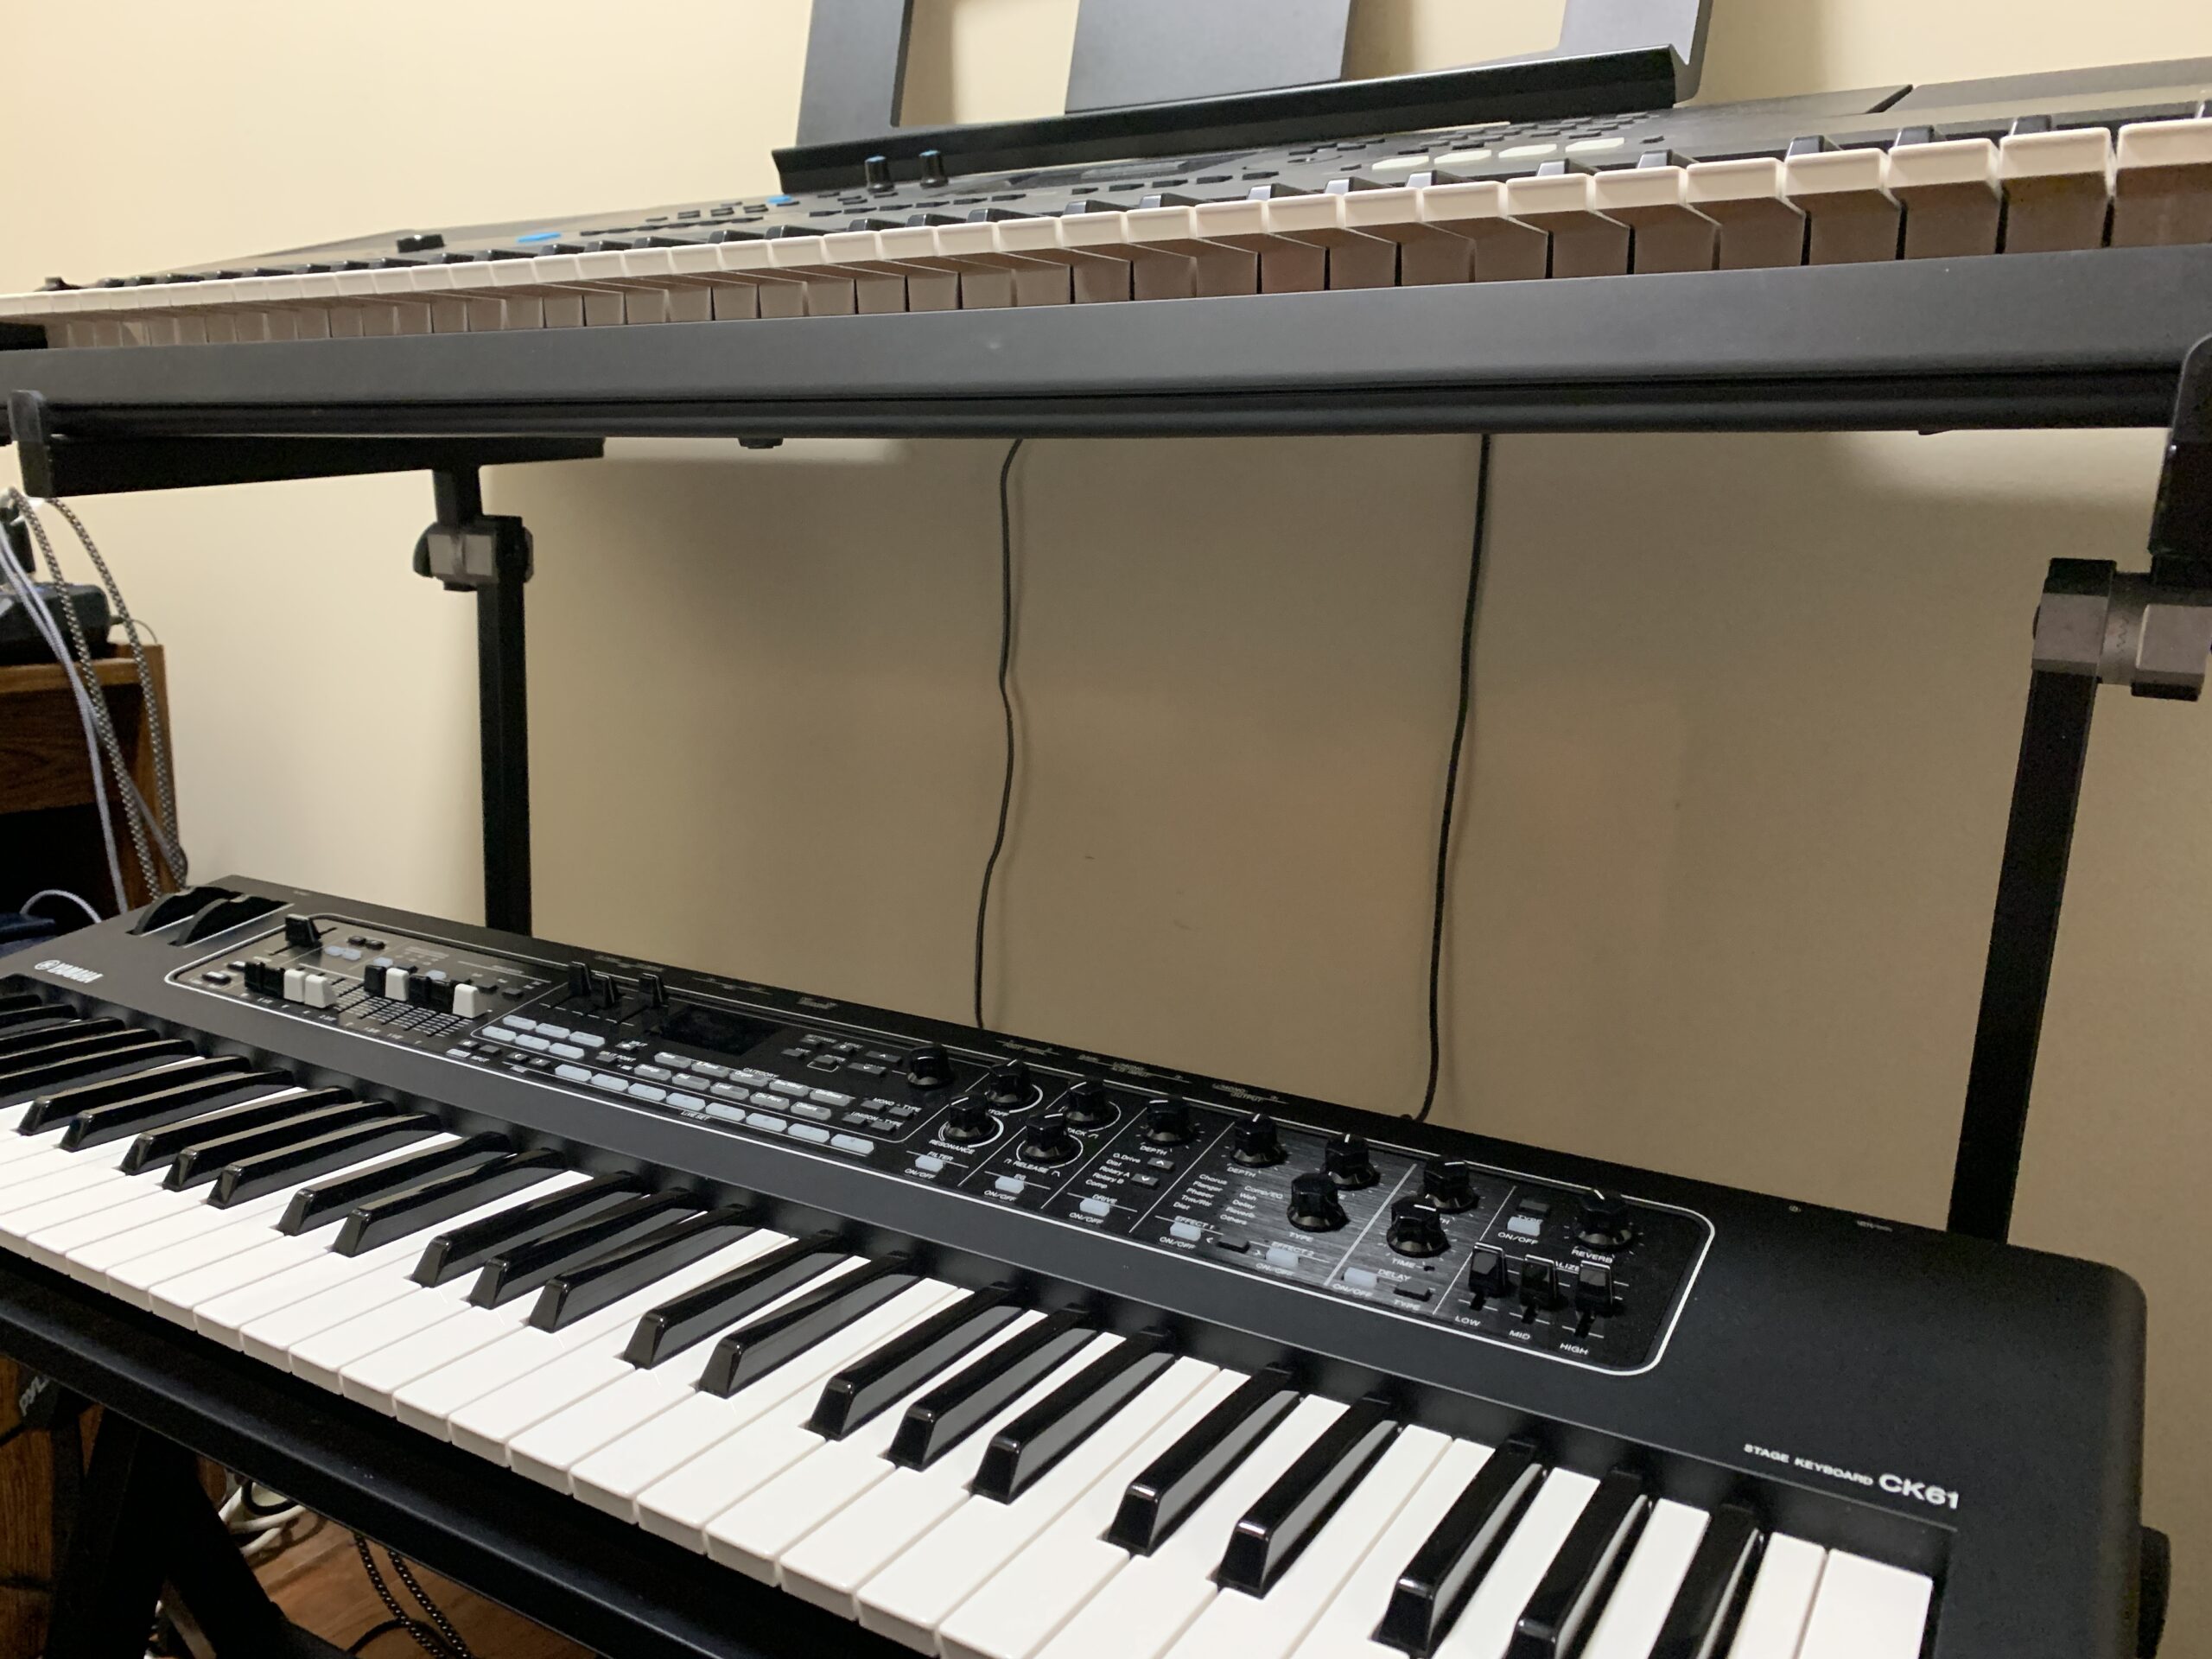
The upper tier is actually quite solid as well, I was kind of surprised; you can adjust the angle of the upper tier arms, and there are 3 height adjustments you can choose from, and there are nice to see rubber stops on the ends of the upper tier arms. Using the top height, I’m actually able to still have the music stand (for me it’s an iPad stand) on my Yamaha even with the Casio on top.
Pyle Heavy Duty Keyboard Stand (2-Tier) – The Verdict
UPDATE 2023: The Pyle stand was a good stand, but I’m now recommending the Z Stand From Liquid Stands instead! Check out that review here:
So, as far as this stand goes? HIGHLY recommended, at least so far. It’s super stable, tons of leg room, lots of adjustments available, the keyboards don’t move at all and the headphone hook is a nice extra, so I can totally recommend this stand. If you’re curious about the assembly, then keep watching after I’m done talking, and if not, then just check out my Amazon affiliate links in the description below to check prices and pick up one of these stands for your keyboard or keyboards. So thanks a bunch for checking out this page! Happy piano playing and happy stand shopping, and have an awesome day!
I have included links below to Amazon so that you can check current pricing – please note that as an Amazon Associate I earn from qualifying purchases:
Pyle Heavy Duty Keyboard Stand (2 tier)
Pyle Heavy Duty Keyboard Stand (Single Tier)
Video Version Of This Review (Includes The Assembly Process):
Piano Training I Recommend
I’ve taken a number of online piano courses and tried various piano learning apps; the ones I’m listing here are my favorites and I can highly recommend any of these if you are looking for some online training to get started on learning piano, or to take your current skills to the next level.
Bird’s Piano Academy is one of my absolute favorite online piano programs. Arthur Bird has created multiple courses on getting started learning piano quickly as well as great intro courses on Blues, Jazz and more. And his courses are chord based, so you don’t have to read sheet music which is AWESOME and definitely the fastest way to learn to play modern music. You can go with a subscription that includes ALL his courses, or you can buy individual courses a la carte with LIFETIME access – HIGHLY RECOMMENDED!
If you’re looking for the least expensive way to get started on piano, Pianoforall is a great option. It’s a unique course created by Robin Hall that uses downloadable eBooks with embedded videos and audio instead of a website.
This course is an amazing option for learning piano from beginner up to being able to perform; it teaches multiple genres of music and focuses on how to be a “one person band” on the piano. This course is taught by pro pianist Steve Lungrin – Steve has been teaching and performing his whole adult life and is a fantastic instructor and performer.
I took this course from 2020 to 2021 and it elevated my playing from a very basic level to being able to play songs in multiple genres.
I was super excited when Simply Piano added the “Chords Path” to their super popular piano training app (iOS or Android); this path allows a new student to get started learning piano using a chords based approach (which I HIGHLY recommend over a traditional approach). Learning to play using chords is by far the easiest and fastest way to learn to play modern songs (MINIMAL sightreading ability is needed). I did the entire chords path, and can highly recommend that you check it out (you will get a trial period so why not?)

This is a fantastic option if you are mostly interested in rock music. This course was created and is taught by Marine Lacoste, who is not only a fantastic instructor & pianist, but she is also a very accomplished hammond organ player – she performs regularly with her own band, as well as playing keys regularly for multiple recording artists on tour. I started this course in 2023 when I joined a band, and it is helping me greatly in taking my playing to a new level. And Marine is constantly adding new content, and is very active on the platform.
If you sign up for Online Rock Lessons yearly subscription, use code PIANOTONE at checkout to let Marine know I referred you, and she will give you some free bonuses!
This is a fantastic (but pretty unique) online program for taking your piano and organ playing skills to the next level, developed by pro piano, keyboard & Hammond organ player Mike Little. Mike shares tips & tricks accumulated from over 30 years of pro touring, gigging, studio & production experiences. This course isn’t for a COMPLETE beginner, but you don’t have to be a super accomplished player either, to get TONS of value from this program!

Ultimate Piano isn’t an actual course to learn how to play, but it IS a really helpful TOOL for piano students. You connect your keyboard to your computer, go to Ultimate Piano’s website (so NOTHING to install!) and you have a ton of helpful training and exercises at your disposal, as well as built in piano sounds. With the help of on screen light up keys, you can learn and practice scales, chords and even ear training and you can play along with MIDI or audio files, and even YouTube videos to practice songs!