So you’ve been working hard at your piano practice, and you want to record a video to share with your friends or family on Facebook or YouTube. You’ve recorded some just using your camera or phone, but you see all these other ones online where the sound quality is so much better, and you want to know how to do that? Hopefully this post will help with how to record a piano video!
MIDI Data vs. Audio
How to record a piano video? Record the sound directly into your phone or camera instead of using the device’s mic. You might be thinking “I connect my piano now to my tablet/phone to use apps and things using the USB cable; won’t that work?” Well the answer is yes you can record your piano this way, but it will be using “MIDI” data, not actual audio. MIDI data is basically the data of what you play – what keys you press, how long you hold them down, was the sustain pedal pressed etc. That data gets sent across you USB/MIDI cable to an app on your device that knows what MIDI data is (like GarageBand) and then turns it back into sounds. So in the end you won’t be hearing the actual sounds your piano made, you’ll be hearing what you played using whatever sounds the app has available (could be a piano sound, or an organ or a guitar even!). But this method will not work for making a video recording (at least not without a lot of extra work).
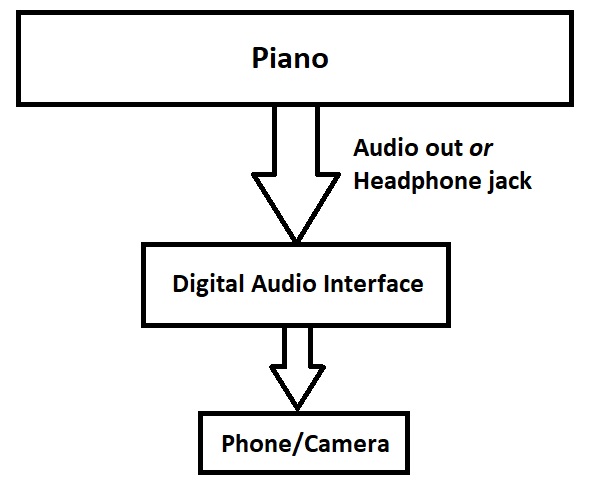
So to record your actual audio from your piano directly to a video capturing device, you will need an “audio interface”. This is a device that will convert the sound your piano is making into a digital signal that your device (camera or phone) will be able to use.
Examples Of Audio Interfaces
There are many different examples and types of audio interfaces; some common examples are (you can click on the links to check prices on Amazon if you like):
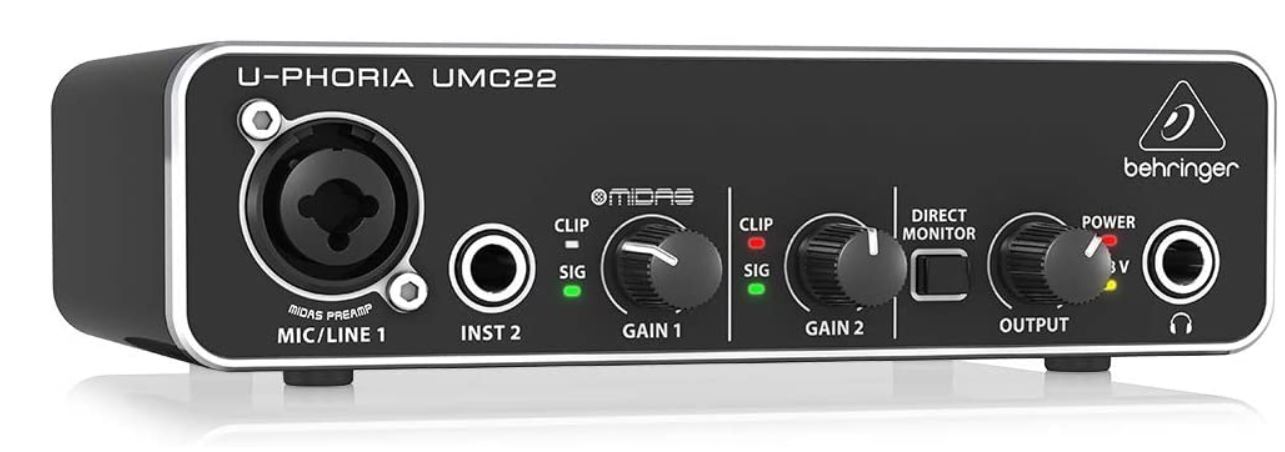
BEHRINGER audio interface (UMC22)
Focusrite Scarlett 2i2 (3rd Gen) USB Audio Interface with Pro Tools | First
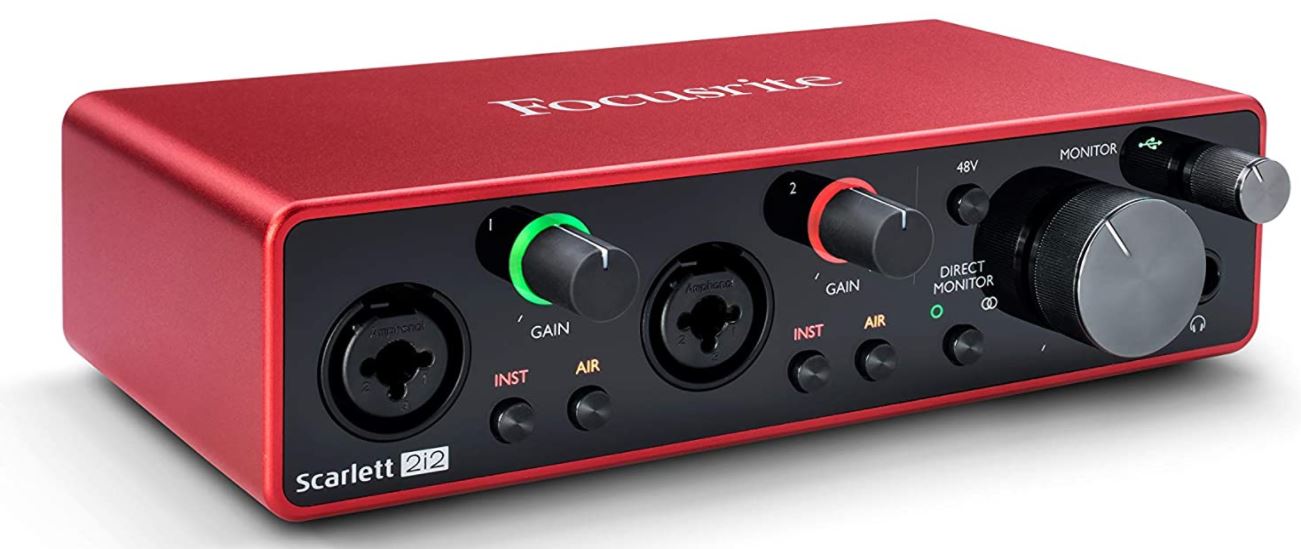
These 2 are quite common, the Behringer one is a less expensive option; the Focusrite is a very popular and well regarded brand (but they will both get the job done). These types of audio interfaces can not only be used for piano, but for any instrument, including vocals if you have a mic with either a 1/4″ or XLR port (that’s another topic 🙂
The 2 audio interfaces I have personal experience with though are a little bit different, because they both double as “mixers” (larger number of inputs allowing you to hook up multiple sound sources at the same time, and “mix” them together). The end result from the next 2 is still the same though; conversion of your piano signal (and potentially other signals like a mic, or an mp3 player) into a digital audio stream your video recording device can use.
Roland GOMIXERPRO Professional-Quality Audio Mixer for Smartphones
(if you are new to all of this recording stuff, this is a great choice to get started with!)
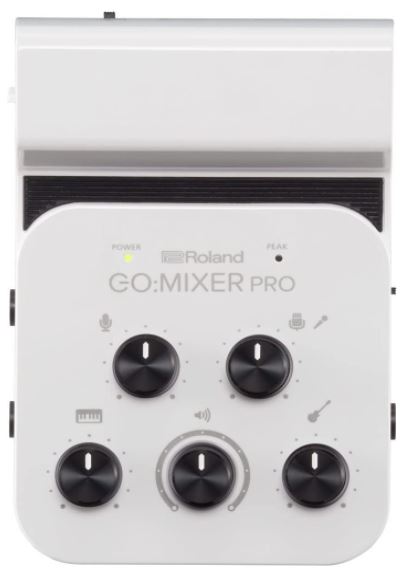
The Roland GO:Mixer Pro was actually designed for the purpose of easily creating videos so it is a great option; it’s very simple to use, and can be powered either by batteries or by a smartphone. I’ve been using this product for about a year to create all my videos (I am working on a specific review for this; coming soon!). If you are new to all of this stuff, I would highly recommend the Roland GO:Mixer Pro to get started because it is super easy to use. It has multiple inputs (more than the other interfaces above), so it is easy to connect your piano, a mic (either XLR or 1/4″ or 1/8″), a guitar, and even another audio in source like a tablet or mp3 player – you can hear all of this at once. So if you want to sing with your piano playing, you can get a mic and do that quite easily.
Alesis MultiMix 4 USB Compact Mixer
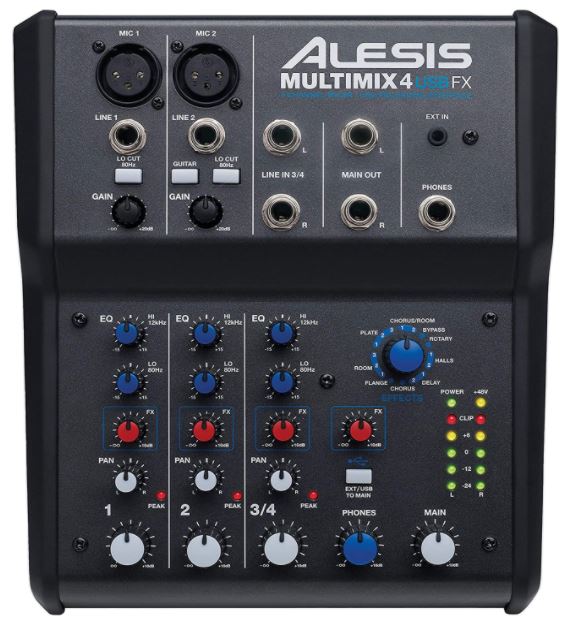
I just purchased the Alesis MultiMix 4 to replace (maybe) my Roland GO:Mixer Pro, but I haven’t even taken it out of the box yet, so this is yet to be evaluated. This product had some features I really wanted to try so I picked one up; it is like a standard mixer (thing a band uses to mix all their instruments together into one output to send to a PA system) that has effects built in (so I can add effects to my vocals) and it has an audio interface built in. So it is the same idea as the Roland product, only with some additional features (but it is bigger, not battery powered, and won’t be as easy to use for a total beginner).
One more example of an audio interface, and this example is a unique one: the Yamaha P-125 digital piano has an audio interface built in to its USB/MIDI port!!!! What does this mean? Well if you happen to own a Yamaha P-125, then you don’t need an external audio interface to record your piano! You can just plug your piano (from it’s USB/MIDI port) directly into your phone/camera and it will work (if you want to sing along though, you WILL still need an external audio interface).
How Do You Connect The Piano To The Audio Interface?
To send the audio signal from your piano, you need to look for “audio out” ports on your piano (you may have 1 of these, 2 of these, or NONE of these; and they may be a 1/4″ port, or a 1/8″ port if you have them). If you don’t have audio out port(s) you will need to use a headphone port (which all digital pianos will have). The examples below are assuming you have 1/4″ ports (check your manual if you are unsure; a 1/8″ port is the size most modern headphones use, a 1/4″ port is much bigger – the size a standard guitar cable uses).
- Do you have audio out port(s)?
- Yes:
- You have ONE audio out port:
- This will most likely be a stereo port; so the cable you will need will split that stereo signal into 2 MONO signals – your cable will look something like this (this example shows 1/4″ ports):
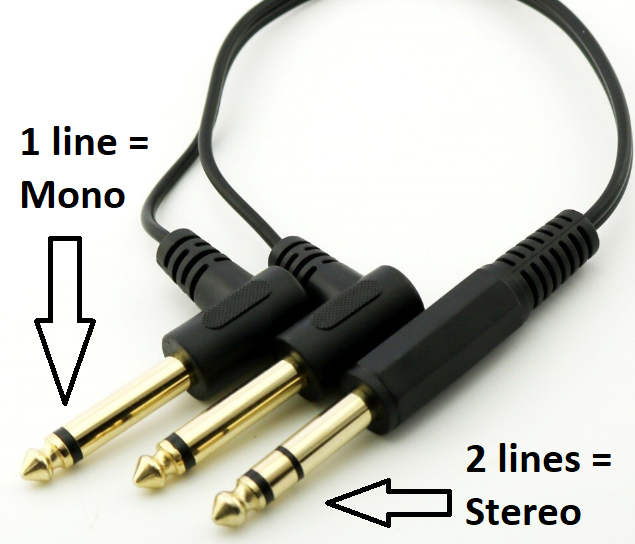
- The plug with 2 black lines indicates it is stereo – it will go into your audio out port; the other 2 plugs with 1 black line are mono; they will plug into 2 ports on your audio interface (NOTE: if your audio interface only has 1 port, it will still work, just use the one marked L for left and you will get a mono signal)
- This will most likely be a stereo port; so the cable you will need will split that stereo signal into 2 MONO signals – your cable will look something like this (this example shows 1/4″ ports):
- You have TWO audio out ports (probably marked L/R):
- These will be mono ports (one for the left channel, one for the right)
- If your audio interface has 2 inputs available, use 2 mono cables (one black stripe on the plug at each end of the cable) to connect. If your audio interface only has 1 port available, you will only need one cable – use the L/Left port
- You have ONE audio out port:
- No:
- If you have no audio out ports, you will need to use your headphone port; the headphone port will be stereo, so you will need use a splitter cable like the one pictured above (the plug with 2 black lines goes into your headphone port and the mono plugs go into the audio interface). Once again, if your interface only has 1 port, use the L/Left cable and you will get a mono signal
- Yes:
As an example, my current piano (Roland FP-30) has no audio outputs so I use a splitter cable like the picture above – the stereo plug goes into my headphone port, and then the cable splits into 2 mono plugs that connect to my Roland GO:Mixer Pro piano input ports (there is a left and a right):

Once your piano (and mic if needed) is connected to the audio interface, you can adjust the levels, and monitor what the “mix” sounds like using headphones or external speakers (plugged into the audio interface monitor/audio out/headphone port). Once you get the levels sounding good, then you can connect your interface to your phone/camera.
How Do You Connect Your Audio Interface To Your Phone / Camera
Well this depends on your phone / camera of course; but you will have a USB output of some type on your audio interface that you will use to send the mixed audio signals from your interface to your video recording device input. The USB out port on the back of the Roland GO:Mixer Pro that connects to your camera/phone is a USB “Micro-B” port. The mixer comes with standard cables to connect to an Android phone and to an iPhone (Micro-USB to lightning). So in my case, I use the cable for the iPhone to connect to my iPhone (NOTE: I did buy an extension for that cable – that’s one complaint I have about the Roland GO:Mixer Pro – the included cable is pretty short).
How To Record A Piano Video
Once you’ve connected the USB out from your audio interface to your camera or phone, you should be able to just go ahead and start recording your video using whatever software / app you normally would use. I don’t own a digital camera, so I can’t give an example of how that would work, but with my iPhone, any app that captures video will work. There are some apps that tend to work better than others; and if you buy the Roland GO:Mixer Pro, there are apps that Roland has that you can try. I have found the best results to be with the “My Recorder” app from Yamaha, but I have used many different ones.
When the USB cable from the interface is connected to the iPhone, the iPhone will use THAT audio signal for the video it is recording instead of the built in mic – now you will have a nice clean good quality audio signal!
And I would highly recommend some type of tripod or holder to secure your phone / camera securely (as opposed to how I did some of my first videos – propping my phone up on a chair 🙂
Next Steps
Next steps you should take would be to decide whether you need more than one input or not (are you wanting to sing into a mic while you play your piano, so you need more than one port?). This will help you decide whether the audio interface you are considering has enough ports for your needs.
Then you should confirm what audio out options your piano has (1 stereo audio out, 2 mono audio outs, no audio outs – in which case what size is your headphone port) so that you have a clear idea of what cables you will need. Then you can check the current prices on the interfaces I listed above (there are links there).
Once again, if you are new to this – the Roland GO:Mixer Pro is going to be the easiest one to get started with to record a piano video.
I also have a video version of this post if you want to check it out as well:
Happy video making! If you have any questions please feel free to contact me!